Monday, 30 August 2021

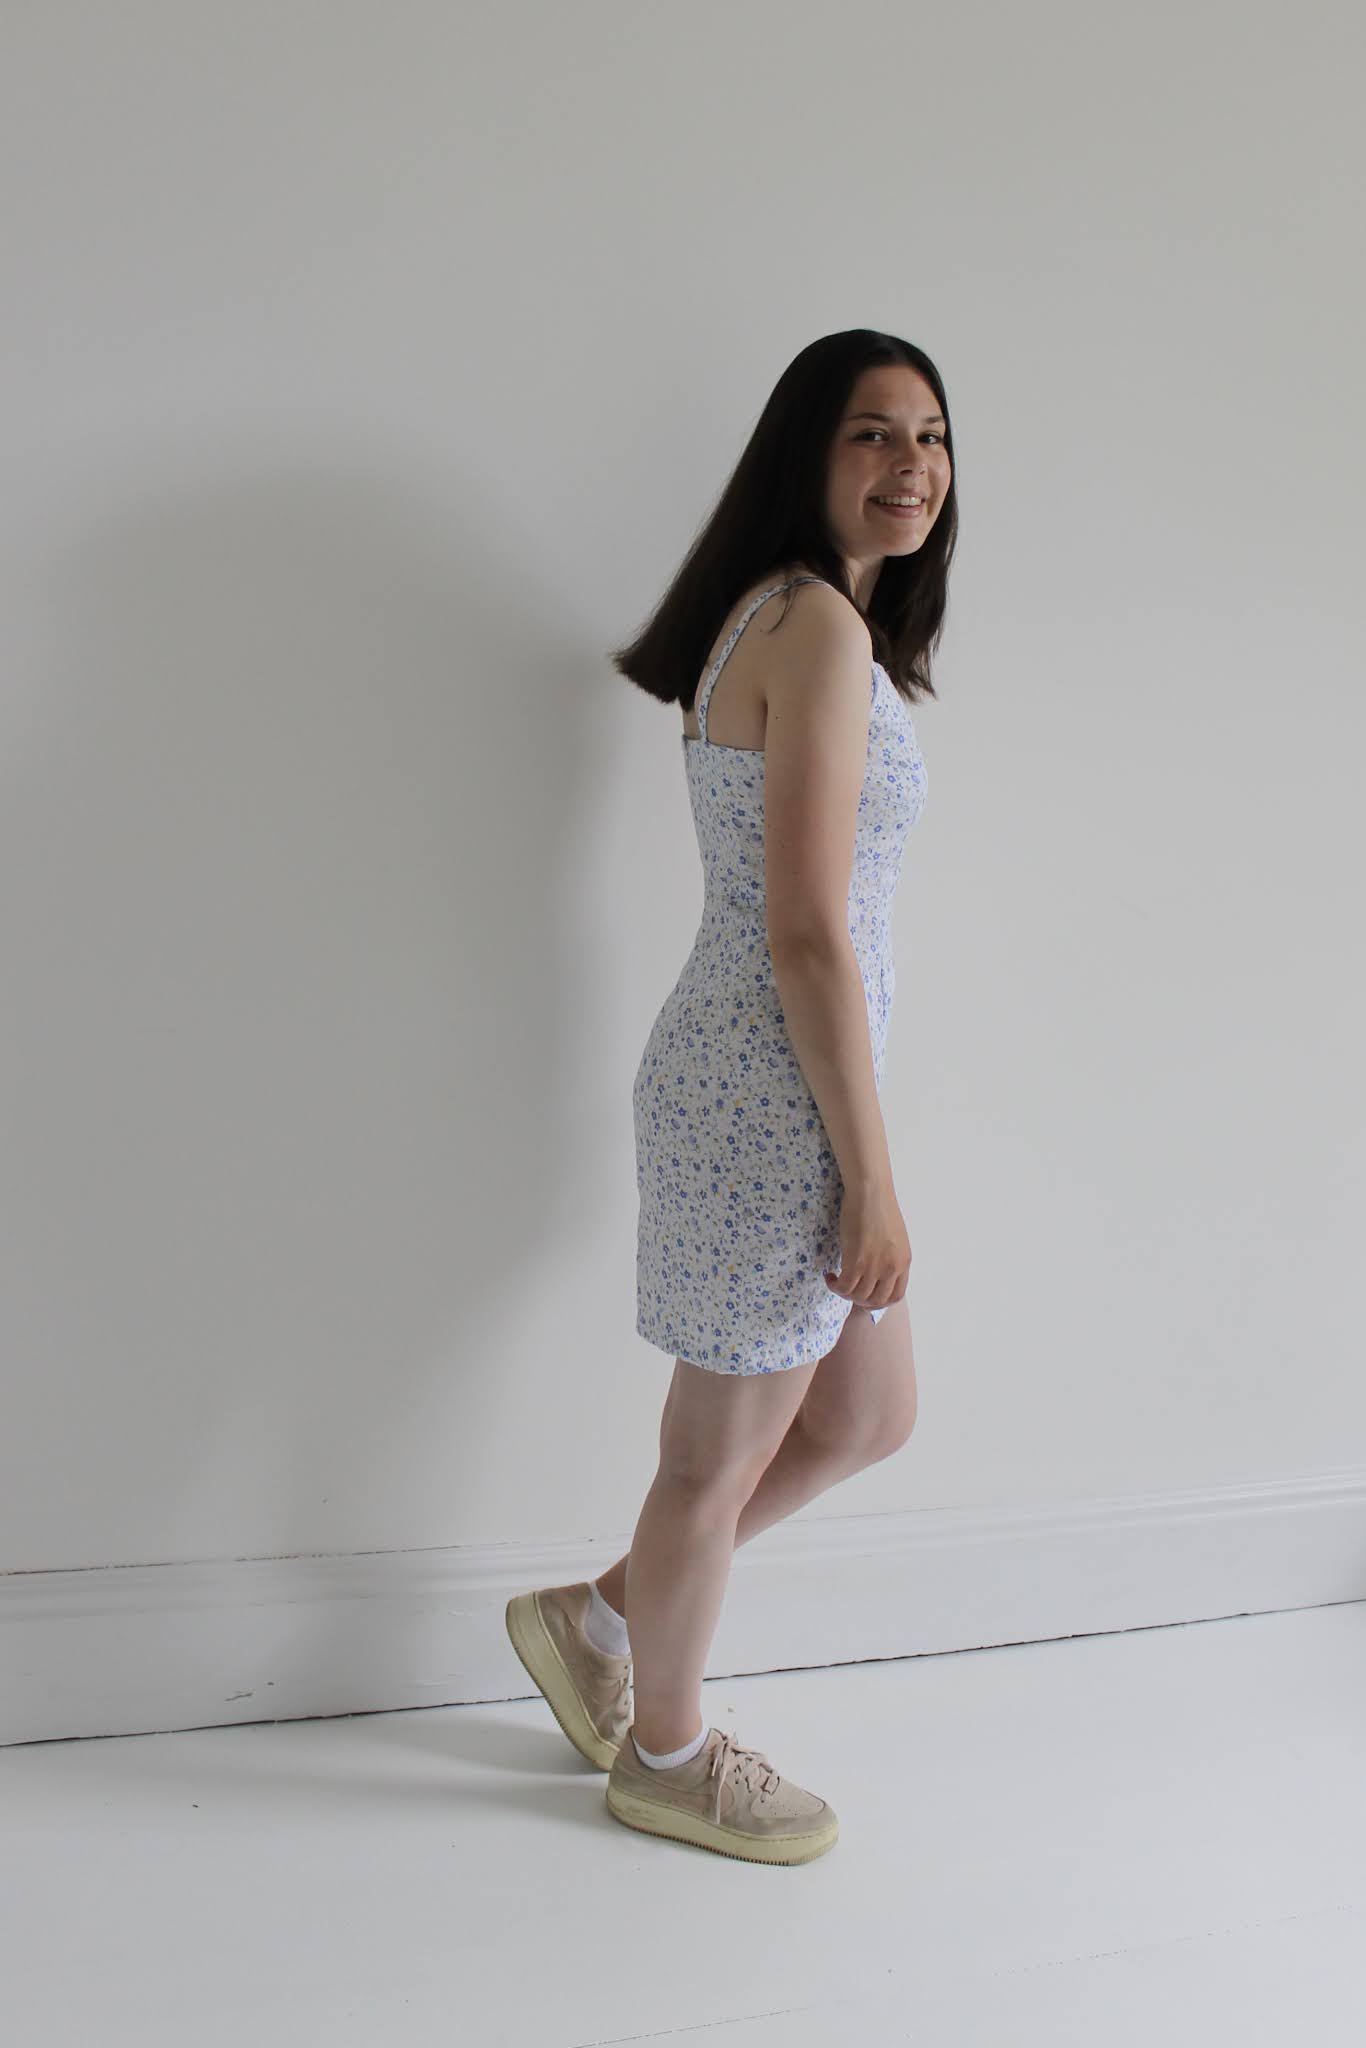
Floral Viscose Vikisews Nola Dress


Sometimes I'm just in the mood to sew myself a summer dress out of the prettiest fabric I can find. I don't wear dresses that often, but I've become much more converted to them since making my own and I really enjoy sewing them. The construction process of making a dress is so satisfying - so much time and focus goes into the bodice and neckline and then the side seams are sewn up and all of a sudden you have a finished dress! 

For this dress I used a pattern that I bought a while ago and have been wanting to make for ages, the Vikisews Nola Dress. This was my second time using a Vikisews pattern (I've also made the Courtney Dress) and the process went quite smoothly, although the instructions are all in Russian and google translate's version of events was... odd! Either way, the pattern came with detailed photos for each step so I just followed those. I found out afterwards that the Nola Dress is one of the few patterns that Vikisews has translated into English, so I definitely kicked myself for having bought the Russian version!


Floaty fabrics are ideal for a dress like this, the design of the looser skirt that comes out below the bodice is so pretty and I don't think that a cotton would do it justice. Because of this I knew that I wanted to use a viscose fabric. I'm always on the lookout for pretty viscose fabrics and I thought that a floral print would be perfect with this dress. I was set on this viscose from Felicity Fabrics as soon as I saw it, I could immediately picture the pattern and fabric paired together. 


Viscose has a reputation for being a slippery fabric that's hard to sew with, but so long as enough pins are used I don't think it's much harder to handle than other fabrics. Also, any issues with the sewing process are definitely made up for by the fact that viscose drapes so nicely! The puff sleeves were one of the details that drew me to this pattern and they are held perfectly in place by the fabric. I've never sewn puff sleeves like these before but they were really fun to add on; there's an elastic casing on the inside of the sleeve which adds a really neat finish too. I think the combination of elastic and gathers could be a little too much on a longer sleeve but with these short sleeves it feels just right.


As well as the sleeves, I really liked the back bodice details of this pattern. More specifically, I love the shirring panel. Shirring isn't a technique that I've used much in the past and I was a little worried about how it would turn out. In my experience bad shirring can ruin a garment and I really didn't want to destroy such lovely fabric! In the end I was pleasantly surprised at how simple the shirring was to do. I used this tutorial which explained it well and practiced on a fabric scrap before the real thing. One thing I'd recommend is to sew each row of shirring without cutting the thread at the end. I can definitely see how shirring can become addictive, I might be adding it to all my makes from now on!


This is a really small detail but I like the fact that the shirring panel doesn't go all the way across the back. Instead, there is another panel on either side which provides a curved shape up towards the shoulders. 


This dress has so many pretty details! There are three ways in which gathers are created: elastic on the sleeves, a drawstring at the neckline and gathering above the skirt. The gathers worked really well in this fabric and I love how they bring everything together.


I'm so pleased with how this dress turned out! Making five more of them is probably unrealistic in terms of how much I wear dresses but I'm very tempted to sew one in every colour. I think the bodice would be really pretty as a top tucked into jeans too.

Monday, 23 August 2021

My Handmade Holiday Wardrobe

I always enjoy packing my handmade clothes to take with me on holiday and being able to wear something I've made always makes me smile. I've also found that limited packing space means that holidays are a great opportuntiy to pair my makes in ways that I don't at home. Usually, holidays also give me a chance to wear summer makes, although this year we went to Scotland and the weather was not in our favour! 
Last time I did a handmade holiday roundup was in 2017 and it's nice to be able to look back and see how much my sewing has improved. Whilst we did miss the heatwave that the rest of the UK experienced I also did a roundup of a week of handmade outfits at the start of summer so I have at least been able to wear a few warm weather items this year.


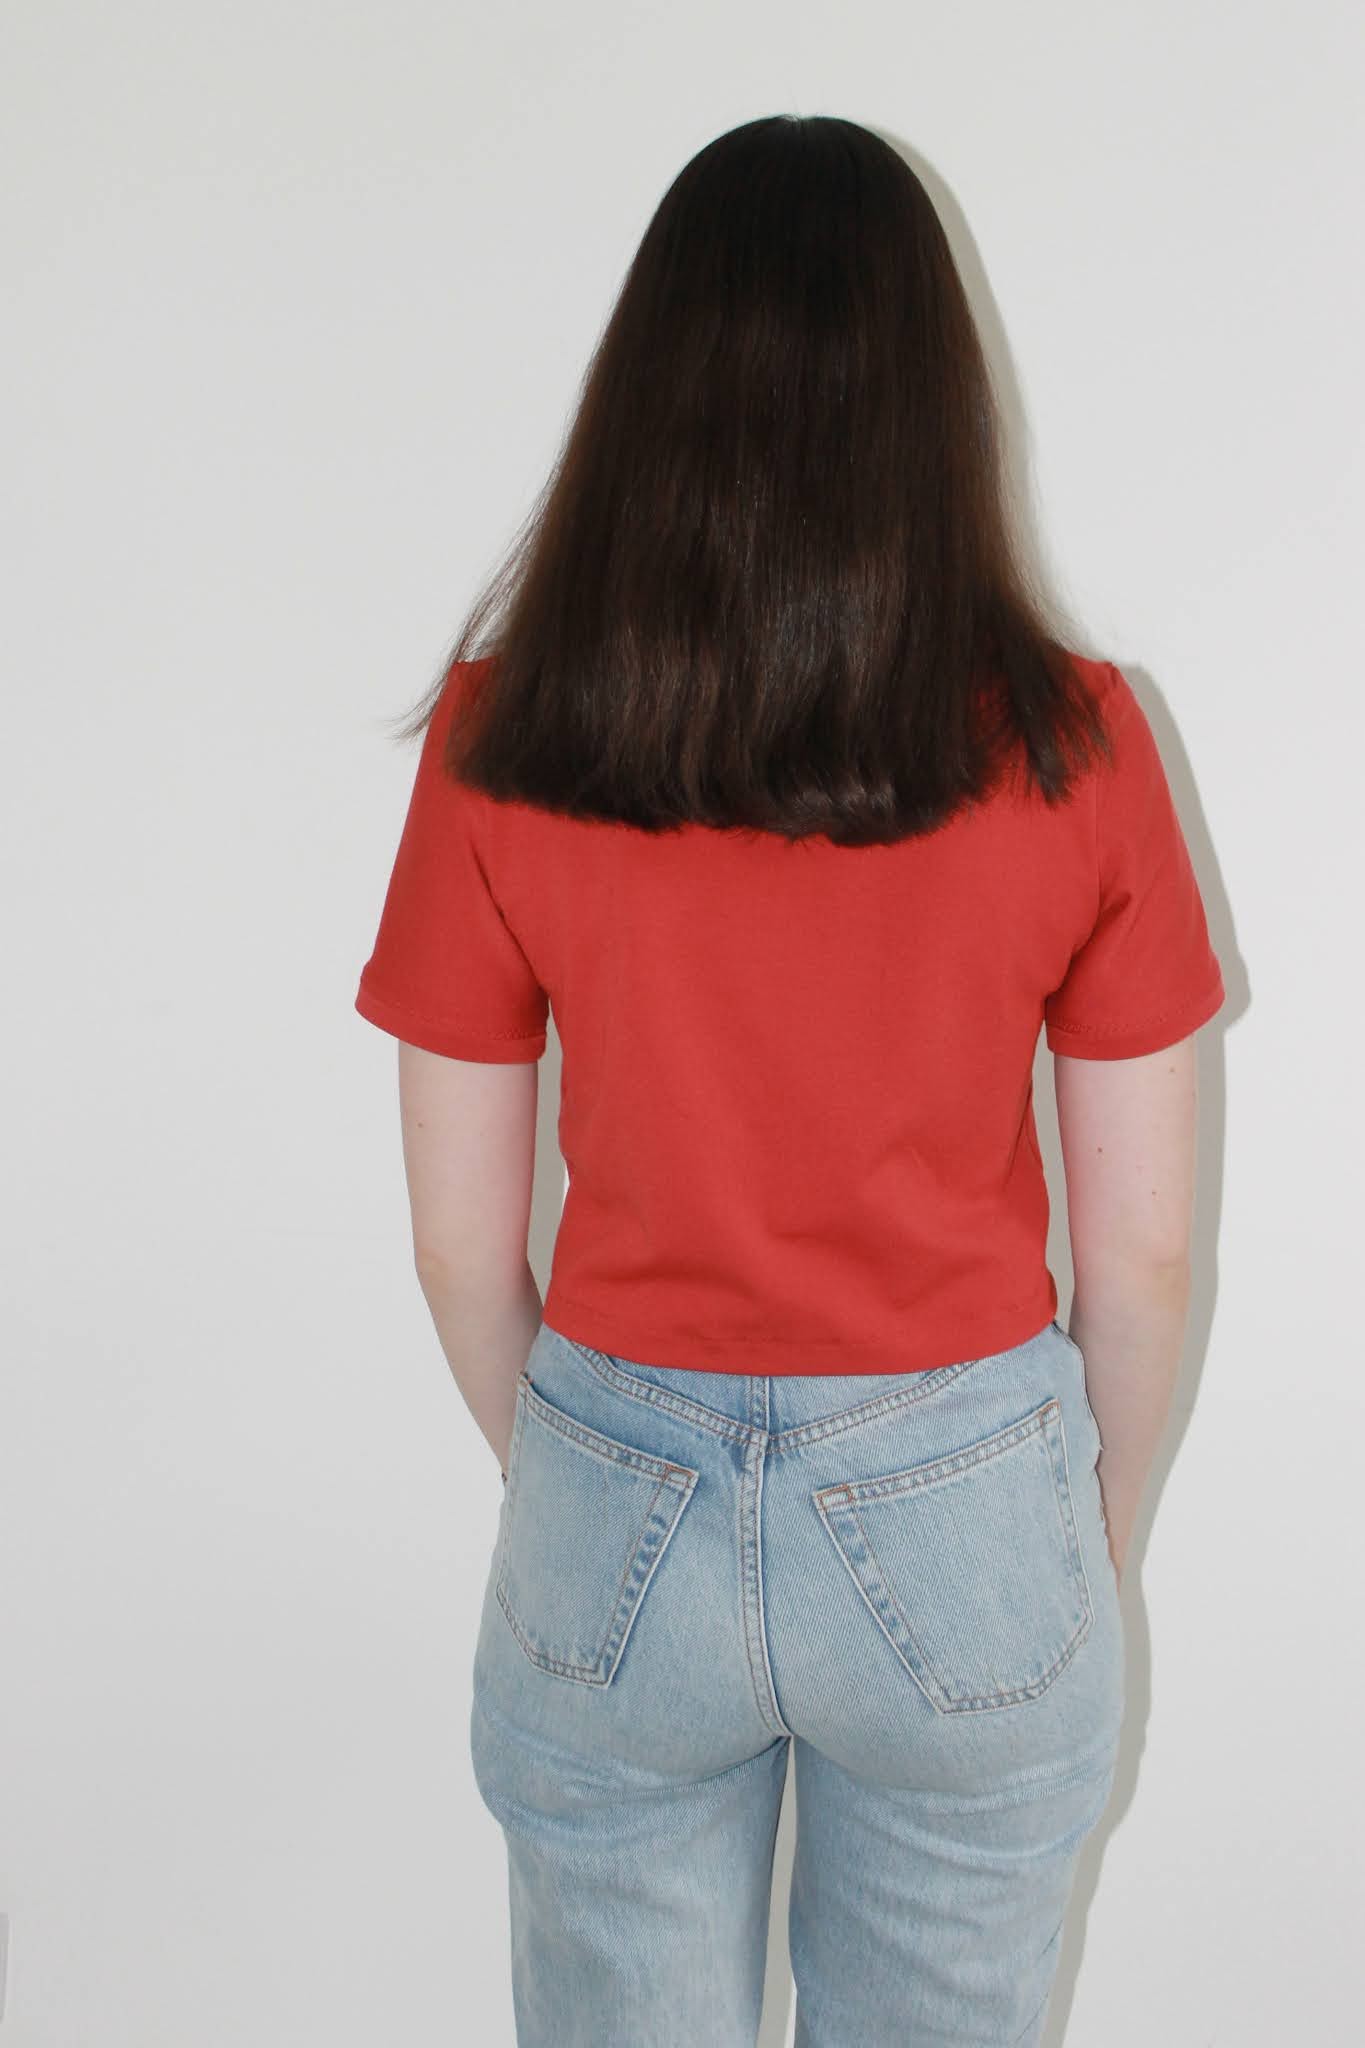
My Gingham Lander Pants have been a favourite of mine since I made them. I usually wear them with a plain white t-shirt, but I brought this orange t-shirt with me on holiday and I thought that the two went well together. I made this t-shirt quite recently out of leftovers from this top and it was a really great one to wear on holiday. We were on the Isles of Mull and Skye for the most part of the holiday and this t-shirt was perfect for walking and cycling.


This outfit is a pretty accurate depiction of what I wore most days for going on walks or cycle rides. I really like being able to wear a handmade t-shirt even if it's hidden under a jumper (which it almost always was - it was cold!). I made this stripy boxy t-shirt in 2019 and it's a really simple one that's easy to throw on.


We finished our holiday in Edingburgh which gave me the opportunity to wear my Lander Pants again. They weren't quite warm enough to wear on most days as they're made from a cotton fabric rather than a denim but they were perfect for walking around the city. 

Zadie Jumpsuit

I'm so happy that I got to wear my Zadie Jumpsuit! It's still a little out of my comfort zone for wearing everyday so it was one of the first things that I packed to take with me on holiday. This was another good one for wearing around Edingburgh.

Black Lander Pants

I really enjoyed wearing my gingham Landers in Scotland but regretted not bringing my black denim pair with me too. I made sure to take them with me when we went to visit my Grandparents and as predicted I wore them a lot. The top that I'm wearing them with here is also handmade and is a new favourite that I've worn a lot since making, I'll share the blogpost for it soon.

Friday, 13 August 2021

Floral Vikisews Patterns Courtney Dress


Sewing projects are often a strange mix between those that turn out exactly as planned, those worse than planned and those better than planned. This dress was the latter of these. It's not that I was expecting it this dress to turn out badly, more that I wasn't expecting to like it as much as I do! The sewing process was tricky in terms of fit which is always slightly demoralising, but I'm very pleased that I persevered with it. 


The pattern that I used for this dress is the Vikisews Courtney Dress, which I've made once before as a top. I mentioned more details about using a Russian pattern in this post, but in summary the step-by-step photos provided were enough to understand the construction. I really love the bodice of this pattern and always planned to make the dress version. The different panels give the dress a lovely shape and also provide a great opportunity for topstitching, which I added to all the seams.


A simple adjustment that I made to the pattern - which makes a big difference to the dress - was to level off the back bodice. On the original pattern the back bodice is curved around the arm and comes up about 2" higher (you can see this clearly on my Courtney Top). I chose to have the back bodice go straight across, which I find much prettier. All it involved was folding down the pattern piece at the armhole and changing the facing shape.


The cotton fabric that I used was great in terms of holding its shape but not quite so good when it came to unpicking. I had to baste and unpick the front skirt panels several times to get the fit right and each time the fabric frayed a little more, This wouldn't be a problem if I made the dress again as I now know the changes to make to the fit and would be able to sew it correctly without the need for unpicking, but I was a little worried that the skirt would fall apart! In the end it was fine, and adding the topstitching to the seams also helped to secure the fabric so that it wouldn't continue to fray. 


I did really enjoy sewing with a cotton fabric, which isn't something that I often do. I tend to use jersey fabrics for tops and jumpers, with drapey fabrics such as viscose for skirts and dresses. The closest I come to using fabric without any stretch is usually denim, but cotton is even nicer to sew with! Cotton is also a great fabric to use when it comes to pressing the seams, it's nice to be able to give everything a crisp, neat finish.  


I'd definitely recommend using a cotton for this pattern, it's a good stable fabric that will allow the dress to hold its shape. However, I did make a mistake in deciding to omit the interfacing in the upper bodice. When I made this pattern previously I used a linen fabric which was more heavyweight and didn't require interfacing. With the cotton, the curved edges of the bodice wouldn't stay in place and the whole thing just looked untidy. I unpicked the curved edges from the front bodice and, rather than adding interfacing to these, I cut a new set of the pattern pieces out and interfaced those. The result is so much better, I actually can't believe how much of a difference the interfacing made!


It was the fit of the skirt which caused several issues when making this dress. I knew from making the bodice previously that it was a little tight across the back, so I added 1" to the centre back seam when cutting out the pattern pieces. This allowed me to make any adjustments after trying on the dress before adding the zip. I also thought that the skirt might be too tight across the hips so I added a bit of extra width to that when cutting the fabric and basted the side seams in place. The extra fabric I added across the hips is what caused me to baste and unpick the seams several times, fraying the fabric and adding to my frustration. It was definitely worth it in the end though, I'm very pleased with the fit and now I'll know the adjustments to make for next time.


One of my favourite little details of this dress is the mini split I added to the skirt. I hacked the skirt pattern pieces to have three panels at the front (this is something that I did on my prom dress and this midi skirt) and I love having the panels and topstitching there. It made sense to add a little split as a nod to the panelling which is otherwise concealed by the busy print. I finished the dress with deep double hem which makes the whole thing feel very neat and professional.


I actually intended this dress to be a wearable toile of my prom dress. At this point I don't think prom will be happening, but I'm very glad to have made this dress anyway. I've now made the necessary changes to my pattern fo fit correctly next time, so I'd definitely like to make it again. I only ever wear dresses in the summer and even then infrequently, but I do love being able to wear dresses that I've made. This one will join my floral Shelby Dress that I made last year and I'm looking forward to wearing it.

[This fabric was given to me by Minerva in exchange for a blog post]

Sunday, 1 August 2021

Tilly and the Buttons Freya Top - Sleeveless Turtleneck Hack


A few months ago I shared the details of a white sleeveless turtleneck top that I made. Well, I was so pleased with how that top turned out that I immediately made an identical one in black! Given how much I've worn both tops over the summer I thought I'd share some more photos of the black version, it's become a top that I reach for again and again.


I can't really say I prefer either the white or black fabric as both colours are really easy to wear. The white top is great as it goes with so many pairs of trousers, but I really like the elegance of the black version. I've made black t-shirts before (this one was worn a lot) and I definitely want to make a few more as they go well with busier trousers. I really love how this top looks with my gingham trousers, and trousers like these ones are also good for pairing with plain t-shirts.


To make this top I hacked my much used copy of the Tilly and the Buttons Freya top. Rather than simply leaving off the sleeves, I changed the shape of the armhole slightly and narrowed the shoulder seam to give the top a nice shape. I went into more detail of the changes I made to the pattern in this post, but in summary it took a lot of pinning and cutting tiny snippets of fabric to make the curve deeper bit by bit until it was just right!
I actually made a long-sleeved black Freya turtleneck back in January, and knowing how much I've worn this one over the summer months has made me think of new ways to wear the long-sleeved one during winter. I have found the sleeveless one much easier to wear and I think it's because the length of the other one is a bit odd - neither short enough for it to sit well on a jeans waistband nor long enough to tuck in - so I might change the hem.


As for the hem on this top, I'm very happy with how it turned out. For the white version I used a shop-bought bias binding and it worked very well, so I made my own jersey bias binding from the black fabric. Jersey tops are tricky to hem so this was a good method to use. The armhole is also finished really neatly with a band of fabric that was folded in half and sewn right sides together to the armhole (like a neckband would be). It means that the t-shirt is well finished around the neck, arm and hem which is definitely worth doing on an otherwise very basic top.


I'm so pleased with both of my sleeveless turtleneck tops and have worn them a lot with high waisted trousers such as these flares, these wide-legged jeans and my balloon jeans. I particularly like the shape of the armhole and would like to make a couple more similar tops with neckline variations. It doesn't get that hot where I live so the balance of a sleeveless turtleneck works pretty well during the summer but I  think that making the same top without the turtleneck would be great hotter days.

Sunday, 25 July 2021

Viki Sews Patterns Courtney Dress - Top Hack

I rarely purchase sewing patterns as I much prefer hacking the ones I already own or self-drafting patterns from scratch in order to create a pattern that matches the design I have in mind. Sewing patterns are also expensive, so I prefer to only buy ones that I know I'll make again and again (like my Lander Pants) or that I wouldn't be able to draft myself (such as the Dawn Jeans). However, when Viki Sews patterns had a flash 50% sale a few months ago I decided to purchase and download a few patterns, including the Courtney Dress

The design of the bodice is what drew me to the Courtney Dress pattern. I've seen quite a few tops with corset-y designs recently, in other words lots of seams and a fairly close fitting bodice. What I liked about this design is that the bodice has an extra level of detail which made this top a bit different. I also immediately pictured this pattern in a floral fabric for summer, I thought flowers would compliment the feminine design. Craft Cotton Co have such a wide range of floral cotton fabrics that it took me a long time to decide which one to go for. Most dressmaking patterns call for drapey or stretchy fabrics, so it was nice to make something out of cotton as there are so many lovely cotton prints available My only brief is that I wanted a pretty floral and in the end I went for this rayon linen fabric which was exactly what I had in mind. Much like cotton the linen held its shape perfectly when it came to the bodice construction, and interfacing helped to ensure that the upper bodice stands upright.

The first thing to note about Viki Sews patterns is that they are a Russian company. Although they have recently launched some patterns in English, the ones I purchased were all in Russian. It isn't just a challenge for the instructions, I actually found the website itself quite hard to navigate in a different language. Google translate is definitely a big help, although I found that the app's camera feature wasn't much use when it came to deciphering which pattern piece was which. In the end, the actual sewing process wasn't any harder for the lack of English instructions as the photo diagrams are really clear and even without those I would have been able to guess the order of construction. The main difficulty lay in labelling each pattern piece, but now that I've made this top I have my pattern pieces labelled in English for next time. Overall it was fun to try out a new pattern company which has some interesting and slightly different designs, especially as their patterns are very affordable - I paid £2.50 for 3 patterns thanks to the sale!


I always like to add topstitching to makes and the seams of this pattern were perfect for doing that. The topstitching adds a really neat finish and also forces the seams to lie flat. I really love how all the features of this make tie in together, having thin straps adds a delicate feel to the bodice which is mimicked by the pretty flowers on the fabric.


As mentioned the pattern is actually drafted as a dress, but I thought I'd get more wear out of mine as a top which I could pair with jeans (I'm wearing it with my balloon jeans in these photos). Simply cutting the top at the waist seam would have made it too short and the proportions a bit off, so I decided to add pleats to the bottom. I'm not usually a big fan of pleats and ruffles but I think the pleats work really well here. The rayon linen was a joy to sew with as it pressed so well, meaning that the pleats and hem are really even and neat.


To finish the top I added an invisible zip down the centre back, my preferred closure for makes. I'm pretty pleased with how invisible the zip is and I think that another closure such as buttons would have been too busy, detracting from the fabric and bodice details. The only thing I didn't think about when I changed the pattern to a top is that the zip can only be as long as the bodice so won't open as far down. I didn't realise this was a problem until right at the end, when it turned out to be a bit of a squeeze getting the width of the waist seam over my shoulders! I'm torn between redoing the zip as an open ended zip (which would take time and I also don't like the look of open ended zips compared to invisible ones) or just accepting that this top takes a while to get on and off.


When I first started making this top summer weather seemed like a long way away and the holidays felt even more distant. Now, I've finished my exams and the sun is shining so I'm looking forward to getting lots of wear out of my finished make!

Saturday, 10 July 2021

How to Upcycle and Refashion Old Clothes

Upcycling is a great way to make a new garment without having to purchase fabric, and also gives old clothes a new lease of life. Using old clothes gives me the freedom to self-draft a pattern without worrying about wasting fabric if it turns out badly. As well as upcycling old RTW clothes, refashioning old makes is also a great way to reuse fabrics. I often do this with clothes that I sewed a few years ago that weren't terribly well made, or that I no longer wear because my style has changed. Below is a round up of the garments that I've upcycled as well as tips on how to completely transform old clothes.


Hadley Top (made from old jeans)

I had to begin with my refashioned Hadley Top as it remains my favourite and proudest upcycling project three years on - and I won a prize at the Knitting and Stitching Show for it! Jeans are the place to start when it comes to upcycling old clothes; they're easy to find in charity shops and denim is a nice stable fabric to sew with. The only tricky thing about using jeans as fabric is their width, so sewing projects with panels are ideal. For this top I used several different jeans to give a variety of denim shades and hacked my pattern into triangular pieces that were small enough to cut from the denim. Another thing I love about using old jeans is being able to keep their old features such as topstitching and pocket marks which I've incorporated throughout this top.


Button-down Skirt (made from old jeans)

This skirt was my first upcycling project and shows another use for old jeans. With this project I only used one pair of jeans, but they were large enough to provide quite a bit of fabric. The skirt I made features several panels to allow for the fabric width. 
When it comes to using old clothes pattern placement can be tricky depending on areas where the fabric is faded or stained. In this case, the jeans had a hole in them that I wasn't able to avoid as I didn't have enough fabric. To get around this I added a strip of fabric down the front, which covers up the hole and adds a decorative detail. The same could be achieved with a patch or visible mending


Ruched Top (made from a long-sleeved t-shirt)

When looking in charity shops for clothes to upcycle, it's best to focus on the fabric and not the style of the garment. Look for something which is too big and a fabric that you can imagine wearing. My dad gave me this grey long-sleeved t-shirt which is pretty uninteresting, but I knew that the plain fabric would be a good one to work with. Because the t-shirt was far too big for me I had enough fabric to turn it into a long-sleeved top for myself with an added ruched detail down the front.


Whilst buying clothes from a charity shop is a great way to start upcycling and means you can buy clothes with large pieces of fabric, upcycling old makes to ensure that the fabric isn't wasted. I made this turtleneck when I first started sewing and enjoyed wearing it at the time but decided to make it into a vest top once I no longer wore it. This is a great way of reusing old fabric that you still like and means you get a whole new garment from nothing.


The top on the left is one that I was really proud of when I first made it but wasn't wearing anymore a couple of years later. At the time I really liked the curved detail and was just starting to hack patterns, but I realised later that I would get more wear out of a simple t-shirt. In fact short-sleeved t-shirts are a great option for refashioning as they don't require a lot of fabric and - in my experience - get a lot of wear. 


I mainly refashion clothes that I no longer like the style of, but upcycling also works really well for makes that don't turn out as anticipated. Sewing failures are inevitable, and I often leave move onto a new project and leave the less successful ones to quietly occupy space in my wardrobe. This zip-neck jumper didn't turn out the way I was hoping, the fit was strange and the zip insertion wobbly. A year later I unpicked the entire thing and remade it into this top and it's safe to say that the second version has been worn much more. The lack of fabric the second time round forced me to add in different panels and seams which are now my favourite features of the jumper, 


Needlecord Skirt (updated from this skirt)

Refashioning doesn't have to mean a full transformation into a different type of garment. I really liked the burgundy needlecord fabric that my Delphine Skirt was made of but it didn't feel causal or summery enough to be worn often. I refashioned it by adding on trapezoid pockets and taking up the hem and it's now the skirt I reach for whenever it's hot out.


Burgundy Anima Pants (made from pyjama trousers)

Upcycling tends to connote a full transformation but just changing the size of a garment to make it fit you counts. The large grey t-shirt that I turned into this top came with a pair of pyjama bottoms which were also perfect for upcycling. I deconstructed the trousers entirely and used the same front and back pieces to cut new front and backs in my size. This doesn't always work as there has to be enough fabric but in omitting the pockets and using the original waistband I was able to make myself some joggers.


This is one of my favourite transformations that I've done. I had no idea whether or not it would work out but I love the final result. Despite being very proud of my Dawn Jeans I wasn't really wearing them as I didn't love the length or the leg style. I hacked them into flares by inserting triangular pieces of fabric into the side seams and I'm so pleased with the how they turned out. My one disappointment is that the flares aren't longer, but I didn't have enough fabric left (the most frustrating thing in refashioning!).


Upcycling continues to be something that I enjoy doing, it's an easy way to try new sewing techniques and turn something unworn into something completely different. It's nice to think that with some of these makes I might be adding in a third transformation depending on how my style continues to evolve.

Thursday, 1 July 2021

Sewing Leftovers - Burnt Orange T-Shirt


Whilst the opposite is currently the case, I sometimes go through phases of having nothing to sew. It's something that I really hate, and is often a combination of not really needing any more clothes and the fact that I sew quite quickly. Also, the weather was appalling here for most of May and making summer clothes seemed pointless. But sewing is my hobby, it's something that brings me a lot of joy and makes me feel calm, so it's important for me to always have a project on the go that I can work on when I have the time and inclination to do so. If I do find myself with nothing to sew, I try and go through my fabric stash and find fabrics that I haven't yet used or old projects that need upcycling. It doesn't always work, especially as I try not to keep too much unused fabric around, but it's often a good way to get back into the swing of sewing. 
I like to think of leftover fabric as 'free' fabric, giving me the freedom to make whatever I want without worrying about whether the project will be successful. It's fabric that would otherwise just take up space and because I've already used it to make something else, there often isn't much left. My absolute favourite leftover make is my corduory jacket, but my cami top and denim Moss Skirt were also good scrapbusters.


I actually started making this top a couple of months ago before it was cast away in favour of making prom dresses (more on that to come!) and picked it up again the other day to finish it off. It's a really simple t-shirt, ideal as I didn't have a lot of fabric and also the kind of thing that will get a lot of wear. I've found that I'm hesitant to wear some of my handmade clothes when I'm doing an activity such as sport that risks damaging them, so it's good to have a well-made t-shirt that didn't take much time or money to make. My stripy t-shirt is a good example of a similar garment that I don't worry about getting dirty or destroyed (which I realise is pretty unlikely but it still goes through my mind!) wheras I'm more cautious when wearing tops such as my polo shirt which took much longer to make.


When it comes to sewing with leftovers, I don't worry much about having several garments from the same fabric. Often, if the two makes are made a couple of years apart, my style will have changed and they will be quite different. With neutral fabrics it's hard to tell that two items of clothing are made from the same fabric unlike with a bold print. For example, my black Lander Pants and this Moss Skirt are made from the same fabric but it doesn't cross my mind when I wear one of them. Likewise, the leftovers from my corduroy Dawn Jeans were used to make this jacket but they're very different garments. I've actually used the same white cotton jersey for four different makes including this jumper, this long-sleeved top and this sleeveless one.
The fabric I used to make this t-shirt was the leftover from my mum's burnt orange Linden Top which I made her for Christmas 2018. She has worn all four of the Lindens that I've made her a lot, although I think the orange one is her favourite. I really like the fabric and have wanted to make something from its leftovers for a while, so I'm pleased to have finally done so. Of course, there is now a chance that we both wear our orange tops at the same time but I'm sure one of us would quickly change!


I will never cease being driven crazy by stitches that snap in the hems of handmade tops - one day I'll get a coverstitch machine, but until then I'll have to live with it. When it came to hemming this t-shirt, I thought I'd try something a bit different and use the triple zigzag stitch on my new sewing machine. Three stitches are sewn for each line in the zigzag, meaning that the line of stitching stretches with the jersey fabric and hopefully avoids the threads snapping. I added the same stitch to the neck and sleeve hem too, which I both finished with a neckband. I probably won't use this on every t-shirt going forward as I like the look of a straight hem, but it works well here and also adds a nice decorative touch.