Sunday, 7 February 2021

DIY Sherpa Lined Hooded Jacket


I tend to almost exclusively share finished projects on my blog, but sometimes it's more about the sewing process and less about the finished garment. I set myself a challenge at the start of the year to make myself a jacket sewn entirely out of fabric leftovers that I had in my stash. I wanted an in-depth sewing project and turned out so much better than I ever hoped it would!
I thought it would be fun to document the process along the way and to do a write up of the steps on my blog. I'll share more photos of the finished make too, but this gives a much better idea of the sewing process than seeing just the finished item could.


I started this project on a bit of a whim. Like I said, I wanted to have a challenging sewing project and seeing as I had just made a pair of jeans I thought that a lined jacket would be the next best thing. I decided to create a pattern from a RTW jacket that I own and then draft a lining. I needed a fabric that wasn't too lightweight but that I had in my stash, so the leftover corduroy fabric from my Dawn Jeans was ideal. Paired with the sherpa that I had leftover from my sherpa jacket that I made last year, it seemed like the perfect plan. I love how the two fabrics look together and I'm really pleased to have found a second project for the leftover pieces as there wasn't enough of either to make something without pairing them with another fabric. The sherpa was such a great lining fabric to use and makes the jacket really warm and cosy too. 


I started the jacket by cutting out the front and back bodice pieces and sewing them together at the shoulders. I've made several jackets before (my pink fluffy jacket, my sherpa jacket and my Kelly Anorak) so I felt quite confident sewing it without any instructions. Something that I do find useful when I've drafted my own pattern without instructions is to look up sew alongs for similar patterns, it helps to make sure the steps are all done in the correct order.
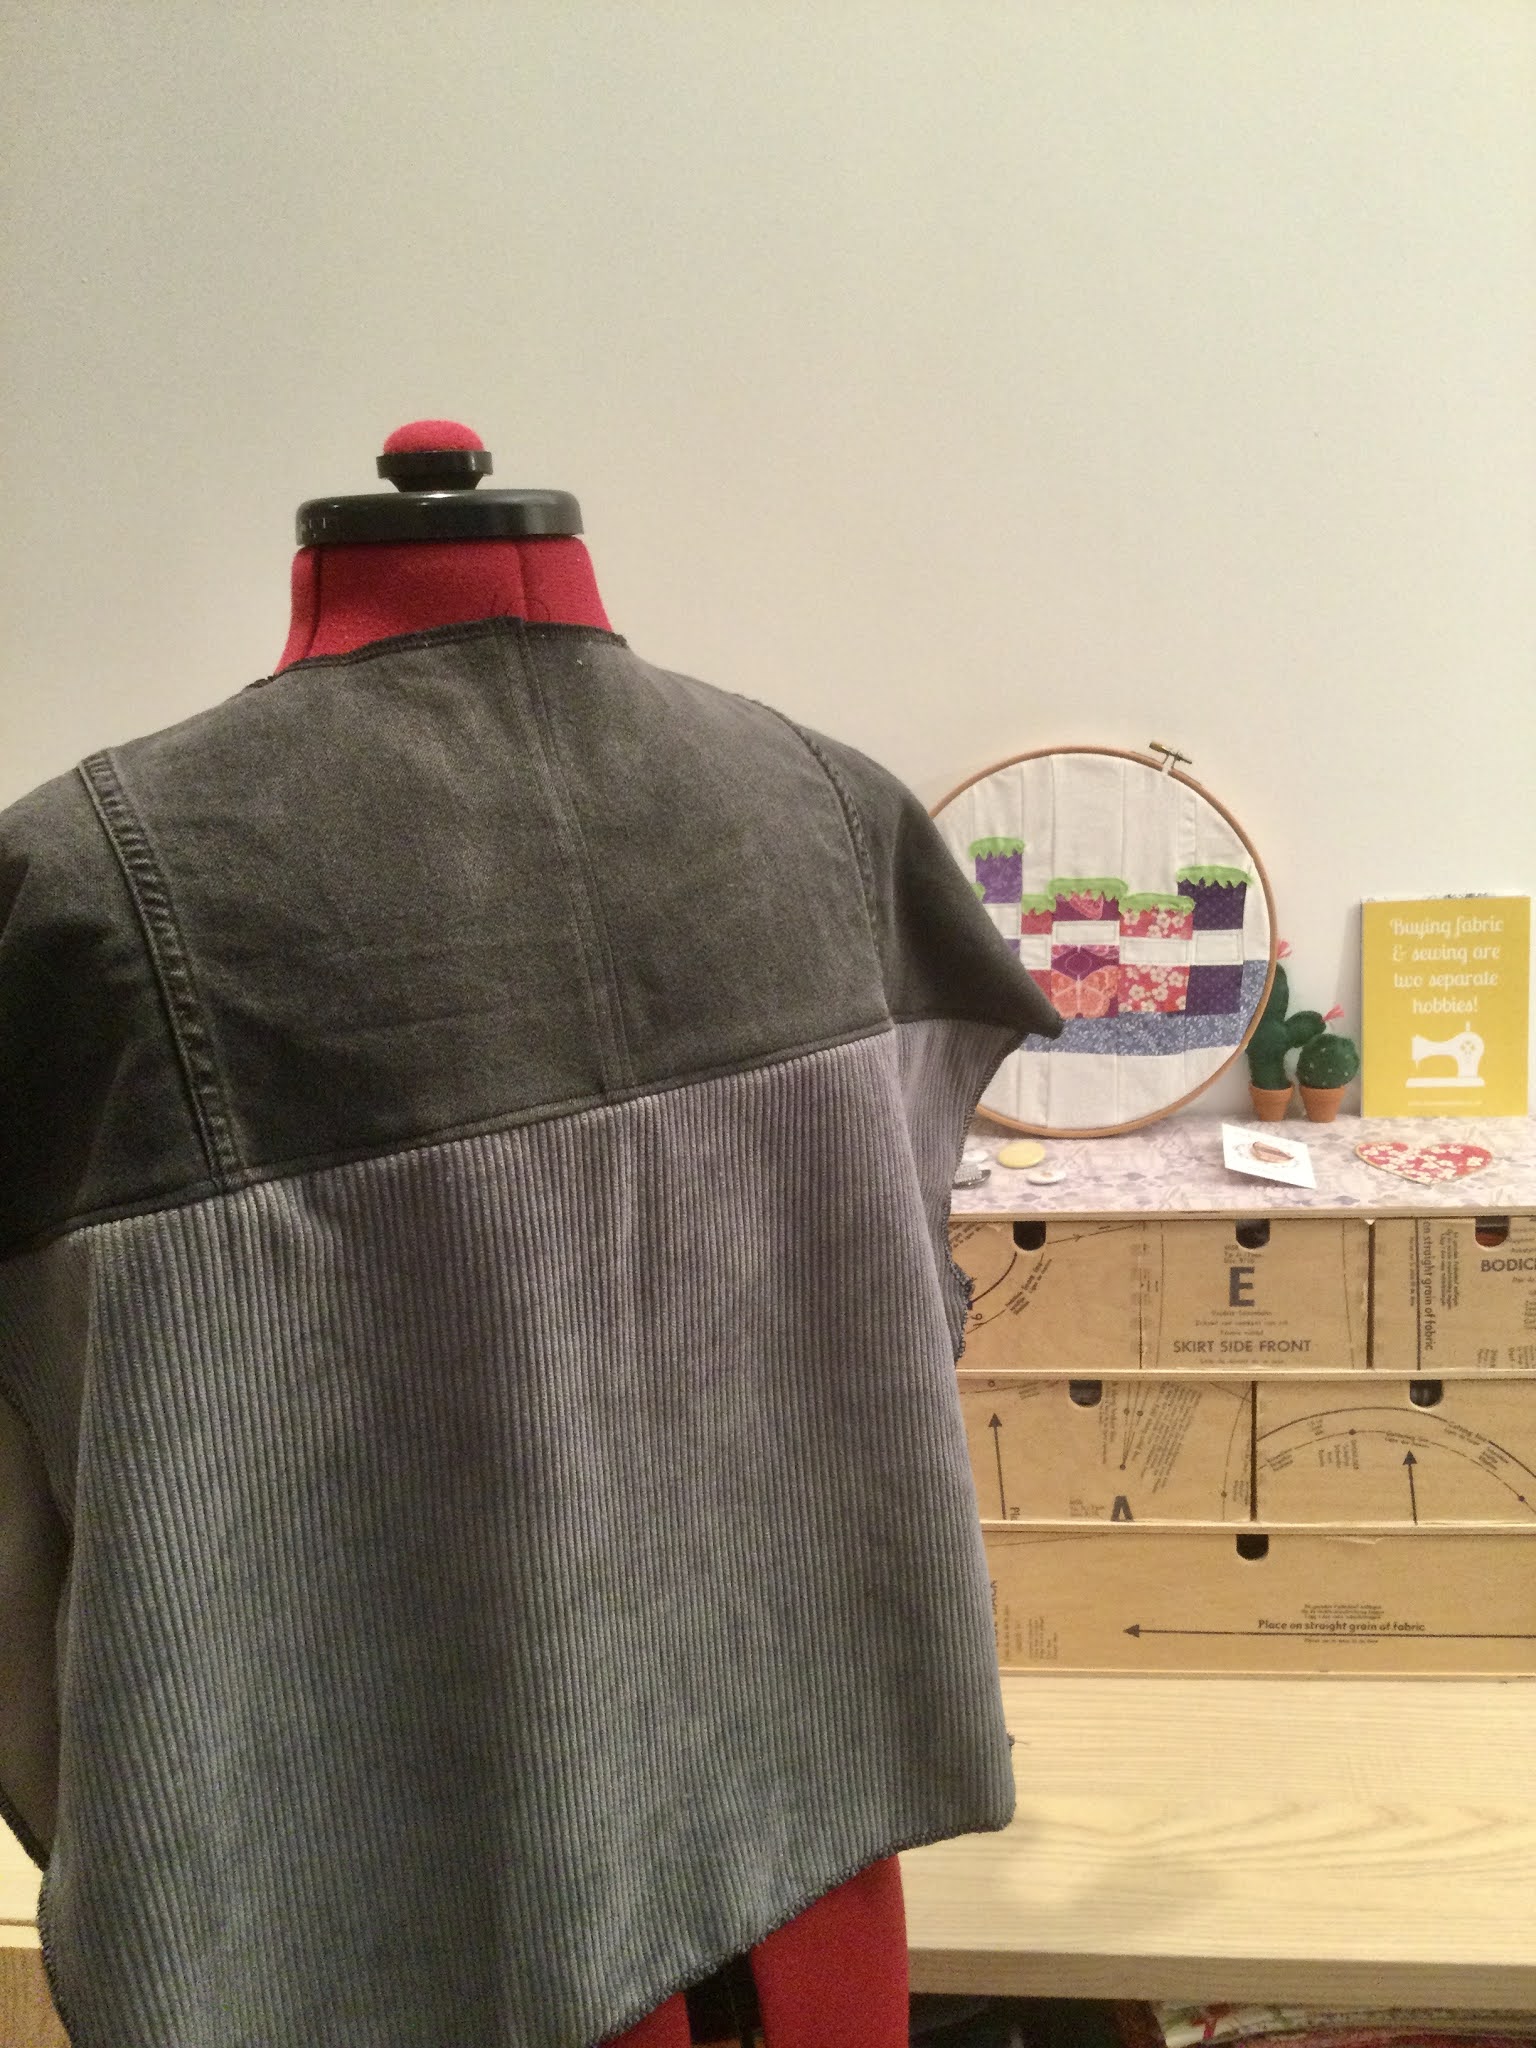

I spent a really long time trying to sort out the pattern placement before cutting out the fabric and discovered pretty quickly that I didn't have enough corduroy. I needed another fabric. When trying to decide what to pair the corduroy with, I thought that a black denim would be the best option. I didn't want to introduce a third fabric which would draw too much attention away from the corduroy and the sherpa. I thought I might have some black denim leftover from my Lander Pants but unfortunately I used up all the scraps when making my Moss Skirt
To me, a large part of this project was about thinking creatively and coming up with solutions that didn't involve buying more fabric. So I cut up a pair of old jeans! It turned out to be the perfect solution. Luckily I had an old pair tucked away ready to be transformed into something new, although at that point I was already overly invested in the project and prepared to sacrifice a pair of jeans that I currently wear for it haha.


The jeans saved me when it came to the back bodice and I created a denim panel to go across the top, but there was still a lot of piecing together of the corduroy to be done. I realised that for the sleeves (pictured on the left) I would have to add a seam across the middle. There still wasn't enough fabric though, so I had to add patch of denim there too. It's details like that which were accidental but I love how they add to the final jacket.
Jeans refashions are fun to do as the denim is often good quality and has been worn in a way that gives a nice used look. Making this skirt out of a pair of old jeans was one of my first ever refashion projects, and I later went on to make this top out of old jeans too.

I was really excited to sew the hood as I was able to pair together the corduroy and sherpa for the first time. The sherpa is such a great lining fabric to have and I really like the idea of the lining being a main feature. I was running low on corduroy at this point and had to start piecing scraps together to make one half of the hood. I'm very pleased with how forgiving the corduroy has been to the seams and you can hardly see them, but they are there. An important detail for me was to have the corduroy overlap the sherpa by about 3/4", it means that the lining doesn't roll over onto the right side. 


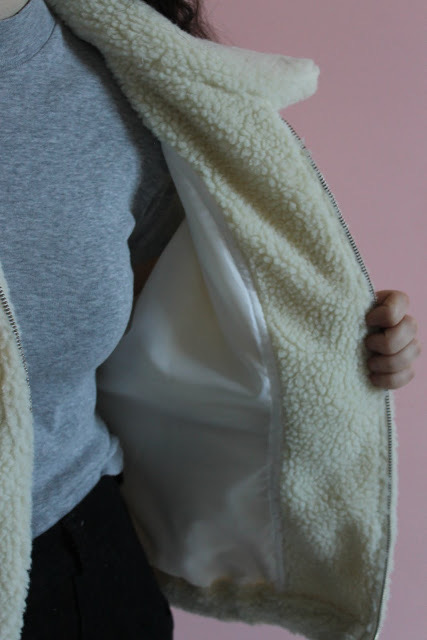
The next detail that involved a lot of piecing was adding a facing to the lining. The photo above is the facing that I added to my sherpa jacket, and I wanted to recreate that in the corduroy for this jacket.


The problem was that there was hardly any corduroy fabric left. To overcome this, I cut out as many pieces of corduroy as I could that were 2.5"wide of varying heights and sewed these together, before cutting around my pattern to create the facing shape that I wanted. Corduroy was a great fabric to use when it came to piecing scraps together, it's not too heavyweight so doesn't have bulky seams which denim would and the wale design is quite forgiving in masking where the pieces have been joined together.


The effort of creating the facing was worth it in the end though. It attached to the lining smoothly and just makes the jacket feel nicer when I'm wearing it.


When it came to lining the sleeves, I had just about enough of the grey lining fabric that I used on my pink fluffy jacket leftover. It's also the fabric I used to line the sleeves of my Kelly Anorak so it's been used for a lot of projects at this point! My only concern with the sleeve lining is that it was much lighter than the sherpa I used to line the body. This hasn't been an issue on the other jackets I've made as I used the same lining throughout.
To make the sleeve lining more similar in weight to the sherpa I added in a layer of quilt wadding. It felt like a bit of a risk to take at the time as I had no idea if the wadding would end up making the sleeves too stiff and bulky (it was also very old wadding that I had lying around and not the best quality!) but it worked out really well. I'm so pleased that it went to plan and I think the sleeves would have felt oddly light and also less warm without it.
To avoid having a loose layer of wadding that risked sliding around inside the sleeve I sewed it to the lining first before attaching the sleeve lining to the sherpa.


Here's what the lining looked like after the sleeves and facing were attached. I think the three fabrics actually made a pretty good combination! It made me think that a colour blocked jacket could be a fun project to try. 


Once the lining was complete I sewed the zip to the front bodice before attaching the sleeves and sewing the side seams. The zip is the only thing I had to buy for this project, everything else I had already. It's a good quality silver YKK zip that I purchased from Jaycotts.


I then attached the lining to the main body of the jacket. At this point it was starting to look like a proper garment which is always the best stage of the sewing process. 
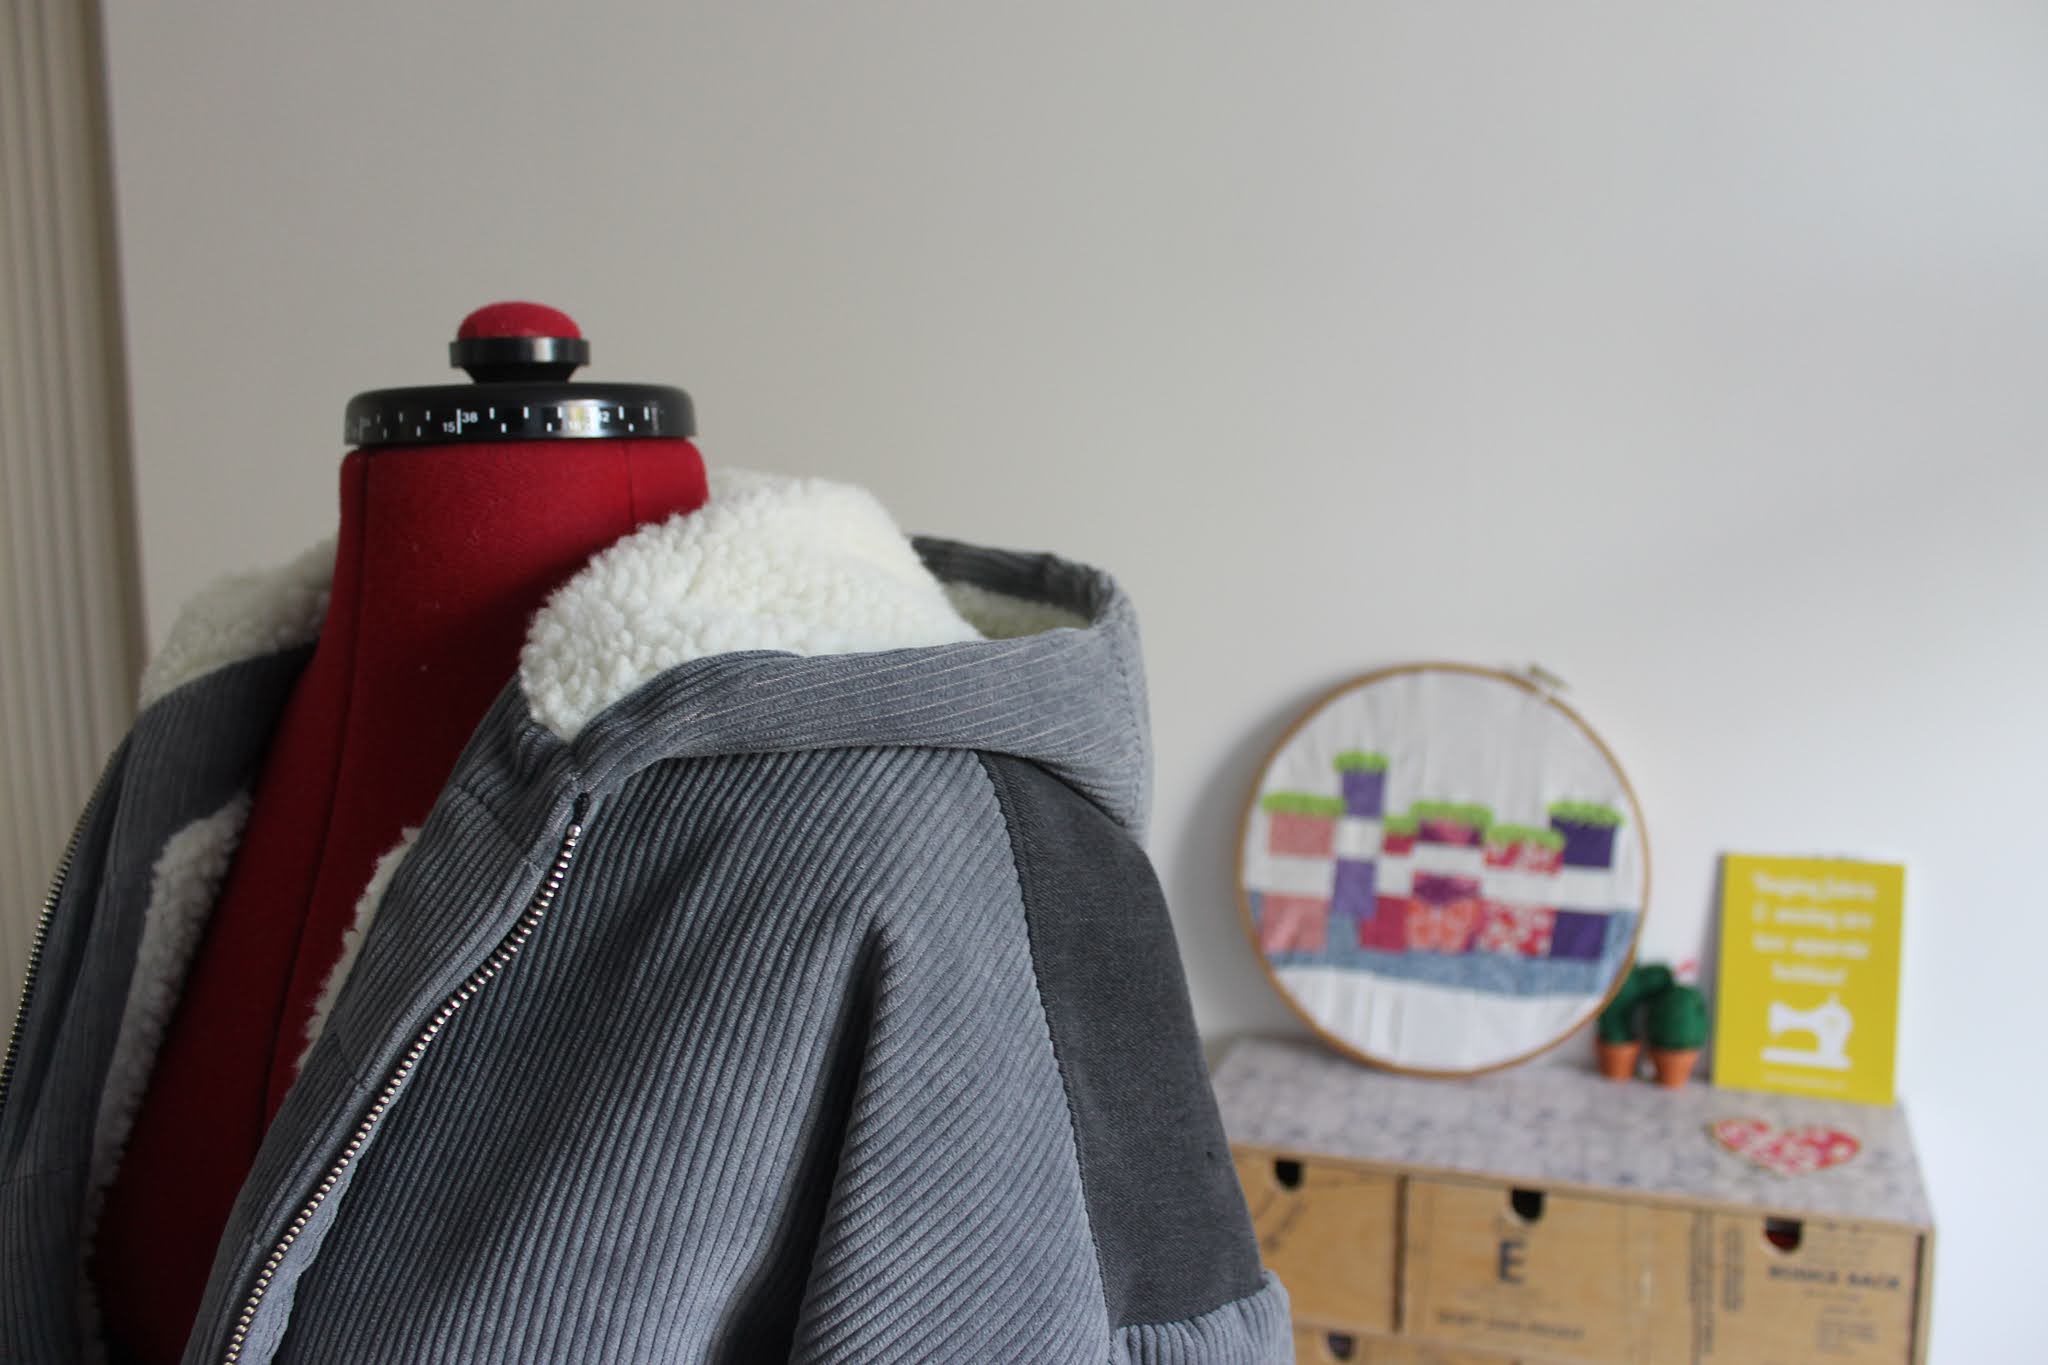

After attaching the lining I added in the hood. It remains my favourite detail, I love how the sherpa pairs with both the corduroy and the denim. I also really like the fact that half the hood has been pieced together from scraps, it feels like a secret detail and makes the jacket one of a kind.


I love adding finishing touches to my makes and especially to projects like this one which take a long time. It means that the finish isn't rushed and it's something to make me smile when I put the jacket on. I really like the liberty hanging loop that I added to my Kelly Anorak and wanted to do something similar with this jacket. I used an orange bias from Petit Pan which I love, my mum bought some ages ago and I've since used it on quite a few different projects including my jersey shirt and this swing top.
The hood made the jacket really take shape. What I like about this project is the fact that the lining is just as nice as the outer jacket. Everything has been finished neatly inside to create something that should last a long time. 


We are so nearly at the end now! The final stage was to add an elastic channel along the bottom of the jacket to bring it in. This was one of the main features on my RTW jacket but isn't really obvious on this one as there are so many other details. The elastic didn't bring it in very much in the end (the elastic hems of my pink fluffy and sherpa jackets are a much larger feature) but it's a good way to finish the jacket off and does give a subtle cinching in.


I also really like having the corduroy channel turned up on the inside. It means that everything is finished neatly with no raw seams showing and is also a nod towards the corduroy facing. Pairing the two fabrics together in as many places as possible means that look like they match rather than contrasting each other.


The sleeves are finished in the same way as the hem, with a 1" elastic channel. Having such a narrow sleeve end was really fiddly to sew but worth it for the finished look.


I did add a couple more extra touches to the jacket, I can't help it I love tiny details like that so much! In addition to the hanging loop I put a Kylie and the Machine 'You can't buy this' label into the side seam. I love these labels and it felt especially fitting for this jacket which has so many very specific details that couldn't be recreated. 
I've also added one of these labels to my Lander Pants, my Moss Skirt and my black joggers and seeing them always makes me smile.


The final detail was one that I wanted to include from the start. When I made my sherpa jacket I discovered these circle zip pulls from Prym that can be added to the end of zips. I've seen so many zips like this on RTW jackets and it makes a handmade item feel more professional. 


And that's it! It feels like it took me almost as long to write this blog post as it did to make the jacket. I am really pleased to have recorded the process though, like I said the majority of the time we only see finished projects without getting a glimpse into the construction. I really loved making this and love the final product too, I'll do another write up of the finished jacket soon. I'm really pleased that I managed to stick to my goal of only using leftover materials that I already had in my stash, even if it did mean that there was a lot of piecing scraps together!

Saturday, 30 January 2021

Megan Nielsen Wide-legged Dawn Jeans


I'm really enjoying long, in-depth sewing projects at the moment so making a pair of jeans was high up on my list of sewing plans. There's something about the combined effect of the month of January and being in lockdown that makes sewing a necessity. Having lots of sewing time at the moment does mean that I've been making things quite quickly though, so I really wanted an involved project. I also really enjoy sewing jeans, there's nothing quite like the satisfaction of being able to wear a pair of jeans that you've made yourself. A sewing goal of mine for the past few years has been to make trousers (especially jeans) that fit really well and I'm slowly getting there. Each new project brings me a little closer to the perfect fit that doesn't exist with ready to wear clothes.

I'm constantly talking about my sewing plans and have had a pair of light wash denim jeans planned for ages. My mum is great at choosing fabric and for Christmas my parents gave me this gorgeous pale blue denim fabric from Fabrics Galore. It's really good quality 12oz denim, perfect for a pair of rigid jeans, but what I like the most about it is the colour. There are so many different shades of denim and finding the right one is really difficult. This one is the perfect pale blue. It was such a lovely denim fabric to sew with and I'm really tempted to buy it in the other colour ways and make jeans in every shade!


I knew I wanted to make a pair of light denim jeans but it took me a long time to decide what style. The Megan Nielsen Dawn Jeans pattern is such a great rigid jeans pattern to have, with four different views to choose from. I made the tapered leg version last year out of corduroy and have been wanting to make a denim pair since so I was tempted to make a classic pair of mom jeans, perhaps with a raw hem. However, I've noticed an emergence of long wide-legged jeans recently and I wanted to have a go at making a pair, so the denim was destined for View C of the Dawn Jeans pattern.


I've liked wide-legged trousers for a while but have only recently started wearing them frequently. A large feature of this style of jeans is that they overlap the shoe by quite a large amount, rather than ending at or just above the ankle which is what I'm used to wearing. When I made my black Lander Pants at the start of 2020 they felt like quite a different style to my norm. It didn't take long for me to enjoy wearing them and I then made a pair of longer Lander Pants at the end of last year. These jeans still feel different to those longer Landers though. I think it's because the leg is quite a bit wider, and also the blue denim feels like a bit more of a statement than the cream corduroy.
I'm sure it won't take long for this length to feel completely normal though, it's amazing to see how quickly my sewing has evolved and what I wear now that I never would have before. I do really like the long length overall and it definitely matches the look I was going for, but I was tempted to hem them about 2" higher when I first tried them on.
I left quite a deep hem on the denim which I think always looks better when using a heavyweight fabric. I did run out of topstitch thread right at the end though so was only able to do a single row for the hem. It isn't really noticeable, but I'd like to go back and add another row once I've bought more thread.


It always takes me a while to decide what colour thread to use for topstitching. I really like contrast topstitching and have enjoyed using it as a feature on makes such as my Rosa Shirtdress. For this denim I thought about using a pale grey thread like the one I used on my Moss Skirt, and I think it would have looked nice but I decided to stick to a matching colour thread. Using a topstitch weight thread means that you still get a nice texture even if you use a matching colour. I've never actually used a contrast thread on jeans before as my Ginger Jeans also have matching thread, so it's something that I'll have to try next time.


Like I said I did run out of topstitch thread right at the end - very frustrating! In order to finish the jeans enough to wear them I just did one row of topstitching around the back pockets and the hem. I'm hoping to have enough fabric leftover to make a pair of shorts so will be buying more thread anyway and I'll go back and add a second row at a later date.
One of my favourite design features of jeans are the small details like bar tacks and topstitching which stand out to me even in a matching colour thread. I've never added an embroidery detail onto the back pockets of jeans but I'd like to give that a go at some point.


The ultimate goal when making a pair of jeans is, of course, to get the fit right. This is something that I've been struggling with for ages and always spend a long time trying to get just right. I have quite a large difference between my hip and waist measurements meaning that if I get the waist the right size trousers are often too tight on the hips. Rather than grading between sizes I cut out a size 6, which is the size my hip measurements put me in, and then took out about 1cm from either side seam (4cm from the waist in total) starting at the top and going down in a triangle shape to rejoin the normal seam allowance at the hips. This means that I can adjust the sizing after I've tried the trousers on rather than cutting them smaller and risking them ending up too small. Doing this before adding on the waistband avoids any gaping in the waistband once the jeans are finished.


Another important part of the fitting process is to baste the side seams together first. I did this at a 1cm seam allowance rather than 1.5, although 1.5cm ended up being right in the end. This enabled me to see how much I needed to take in at the waist and avoided any potential unpicking. When I sewed my corduroy pair of Dawn Jeans they ended up really tight at the leg and I had to unpick the seams. I think it was to do with the adjustment I made to the centre back seam and also the fact that I sewed the tapered leg version, so tightness on the leg wasn't an issue with these jeans but basting the side seams is always a good 'just in case' measure to take.


Taking out a sliver of excess fabric at the side seams was pretty simple and not the main adjustment I made. I often find that jeans gape at the back and nearly always have to take a wedge of fabric out of the centre back seam when making them. I tried on my corduroy Dawn Jeans several times while making this pair to check the fit. I managed to do a pretty good job making my first pair of Dawn Jeans fit, so I knew that I'd need to do a similar adjustment of taking about 1" out of the centre back, reducing the waist by 2" in total. In the past, I've always done this adjustment after I've sewn the centre back seam and tried the jeans on. This has allowed me to pin the fabric in place to work out exactly how much needs to be taken out. It isn't a bad method and has worked well but often results in the yoke seam not matching up (which was the case with these jeans) or the fabric bunching up a bit (the issue with this skirt).
Having already used the pattern once before, I had the benefit of knowing that I needed to take 1" out of the centre back seam. To avoid the mess of taking this out after the centre back seam was already sewn, I decided to alter the pattern. I drew a curved line that took out a triangular wedge of fabric from both the back yoke pattern pieces and the back leg. It was a bit of a risk to take in case the curve wasn't right but it worked and I am so happy with how the fit has turned out. The back yoke matches exactly and the seam allowance is consistent along the centre back seam as the pieces were already cut to exactly the right shape. It also means that I now have a jeans pattern that fits me so next time I'll be able to sew them up without having to worry about the fit.


The Dawn Jeans are designed to have a button zip but, like with my first pair, I replaced this with a fly. To me it's both a feature and more practical finish. I would really like to make a pair of Dawn Jeans with an exposed button fly though, much like my Lander Pants.


To me, the best part of making jeans is being able to add in hardware to make them feel professional. I used rivets on my first pair of handmade jeans and love how they look. For the light wash denim I chose to add silver rivets and a silver jeans button.


I added 5 rivets in total, at the top and bottom of the front pockets and one on the coin pocket. I did think about adding them to the back pockets too but none of the RTW jeans I looked at had them there so I decided to stick to the front.
I still make my mum hammer in the rivets, I can't bear the thought of ruining the whole make with at the final stage!


Even though it's not a style that I'm fully comfortable wearing yet, I love these long wide-legged jeans and I am sure I'll love wearing them. I think the pale denim will look especially nice in the spring and summer too. I'm so pleased to have achieved such a good fit with these jeans and I'll definitely be using this pattern again and again. I enjoy sewing jeans so much so I'm sure my next handmade pair will come very soon!

Monday, 25 January 2021

Sewing for others: Ribbed Jersey Shirt


My latest sewing project is another make for my mum. I love sewing clothes for her and she (generally!) enjoys having clothes made by me. In the brief spell between lockdowns, we enjoyed a trip to Higgs & Higgs together and each bought some fabric to for me to sew up into a garment. I bought a cream needlecord fabric which I used to make a pair of Lander Pants and my mum bought some grey rib to make a shirt.


I've made quite a few different items of clothing for my mum over the years. I'd say the most successful have been her Linden jumpers of which I've made her four (a navy one, a blue one, an orange one and a grey one) although I think it might be time to make another as she's worn a couple of them pretty much to death. The Frou-Frou blouse that I made a few years ago as well as this checked one more recently have also received a lot of wear.
For this project I was asked to make something a bit different. Mum chose a lovely grey rib fabric from Higgs & Higgs to be made into a shirt. We both really like the idea of making items of clothing out of fabrics that they wouldn't traditionally be made from and I've made both a grey jersey shirt and a white one in the past for myself so I thought it would be a fun project. 


In order to get the proportions right I copied a RTW shirt that my mum already owns. Its most interesting feature is the neckline which curves slowly out to open at the neck. I added a collar to this top but I think that the design would also look nice without a collar too.
The only thing I changed from the design of the shirt that I copied was to have the buttons running all the way down rather than have a button placket which ended about halfway down the front. The RTW top also had a stretchy panel inserted at the side seams that ran along the sleeves which I chose to exclude as I used a rib for the whole thing anyway. Even though it's a copy of a top the two look very differnt due to the different fabric types.
The fit turned out really well, but it wasn't the easiest of projects! When my mum first tried it on the shoulder was really wide making the sleeve stick out strangely. After a lot of pinning and basting we managed to fix the fit. I ended up taking quite a lot out of the shoulder where the sleeve was attached and also some at the armpit. I wonder if using a stretchy fabric was the reason the fit didn't quite work out despite copying a top. I'm glad I was able to fix the problem as I really like the style and fabric. 
 

I can't take any credit when it comes to the fabric choice as it was all my mum's idea, but I love the collar so much! I've used cuffing like this one before on the cuffs of this jumper but hadn't thought of using it on a collar. Because we bought the cuffing and ribbing fabric together the colours match exactly which is really nice. It adds such a lovely detail to what might otherwise be a fairly plain top. 
I wasn't sure about how to go about using the cuffing as a collar as the collar would usually have a lining with the raw edges enclosed. All I did was to curve off the edge with scissors to make it round. It doesn't seem to be fraying, but I am slightly worried that it might fray after being washed.


As with many sewing projects there was a bit of stalling with this one when it came to finding buttons. The first issue was waiting for lockdown to end so that we could go into shops, but once it did we struggled to find the right buttons. The initial plan was to have dark grey buttons to match the dark grey in the collar but those apparently don't exist in the size we needed! In the end my mum bought some pearly grey buttons which I sewed on with dark grey thread. They're intended to just make the top wearable until she finds some dark grey ones, but I wonder if we'll ever change them!

Thursday, 21 January 2021

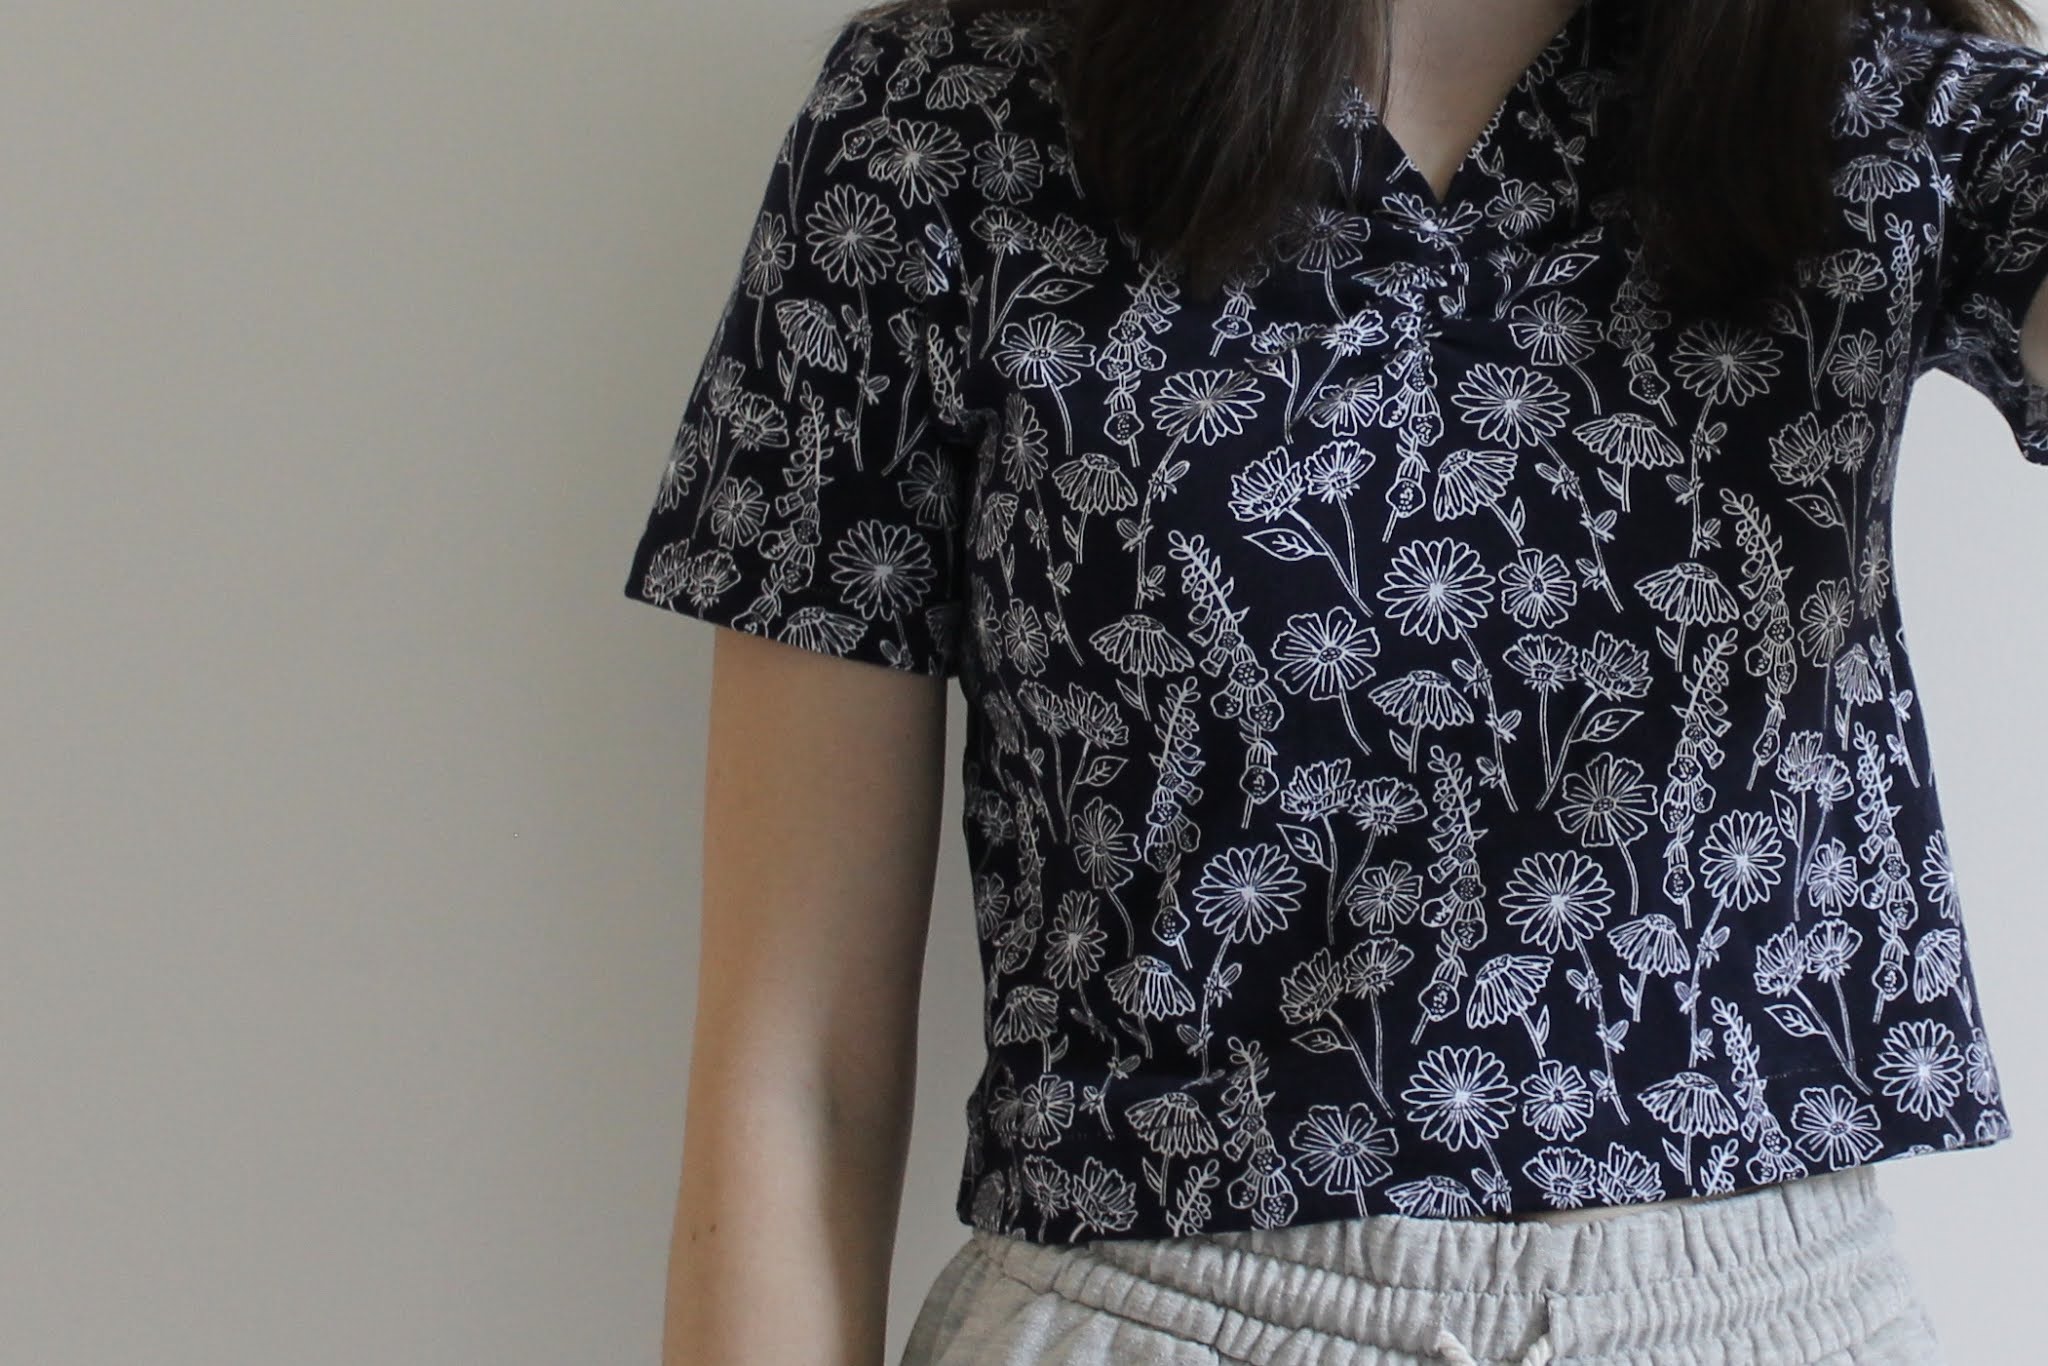
DIY Ruched V-Neck Top

One of my favourite things about making your own clothes is the ability to transfer different design features onto any kind of garment. This can be anything from an exposed zip to gathers, all of which help the final outcome feel a bit more interesting. The idea of a ruched neckline is a detail that I've wanted to try for a while. I've enjoyed making several ruched tops before (a grey one and a multicoloured one) but with the gathering going the entire way down the top and, having noticed this done several different ways on ready to wear clothes, I chose to reuse the same technique but to achieve a different look.

Ruching the fabric was actually fairly easy to do. I used a piece of 1/4" wide elastic which I held stretched out on the wrong side of the fabric and sewed down the middle of. When you let go, the elastic goes back to its original length creating this gathering effect. It's quite fun to do and surprisingly simple to achieve. Because the elastic that I used was narrow I can't really feel it either which is good. 


Whilst achieving the gathers was fairly easy, planning the shape of the neckline was less so. Before adding the elastic I cut the neckline of my top into a v shape. I then hemmed the neckline to create a neat finish which would be tricky to do once the elastic had been added. The main thing I struggled with was knowing how long to make the elastic. It's meant to be a neckline detail so I didn't want it coming down too low, but at the same time it stretches a surprising amount so doesn't need to be cut very long. In the end I think I actually cut it a little bit too short and an extra inch of gathers might have looked better, but it's a small mistake. 
My only other regret with this top is that the neckline has ended up feeling a little narrow. Once again, in order to avoid it coming down too low or being too wide I actually went in the opposite direction and made it too high and narrow. It's hard to judge what will happen to the size of the neckline once the elastic has been added, so bare in mind that the shape will change due to the gathers. 


I used a cotton jersey from Craft Cotton Co to make this top, which is a fabric I'd definitely recommend for adding details like ruching. Cotton jersey isn't too heavy weight so it gathers nicely, but is also stable to sew with so inserting the elastic remained nice and simple. I think this would work really well on a cotton fabric too and would probably be even easier to sew as the fabric would be more stable. I think adding in the gathered neckline gives a nice balance between adding detail to an otherwise basic t-shirt shape but also leaving plenty of room for a printed fabric like this one. 

Wednesday, 13 January 2021

Tilly and the Buttons: Stretch - Freya Turtleneck

I've finally got round to making myself a black turtleneck top, the kind of simple top that I wear a lot. This top has been at the back of my mind for what feels like ages, but seemed to always get overtaken by more spur of the moment projects. After making a pair of cream Lander Pants I needed a top to pair with them, and my black turtleneck plans found themselves at the top of my sewing queue once again


I used, as usual, the Tilly and the Buttons Freya top to make this. It's definitely my most used pattern although I've only used it to make a turtleneck a few times before. The bodice is a really good base pattern to hack but sometimes it's nice to make the pattern as intended! I've previously made a grey stripy Freya top, a blue and white stripy one, a mustard one and more recently a red one with a zip-neck hack. I really like the depth of the turtleneck, though it could easily be made shorter or longer depending on preference. 


Whilst my Lander Pants are what initially convinced me to make a black turtleneck, it's the kind of wardrobe basic that can be worn with so many different trousers. I also have a habit of making short sleeved t-shirts rather than warmer tops that I'm more likely to wear so hopefully this will fill a wardrobe gap too. 
I really wanted to use a cotton jersey to make this top for a couple of reasons, the first being that they tend to be better quality jerseys which don't feel synthetic and are also fully opaque - obviously ideal when using a plain fabric. Cotton jersey is also slightly heavier weight than a lot of other stretch fabrics which work for t-shirts, perfect for making sure a turtleneck holds its shape. I used this plain black jersey fabric from Fabrics For All. I'm so tempted to make some more plain turtlenecks now, I try to push myself to use prints from time to time but the truth is I just prefer wearing plain fabrics! Maybe a bit boring, but when paired with more interesting trousers I think plain tops are perfect.


I spent a while trying to decide what length to make this top. My initial plan was to make it long and wear it tucked in, but after trying on my Landers with a tucked in t-shirt I just didn't like how it looked. I went for the middle-path in the end, making it long enough to cover the top of the waistband of trousers without it being so long that it looks like it needs tucking in. I've just realised that it's actually the same length as my red Freya top, not a conscious decision but clearly it's a length that I like!

[This fabric was given to me by Fabrics for All but all thoughts are my own]

Monday, 4 January 2021

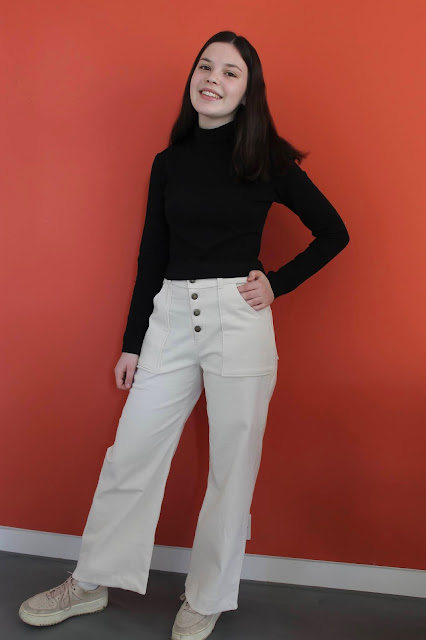
Cream Corduroy True Bias Lander Pants

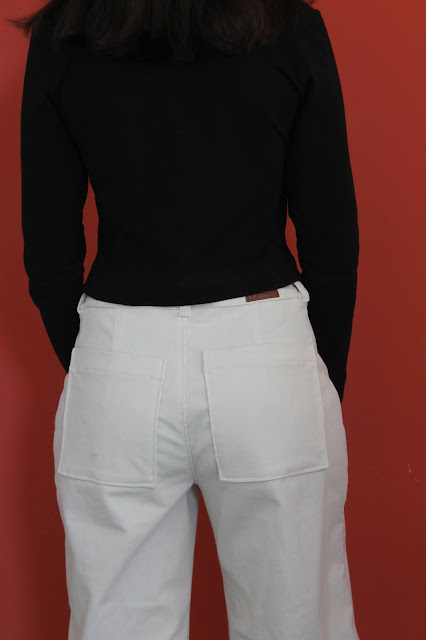
I've made another pair of Lander Pants - woop! This was definitely the pattern of 2020 for me, not necessarily because I made lots of pairs but because I discovered how much I like it. I actually bought this pattern ages ago (I think it might have been on sale somewhere at some point?) but didn't get round to making it until last January, when I made a black denim pair. I surprised myself with how much I enjoyed wearing them and went on to make a gingham pair in the summer which I also love.

I knew that I wanted to make another pair, this time a pair which was long unlike the other two which are slightly cropped. I hadn't yet decided what kind of fabric to make them out of but my mum and I enjoyed a trip to Higgs & Higgs just before the second lockdown. It's such a nice fabric shop as it's essentially their warehouse which is open to the public, making it amazing to look round. I last went in 2018 (you can see what I bought here) and have wanted to go back since. I didn't buy as much this time, leaving with a grey rib to make my mum a top and cream corduroy to make myself a pair of Lander Pants.

I hadn't planned to make a pair of corduroy Landers but I had been toying with the idea of making some cream trousers. The fabric that I found was so lovely and made my plan fall into place, specifically to make a pair of long Lander Pants. Higgs & Higgs have quite a large selection of corduroy fabrics but there was very little of the colour I liked left on the roll. I've had a look on their website and can't find the fabric that I used, it looks a lot like this one but the two shades of cream in the shop were slightly different. There was only 1.3m left on the roll and they wouldn't be getting any more in as it was ex-designer. I really wasn't convinced I'd be able to get a pair of Lander Pants out of 1.3m if they were long and included the pockets, but after hesitating over the other shade of cream and also a tan colour I decided to try and make it fit. If there wasn't enough fabric, I'd make a pair of shorts instead.


But there was enough fabric! It was very, very just but I managed to squeeze all the pattern pieces on and even got pockets cut out too. There wasn't quite enough to make them full length so for the hem I literally pieced the scraps together to make a 2" deep strip that I then sewed around the bottom and turned up. I'm so pleased I went with the fabric I wanted as the colour is just right.


One of the things I really like about the shade of cream is how well it goes with the brass buttons. These are the same buttons that I used on my black Lander Pants, they're hammer in jeans buttons that I think complete the trousers perfectly. I considered using a tan coloured topstitch thread to match the buttons, but went for a matching cream in the end. I'm not displeased with the matching topstitching but I think a subtle contrast could have looked nice.


I was expecting to have to leave off the back pockets due to fabric shortage but just had enough fabric to add them in the end. I purposely chose to leave off the back pockets on my black and gingham Landers as I just didn't like the square look, but somehow felt like they were needed on the cream corduroy. I'm not sure why I felt like that, but I think they look nice!


In the interest of adding extra details, my favourite thing to do on makes, I added a leather patch to the waistband. I'm so pleased with it and definitely want to buy some more to add to future jeans. I got a pack of 3 when I went to Stoff & Still, used one on my mum's bag and one on these Landers leaving me the last one to add to my next pair of jeans. It's a lovely way of making them feel more professional too. 


The main reason that I love the True Bias Lander Pants is because the pattern fits me so well. I still stand by that but this pair sadly doesn't fit quite as well as my other two pairs. The issue this time is that they're just a bit big around the waist causing them to fall down slightly which I find really annoying. I made the same adjustments of taking them in at the side seams as I always do, so I think that the problem with these is that the fabric has stretched out slightly. The gingham Landers fit me perfectly thanks to the fact that they're made from a lightweight fabric with absolutely no stretch. Whilst the corduroy isn't really very stretchy, it does have a bit of stretch in it which is why they've turned out a little big. It's not a massive problem but it's a bit of a shame.


I really love the details on this pattern, especially the front pockets which I was really keen to add so luckily there was enough fabric. What I like about these pockets is that fact that they're different to most jeans pockets making the finished make more interesting.


I haven't been able to wear these out yet but I'm hoping to do so soon as I really like them and need to get used to wearing what is a slightly different style for me. When I first made the Lander Pants I really didn't want a pair of long wide-legged trousers. That was less than a year ago so it just goes to show how much taste changes!