Wednesday, 12 May 2021

Making a velour zip-up jacket


I've always enjoyed making things from fabrics that they wouldn't normally be made from (like this shirt top made out of jersey) and having seen a resurgence of velour type fabrics recently I thought it would be fun to make an item of clothing from a fabric which is often used for upholstery. I chose a deep jewel green colour velour (the colour way is called 'petrol') for this project which seemed like a good fit for a zip-up jacket.


This project actually started off with the assumption that it would be a zip-up hoodie, but the structure of the fabric makes it feel much more like a jacket. I actually used the same self-drafted pattern that I made this black zip-up hoodie from, which goes to show how different the same pattern can look when made from two different fabrics. The pattern still worked really well for this fabric, although I should have widened the sleeves slightly as they are a little tight when made from a non-stretch fabric. Because it's so difficult to find matching ribbing I just used the same fabric for the hem band and cuffs on this jacket, but I think the velour would have also paired well with a rib for those.  


The only change I made from my black hoodie was to add in some pockets. I got this idea from a cropped RTW hoodie and, whilst the pockets aren't functional as they're so high up, I really like how they look. It's also a nice addition to a plain fabric as they add a bit of interest, especially with the topstitching. Rather than drafting a disproportional pocket I used my pattern piece from the Tilly and the Buttons Stella Hoodie (which I've made before here, here and here but without the pocket) and cut it in half to allow the zip to run through it. The pockets are fully lined which is a nice finish to have but they were almost impossible to attach! Because the velour is a fairly heavyweight fabric having a double layer for the pockets and then a double layer for the hem band made the topstitching around the bottom really tricky. It probably would have been better to turn the pocket fabric under and hem with this kind of fabric.


As always I enjoyed focusing on the smaller details like topstitching. Like the pockets, adding some rows of stitching adds a bit of interest to the plain fabric. The hood is also fully lined (unlike the pockets I think that was necessary, the wrong fabric would have showed) which creates a bit of stiffness but that will probably soften with wear.


Zips can often make or break a garment (literally, I was so sad when the zip on these jeans broke!) so they're definitely worth spending extra on. I've found that YKK zips are a really great quality and used one with silver teeth for this make. As I mentioned above it's really hard to match colours online, especially with a colour like this green one which isn't a classic shade. I decided to go for a green zip which seemed like the closest match but the shades were completely different and I reckon it would have been better to go for black or grey. 
It wouldn't usually matter so much if the zip isn't a perfect colour-match but for a jacket like this one the zip tape would have been visible whenever the jacket wasn't zipped up. To fix this problem I made some bias binding out of the velour fabric and sewed it around the zip tape. As a bonus it also makes the inside super neat, although I had to hand sew it down which took forever!


I think I must have been unusually distracted while making this jacket as it I had to unpick quite a few sections (I actually forgot to add the pockets when I first sewed in the zip!) but it was a really enjoyable project. I definitely think that velour can work for clothes and not just cushions, and I'm very pleased with how this jacket turned out. Looking back through some of my older makes I realised that I've actually used velour before on a dressmaking project - I made this dress back in 2017. I'm still proud of that dress but it's also really nice to see how much my sewing has improved, this jacket was a self-drafted pattern and is much more suited to something I would wear on a daily basis. 

[This fabric was given to me by Minerva in exchange for a blog post]

Thursday, 29 April 2021

DIY Sleeveless Turtleneck Top

I started off this year with quite a few long, involved sewing projects. I made a pair of jeans, followed by a lined jacket and another pair of jeans. My sewing fluctuates between wanting to make more complicated things that I can be fully absorbed in, followed by simple makes that take a short amount of time. For me, those simple makes are always t-shirts. I know I'll get a lot of wear out of them and I really like using t-shirt sewing patterns as a base for pattern hacks. Recently, I've been focused on exams and revision so simple t-shirts have been ideal sewing projects.


I've had a sleeveless turtleneck top in mind for a while and of course turned to the Tilly and the Buttons Freya top to use as a base to hack. I've made the pattern over and over, including this sparkly version and this plain black version so far this year. One of my favourite Freya hacks that I've done is this zip-neck version. This is my first time making the pattern sleeveless and for this project I kept the turtleneck, but I think it could nice to make it as a vest top too.


My biggest challenge when it came to this top was getting the armhole to fit well. I wanted to give the armhole an inward curve, as well as narrowing the shoulder seam by about half its initial width. To make sure there wasn't any gaping I tried the top on quite a few times while making it and pinned the fabric in place. The main thing that made the fit work was to add an armband around the armhole. Much like a neckband, this was a piece of fabric that was folded in half and then stretched when sewn in place. It worked really well and has drawn the fabric in place to ensure that there's no gaping.


I wanted to make a simple top that I could pair with my wide-legged Dawn Jeans which are really high-waisted, so I cut it quite a bit shorter than I usually would. The length has ended up pretty good for pairing with those jeans as the top finishes just above the waistband, but it meant that I couldn't lose any length when it came to hemming the top. I wasn't sure how to avoid a wobbly hem which is how jersey hems often turn out if anything less than 1" has been turned under. When I mentioned the problem to my mum, she reminded me of some white jersey bias binding that I had in my stash. It was the perfect solution, I sewed the bias along the bottom of the top before flipping it to the inside and stitching it down. Not only is it really neat on the inside, the hem is perfectly straight and I only lost 1/4" in length. I happened to have some shop-bought binding in my stash but it would be really easy to make and it's definitely a finish I'll use again.


For the fabric I used a plain white cotton jersey from Craft Cotton Co, one of my favourite fabric types. I've actually used this same plain white colour way before to make this jumper and this top, I love it because it's much more opaque than most other white jerseys and also feels nice to wear.

I remember talking about how sewing often feels like a superpower when I made this top a few years ago, and my new sleeveless turtleneck feels like another example of that. Sewing allowed me to replicate a design that I liked while making it in a lovely fabric, achieving a great fit and adding something to my wardrobe that I know pairs with other items. 


I actually loved this top so much that I immediately made another one in black! That's definitely a sign of a successful sewing project. I know I'll get lots of wear out of this style of top and having one in white and in black means that I can wear one of them with pretty much any trousers. I'll share more about the black version in a seperate blog post. Seeing as they're both identical and are both very basic colours I'll be interested to see which one I wear more.

Friday, 2 April 2021

Megan Nielsen Dawn Jeans - DIY Balloon Jeans Hack

I've always enjoyed the in-depth sewing process of making a pair of jeans. Not only are they enjoyable to make as the sewing involves more thought than a simple top, being able to wear a pair of handmade jeans is an amazing feeling. As my sewing skills and confidence has increased I've started to hack sewing patterns into different styles but I've previously steered away from hacking jeans patterns. The fitting is more complicated on jeans, and I worried that I wouldn't get the proportions right. Now that I've made quite a few pairs of jeans I feel more comfortable with the fitting and sewing process and after the success of my flared jeans hack I thought I'd venture further jeans hacks.

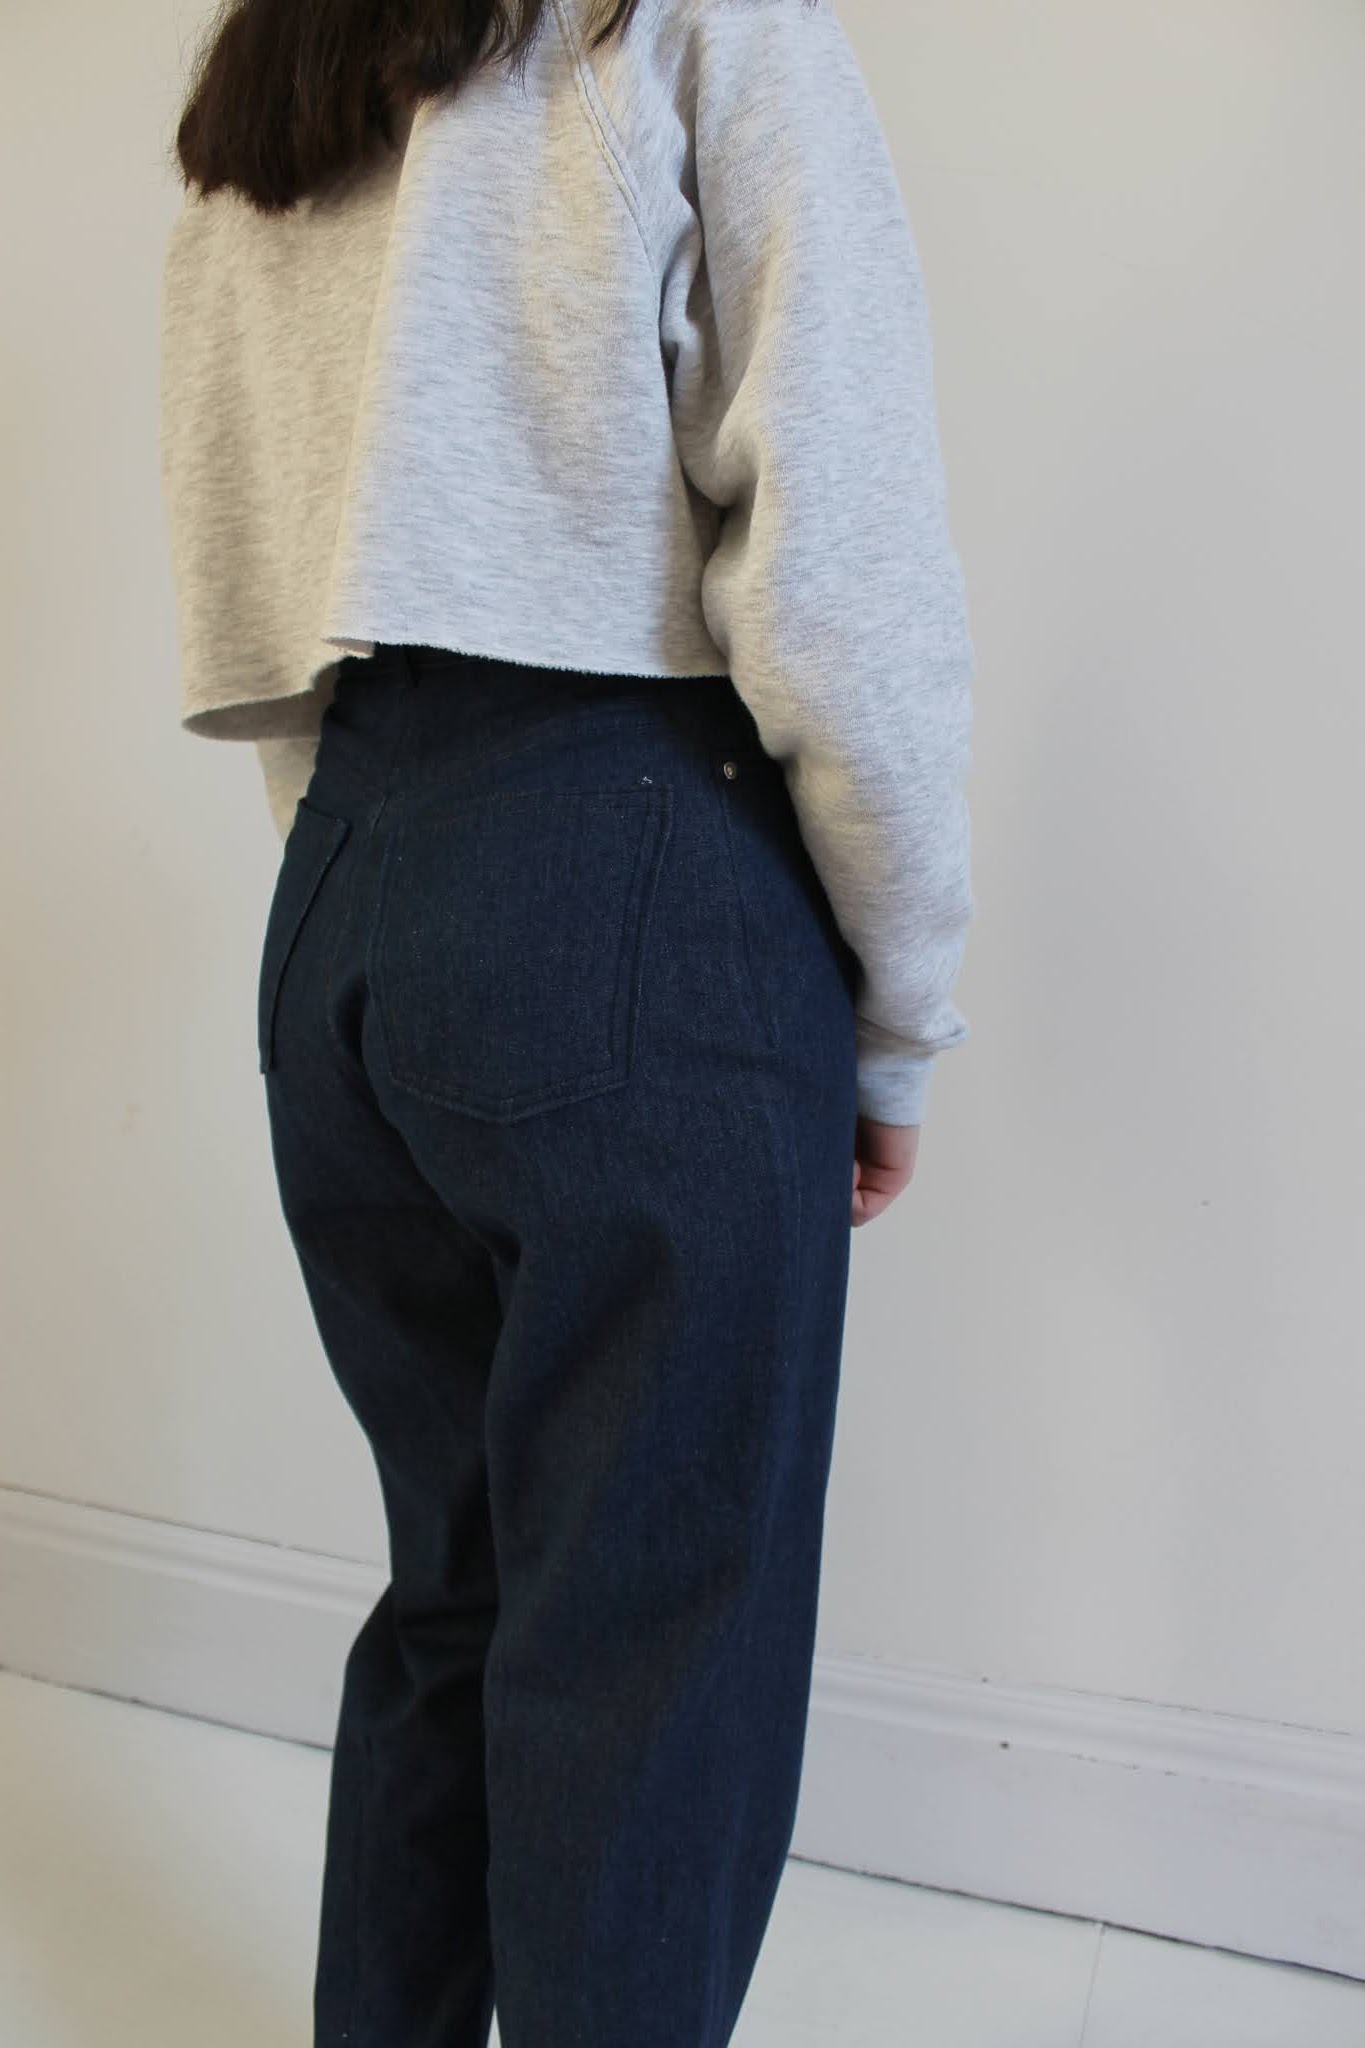
The Megan Nielsen Dawn Jeans is a great pattern for non-stretch jeans, I made my first pair out of corduroy last year and have recently made a wide-legged pair. I especially like how high-waisted they are, making them comfortable to wear. Having made two pairs previously I've managed to alter the back pieces to get the pattern to fit me perfectly at the waist, so it seemed like a good pattern to use as a base for future jeans hacks. With three different views, the pattern also has a variety of different leg-widths which provide a great starting point.


Quite a few different styles of jeans have emerged recently and I always like to use RTW clothes as sewing inspiration. One style that I kept going back to was balloon jeans, which have a fitted waist and ankle but go out in a balloon-shape before coming back in. I looked at quite a few photos online and the main technique seemed to be having darts around the base of the leg to bring the fabric in whilst keeping volume around the knee.

In order to make these jeans I cut my fabric pieces out as view C of the Dawn Jeans which are wide-legged, I made a pair of these without any hacks a few months ago. For this pair, I constructed the jeans as usual until it came to sewing the legs together, at which point I basted both the inner leg seam and the side seams in place. Then came a lot of pinning! I tried the jeans on and basically pinned the shape I wanted in place. The wide-legged jeans were quite a bit wider than what I wanted for the balloon jeans so I took quite a bit of fabric out from both the inner leg and side seams, especially around the thigh/knee area. 

To get the shaping that I wanted I needed to add in some darts. Again I basted these in place so that they could easily be unpicked and re-sewn at a different length. I was expecting the darts to take ages to get right but they were surprisingly straightforward to do, I added one up the middle of the back and two in the front at equal distances from the side seams. My darts ended up being about 1" wide at the bottom and 11" long, but depending on how much fabric you want taking in at the ankles you could vary the width.

Once the darts were in place I basted the seams for a second time, following the shape that the pins made. This took quite a while to get right and I ended up taking more fabric out than I was expecting as I found that I didn't like the really baggy look that the jeans had. The great thing about making these myself is that I was able to create a pair of balloon jeans which go out in the right shape but weren't too baggy, I think I might have found a RTW pair a bit loose and harder to wear.

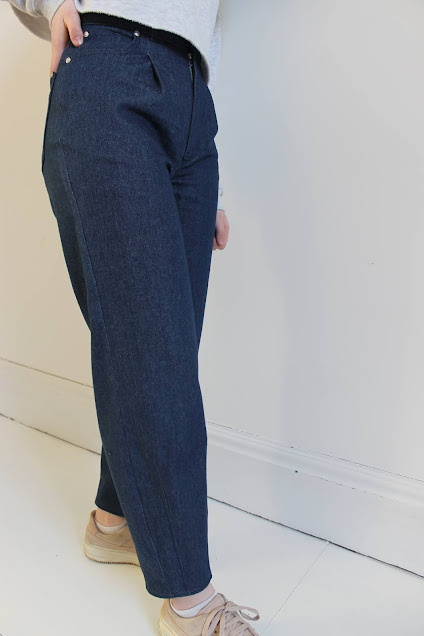
I'm very pleased with the shape that I created, like I said they don't go out too much so aren't overly baggy but the balloon shape is there and is especially visible from the side. 

Because the legs are quite loose it was important to me to make sure that the waistband fit really well. It means that the jeans can be worn with a more fitted top to balance out the looser legs and I think having a pair of jeans that fits well on the waist makes them seem a bit smarter, not to mention that they're much nicer to wear if they fit.
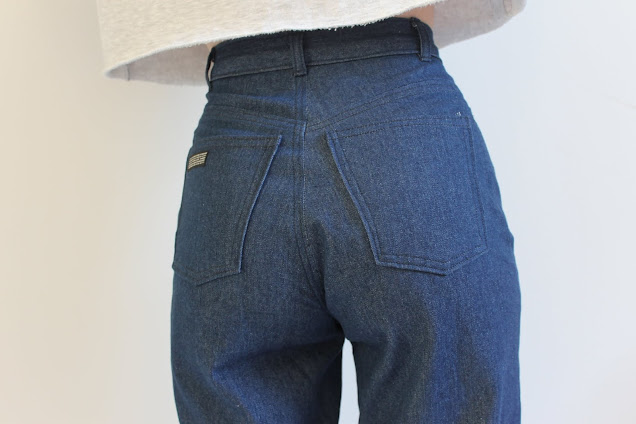

It's taken me so long to get the fit of jeans right but I've finally got there with the Dawn Jeans. The main adjustment I made to the pattern was to remove a wedge from the centre back seam and also take the side seams in by 2cm either side at the top. I wrote more about the fitting process in this post. I'd really recommend making a jeans pattern without hacking it several times to get the fit right and to then transfer those markings to the pattern. Having the pattern already altered to fit me makes the sewing process so much more enjoyable as I don't have to think about adjusting the fit every time I make a pair of jeans, I can then focus on hacks to the leg shape instead. 

As well as having darts to shape the legs, the main thing I noticed when looking at RTW balloon jeans was that they featured pleats at the waist. I did consider leaving off the pleats as I was worried about over-hacking, but they link to the more relaxed style so seemed like a necessary addition. Fortunately the denim I used was the perfect weight. I'm not sure the pleats would have worked in a thicker fabric, I didn't want them to stick out stiffly.

In the end adding the pleats was a fairly simple pattern adjustment. When cutting out the front trouser piece I marked on the pattern where I wanted the pleat to go (ideally about 1/2" away from the pocket) and then moved my pattern piece to add in an extra 2" of fabric which would then be folded to create the pleat. The proper way of doing this would be to alter the pattern but my lazy method worked fine too!

Initially, I folded and basted the pleats in place and just left them as they were. However, when I tried the trousers on the pleats seemed to get a bit lost among the other features and didn't really stand out enough. To get past this I sewed together the pleat, adding about 1" of stitching down from the waistband. It's hard to explain but this post gives you an idea of what I did, you can see from the photo that it makes the pleat stay in place at the top. The pleats remind me of these trousers that I made a few years ago and loved wearing.


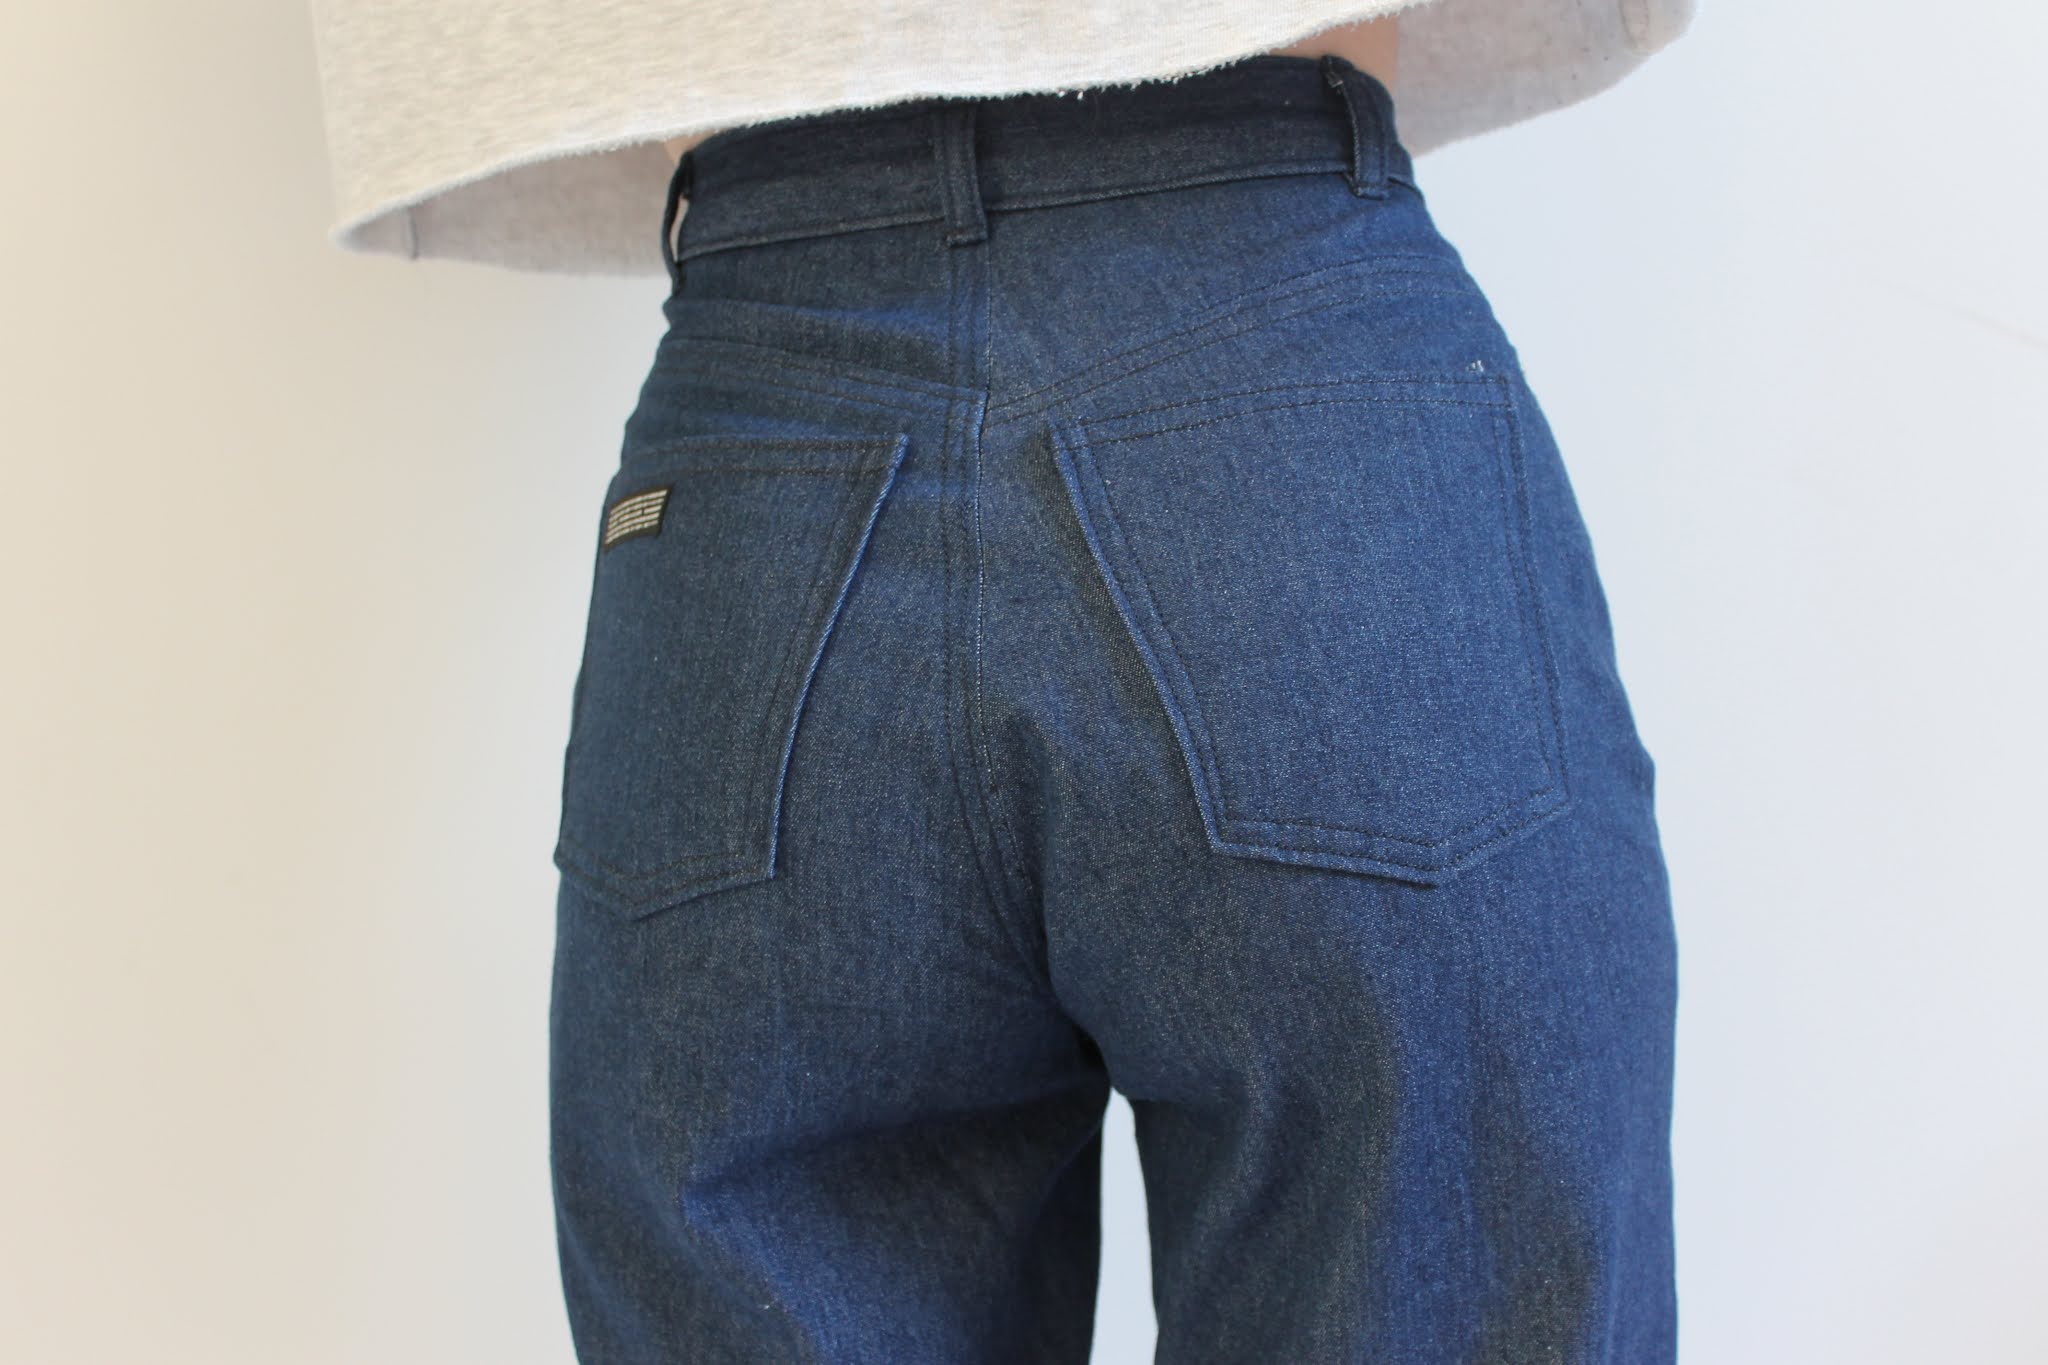
I really enjoyed adding topstitching to these jeans. I used a matching colour thread (I didn't want a contrast colour to take away from the leg shape which is the main feature) but I think that the texture of a heavyweight thread adds a lot of interest, especially around the waistband and on the back pockets.

Possibly my favourite feature was my decision to add topstitching to the darts on the leg. I wasn't planning to do this but kept thinking that it could look really cool, so I decided to go for it and I love how it looks. It makes the darts seem purposeful and ties the legs to the waist. It helps that the inseam has a double row of topstitching which I then repeated for the hem, again drawing it all together.

When it came to hemming the jeans it took me quite a while to decide what length I wanted them. I turned them up by a couple of inches to start with and really liked the slightly cropped length. However, I've noticed that the length of jeans seems to be increasing so I wanted them to be slightly  longer. When I compared the two lengths I actually really liked both of them, in the end I went for the longer length but either would have been nice.

Like all handmade jeans these were only complete once I added rivets. They're surprisingly easy to add but I think they go a long way in making these look shop bought rather than handmade. I chose to go for silver rivets with this colour denim although it probably would have looked nice with bronze ones too.

Another lovely detail of handmade jeans is being able to add pocket bag lining fabric. This is always something that I like to do in a fun contrast fabric, it isn't visible from the outside but always makes me smile when I put the jeans on. I chose to use this floral cotton print from Craft Cotton Co, I think it pairs perfectly with the navy denim.

I couldn't resist adding a 'pattern hacker' label to the back pocket. I tend to add labels to the insides of makes but this one is so perfect for these jeans and it's quite subtle so isn't too much of a statement.


I'm honestly slightly surprised by how well these turned out! I had a very clear picture of what I wanted these jeans to look like in my head but it's often really hard to transfer that onto an actual garment, especially without a ready-made pattern. The time it took to baste the side seams of these jeans really paid off as the width is just right. I also love how the darts are used to bring the fabric back in at the bottom, it's a clever design feature that I like the look of too. I'm definitely going to be hacking the Dawn Jeans again, once the fit has been perfected the possibilities are endless!

Sunday, 21 March 2021

Sparkly Tilly and the Buttons Freya Top


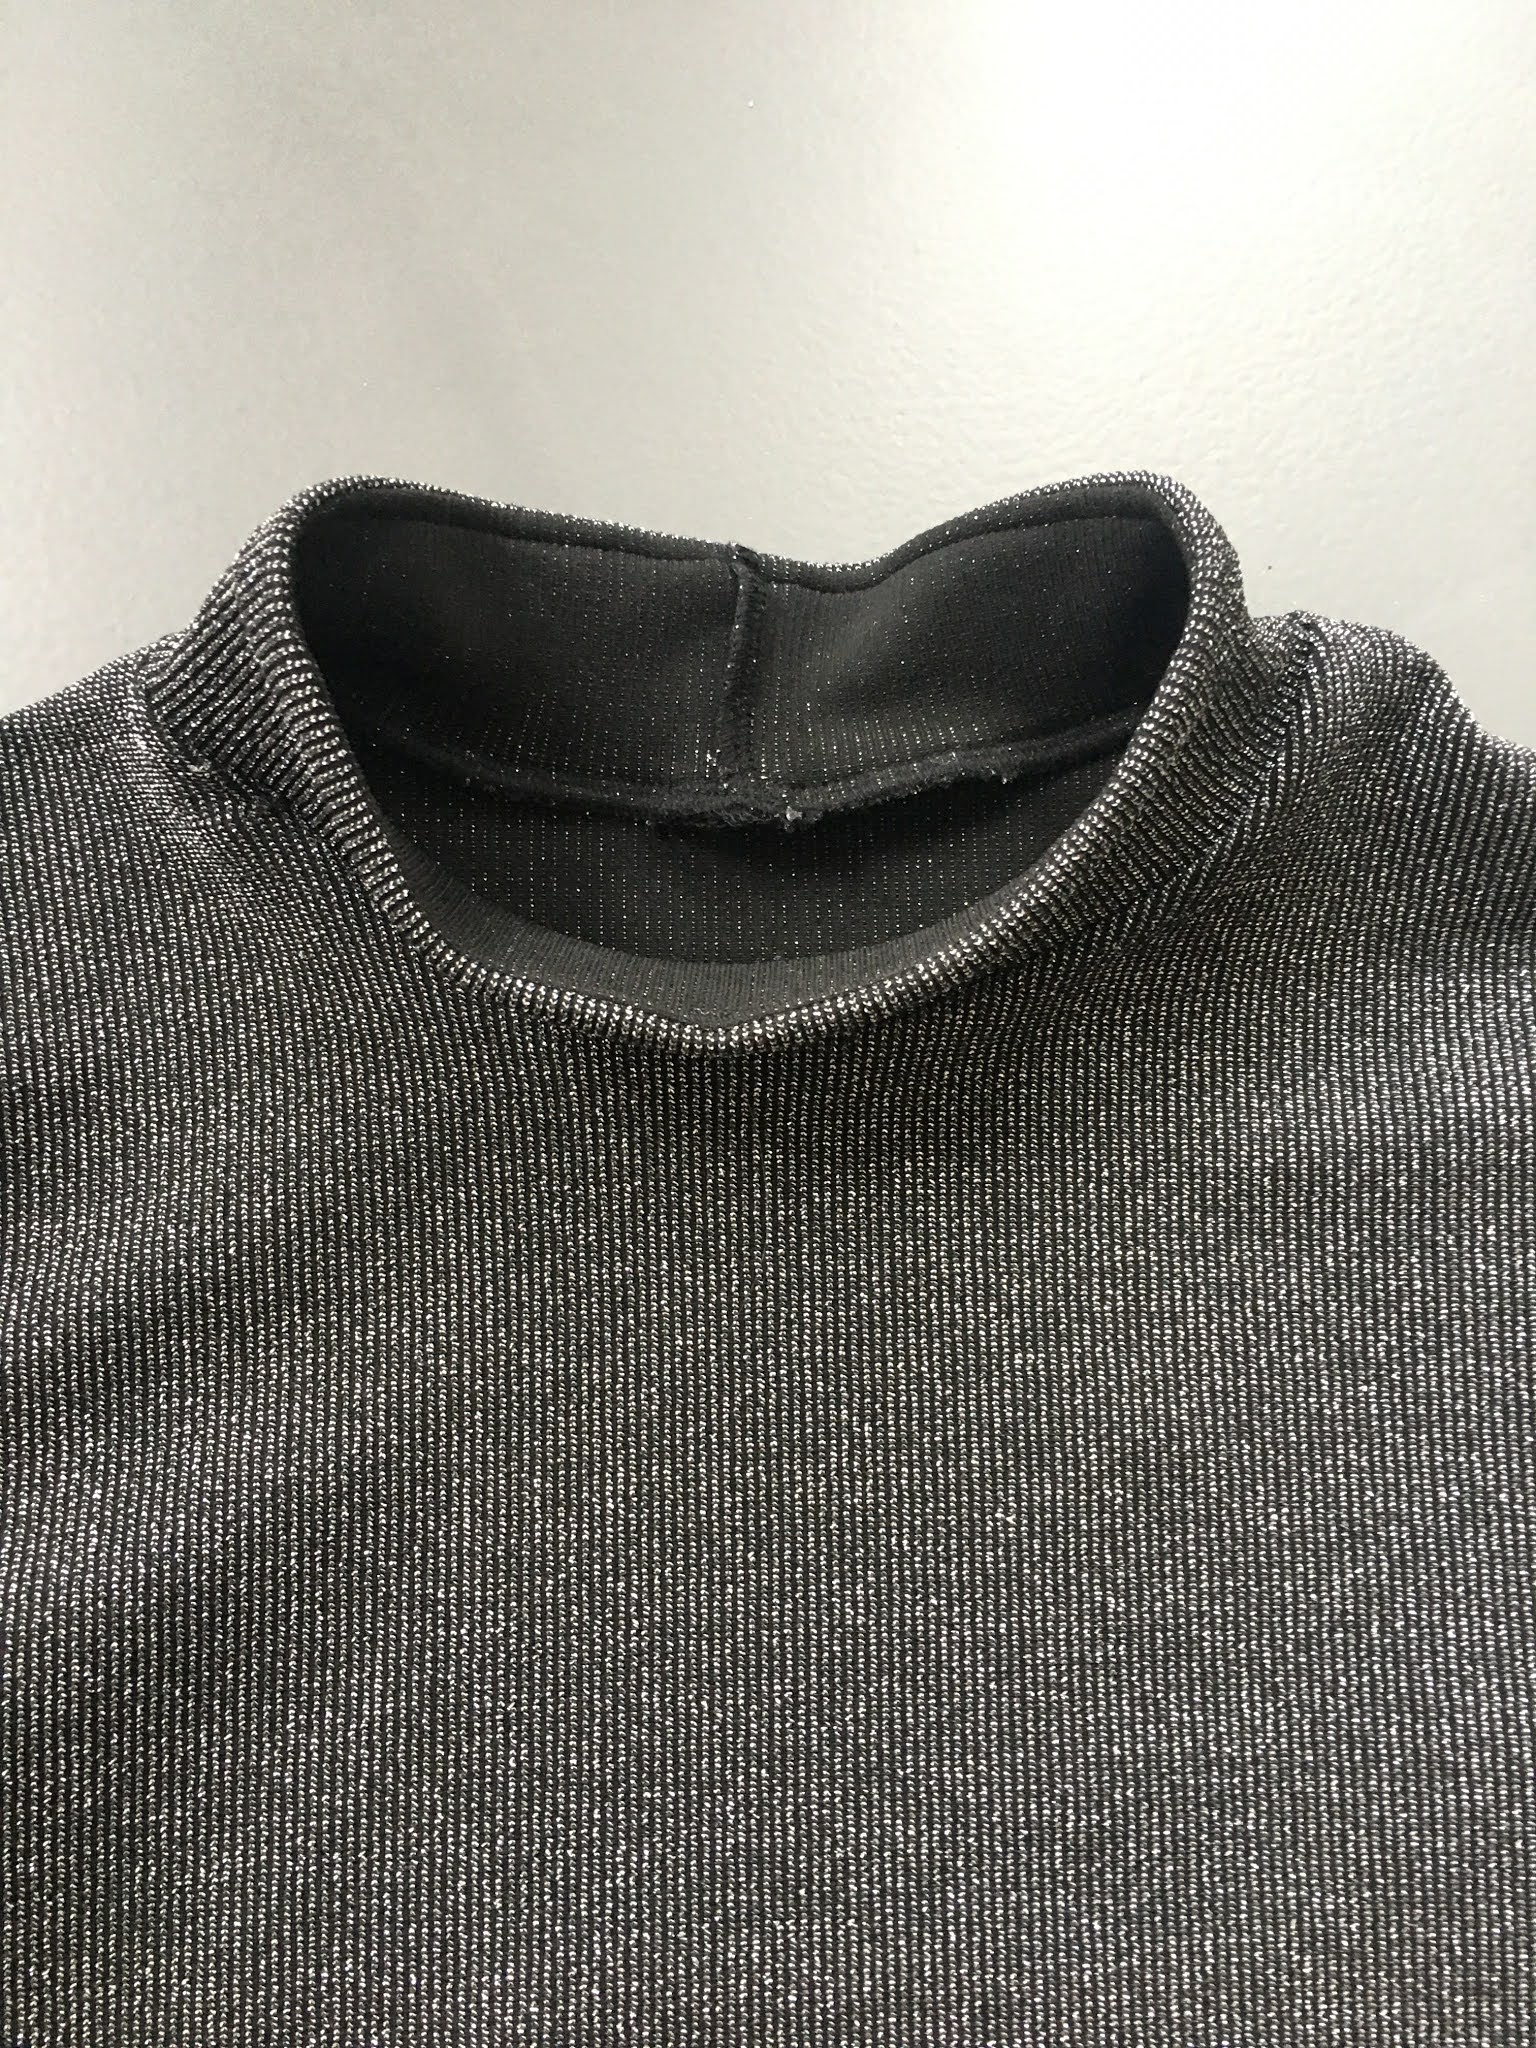
Despite having made countless Tilly and the Buttons Freya tops, it's still a pattern that I turn to again and again. Not only is it perfect to hack, the original version with a mock neck can be made to look completely different depending on the length and fabric choice. As soon as I saw this fabric from Minerva I knew that I wanted to make a cropped turtleneck top from it. It was exactly the kind of fabric I've seen RTW tops made from and my sister even has a turtleneck top made out of a lurex rib like this one. Most of the time I use RTW clothes to inspire my sewing, but sometimes I want to make something exactly as I've seen it so when the right fabric comes along the plan falls perfectly into place.


The top that I wanted to recreate was a fairly simple cropped turtleneck neck which seemed like a great way to show off an interesting fabric like this one. I like that it isn't too bright, for me having a sparkly fabric which was also brightly coloured would feel a bit much to wear but having a black lurex fabric like this one is perfect. It means that I can wear the top not just as a going out top but also as something that can be dressed down.


One thing that I've found to be quite annoying when shortening the Freya top (or any similar pattern) is that the side seams flare out slightly at the hem. It's because the pattern side seams are designed to be curved not straight, and I often forget about it until after I've sewn the hem. I regret not doing this on my most recent Freya, so for this top I straightened the edges of the pattern pieces  before sewing the side seams so that the hem lies completely flat. I also made sure that the hem was 1" deep which is a must on stretch fabrics to avoid it turning up.


I've made turtleneck tops out of quite a few different jersey fabrics with varying degrees of stretch but using a rib tends to give the best results. My zip-neck Freya top made from a red rib fabric my favourite of all the Freyas that I've made. Ribs are great because they're so stretchy, but they also bounce back into shape really well meaning that the neckband doesn't get stretched out. I've found this to be true when comparing two Freya tops that I made ages ago, this one is made from a really stretchy rib and is much easier to take on and off than this one. I also like that rib offers a different texture to a cotton jersey so that even if the fabric is plain the top doesn't feel boring. 


The only problem I found when it came to making this top was that the right side of the fabric is quite itchy. This isn't a problem for most of the top because its the inner fabric that I can feel (which is very soft and comfortable to wear) but it did pose an issue when it came to the neckband. The neckband of the Freya top is designed to be folded in half with the right side of the fabric on both the inside and the outside of the neckband. When I tried the top on the neck kept bothering me, so I unpicked it and resewed it so that the inner layer of the neckband has the wrong side of the fabric touching the neck. It was really simple to do, I just added in a seam around the top and cut the neckband into two pieces rather than folding it in half. I don't think you'd need to do this with a thin neckband but it was an easy adjustment to make on this top and has made a big difference.


The best part about this top is that I was able to make an improvement on the RTW version in avoiding having the right side of the fabric touching my neck. It's the kind of thing that RTW clothes wouldn't think to do, but when the clothes are homemade they can be tailored exactly to your wishes. I'm really happy with how this top turned out and have already worn it to a zoom-party! Hopefully I'll be able to wear it out in the real world at some point soon.
Saturday, 13 March 2021

Handmade Sherpa-lined Corduroy Hooded Jacket


About couple of months ago I set myself a sewing challenge to make a jacket using only leftover fabrics. I wanted to see if I could use up those pieces of fabric that seem to be too small to make anything out of, while making something really nice to wear. I've already written about the step-by-step process of making this jacket, where you can see how I went about piecing tiny fabric scraps and the way in which it came together. Because I love it so much (and because it took so long to make!) I wanted to share some more photos and details of the finished jacket.

The main fabrics I used for this project was a corduroy leftover form my Dawn Jeans with sherpa that I used for my Sherpa Jacket for the lining. I love how the two fabrics go together and the sherpa also adds a cosy feel. I like the idea of having a lining fabric which is secretly the main feature, just like with my Kelly Anorak which had a contrast lining the sherpa here is visible in the hood.

I've made quite a few jackets before and they often turn out to be some of my favourite projects. My Kelly Anorak was a real turning point in my sewing skills, it was a really complex make that took a long time and I'm really proud of it. I then made a fluffy pink jacket which I love, it was so fun to make and to sew with a slightly different fabric. Most recently I made my sherpa jacket which has been one of my most worn garments ever.


I wasn't planning on making another jacket (I probably have more than I need) but as soon as I had the idea of making a corduroy jacket lined with sherpa I couldn't let it go. By challenging myself to only use fabrics that I had in my stash it didn't feel frivolous to make another jacket and also meant that I had a good sewing challenge. This jacket is a copy of a RTW one, but I drafted the lining, facing, denim panels etc myself.


If you've read the blog post about the jacket construction you'll know that the denim panels weren't intentional but rather were added when I realised that I didn't have enough corduroy fabric. In keeping with only using fabrics from my stash I found an old pair of jeans which I cut up to create a panel in the back. Denim is always a great fabric to up-cycle as the seams can be used to add design interest, which is what I did when I made this top from old pairs of jeans. For my corduroy jacket I kept the two side seams and then added a third seam down the middle to create a piece that was wide enough to span the back bodice.


When it became apparent that I'd need another fabric I was slightly concerned that it would be too busy having three fabrics with very different textures - corduroy, sherpa and denim. But I love the addition of the denim and can't imagine the jacket without it. Limited corduroy fabric meant that I had to add a denim panel to the sleeves too, in order to make it look purposeful I added a rectangle that only covered half the width of the sleeve and left the elastic channel in corduroy. You can read more about the process of doing that in the construction post.


For most of the project I was working with really tiny scraps of corduroy. Half of the hood is made from pieced-together scraps, and when I decided to add a facing I had to sew together whatever was left of the fabric. It was exactly the kind of challenge that I'd set out for, I wanted a project that would make me think when trying to find solutions rather than one that was broken into simple steps. I often vary between more complex makes like this one and simple tops that can be sewn up in an afternoon, both are projects that I enjoy depending on what else I'm doing. When it came to this jacket I had a lot of time in lockdown to sew so it was the perfect opportunity to try something a bit different, but simple t-shirts are ideal makes when sewing time is limited.


It was definitely worth adding a facing, I think it's the kind of detail that really elevates a homemade garment. I regretted not adding a facing to my pink fluffy jacket, the lining is visible when I wear it undone which bothers me a bit and doesn't happen with my sherpa jacket thanks to the facing. It probably wasn't as necessary with this jacket because the lining is one of the main features so I don't mind it being seen, but it's still a nice detail to have.


Much like the other jackets I've made, the hem on this one is finished with an elastic channel. I really like having elastic to draw the jacket in at the bottom and it also means that everything is finished off neatly inside with no raw edges showing. Finding that Prym make a circle zip pull has been one of my best discoveries in terms of finishing makes off, it's a detail that I didn't realise could be added to a handmade jacket but that I always like having on RTW ones.


Despite being unsure about adding the denim the three fabrics go so well together. Sherpa is a fabric that I've seen a lot of recently and it's so perfect for jackets. This is the sherpa that I used, I've now made two different jackets with it but it gives a very different feel when used as the lining rather than the main fabric.


I didn't want to line the sleeves in the sherpa (it would have made the jacket annoying to take on and off) but I was also keen to stick to only using fabrics from my stash. I first used this grey lining fabric on the sleeves of my Kelly Anorak and then again to line my pink fluffy jacket, so I was very pleased to find that there was enough leftover. In order to make the sleeves the same thickness as the rest of the jacket I also added a layer of quilt wadding between the corduroy and lining fabric which I explained here.


This is definitely one of my proudest makes, I created my own pattern to make it and spent a long time piecing together scraps and overcoming fabric shortages. I'm also so proud of how it looks, the denim panels might have been accidental but I love the detail they add. Considering how much I wear my sherpa jacket I'm certain this one will get a lot of wear too, and it's different to the other jackets I own. If you'd like to read more about the process of making this jacket, you can do so here. I'd like to try a similar project again in the future to use up more fabric leftovers, but in the mean time I think some simple sewing sounds like a good idea!