Thursday, 30 July 2020

Paper Theory Zadie Jumpsuit


If you'd told me two years ago that I would make a jumpsuit, I probably wouldn't have believed you. I probably wouldn't have believed it a year ago either. But here I am now in a me-made jumpsuit! Over the last few years, I've seen more and more jumpsuits emerging both on the high street and as sewing patterns. At first, I wasn't entirely sure if I liked the style, but as different jumpsuits started appearing I began really liking them. My apprehension about making a jumpsuit wasn't because I didn't like them but because I could never really see myself wearing one. 


Because I started making my own clothes when I was quite young I've often felt that a lot of patterns aren't really aimed at what I want to wear. I've mentioned before that I think there is a gap in the market for teen sewing patterns, but in general, I've been able to overcome this by drafting and hacking patterns. I'm also not overly bothered about wearing clothes 'aimed' at my age. 
Anyway, as I've got older I've felt able to make things that I've always liked but haven't necessarily wanted to wear; jumpsuits fall perfectly into that category. This is also something I've felt with wide-legged trousers like my Lander Pants which I would never have worn a few years ago but now love wearing.


What truly sold me on making a jumpsuit was this pattern, the Paper Theory Zadie Jumpsuit. I know that it's been around for a while and I've certainly liked it for a while but I now felt like I could actually wear it if I made it. I decided that I wanted to make a jumpsuit at the start of this year and have spent a long time looking at patterns - there are a lot of jumpsuit sewing patterns out there! The main thing I wanted was for it to be fitted at the waist, and I like the design feature of the tie. Thanks to the popularity of the Zadie Jumpsuit I knew about this pattern and thought it looked lovely. I was particularly inspired by Kathy and Fiona's versions, especially as I'm fairly short and was worried a jumpsuit might swamp me. 
The only thing that put me off the pattern was that it's PDF only (and I hate PDFs!) but I liked it so much that I bought the pattern anyway. I bought a copyshop version from The Foldline so that I didn't have to print it which is great, except that it's definitely not worth it cost-wise compared to getting a paper pattern and I always trace my patterns anyway.


Again, thanks to the popularity of the Zadie Jumpsuit I knew that there were some common tweaks that most people made to the pattern. I read quite a few blog posts that people had written and a recurring theme was that it came up really big and that the crotch was way too long. I'm not sure I was quite prepared for the extent of this though! 
When I saw the pattern I noticed how long the crotch was but didn't want to take too much length out in case it was part of a design feature. Well, it may be part of the design feature but I find it hard to believe that the extent of the crotch length is intentional! I took out 1" at the lengthen/shorten line on the trousers and decided against taking out more because there would be no solution if the crotch ended up too short. I was slightly amazed at how long it was even after this adjustment once I tried it on though!


After attaching the legs to the bodice I had to take out a further 1.25" by literally cutting fabric off the top of the trousers. This is not ideal as the wrap doesn't quite match up and risks the pockets becoming too small but luckily it worked fine, I don't think it's at all noticeable. The important thing is that the jumpsuit is still entirely wearable and because the pockets are so big I can still easily fit my hands into them. Also, I now know to take out a good 2" when I cut the legs next time!


The other adjustment I made isn't really an adjustment but on as recommended I sized down and made a size 6 which is the smallest size. Again, I was wary about doing this but I'm so glad I did as it fits perfectly. I have quite a large difference in size between my waist and my hips and often find that things are too tight on my hips but this pattern is loose in style and is still nice and roomy.


There are some really interesting details in this pattern, in particular the wrap which comes up from below the waist. I'm not a massive fan of bias binding but I've grown weirdly fond of sewing it recently and enjoyed taking my time to make it really neat. 
I chose to make the 3/4 length wide-legged trousers (a style which I love, evidenced here) and the short sleeves. For the fabric, I knew I wanted to use a plain chambray and this one from Craft Cotton Co is so perfect. One thing I would say is that this pattern is a fabric eater! The fabric I used was relatively narrow so luckily I had 3m because it was almost all used up.


Whilst this jumpsuit is still slightly out of my comfort zone I really love it and it does feel very 'me'. In using a plain fabric and having short sleeves and a shorter leg length it is a lot easier for me to wear and feels really perfect for the summer. I'd really like to make this pattern again, possibly in black and I'd also like to make a short playsuit version.


Oh, and I've been wearing it! Tentatively at first, but I really love it and I feel so good in it. You might have noticed me wearing it in this post, in which I talked about my English Paper Piecing project. I was wearing my jumpsuit on that day and realised it went perfectly with my quilt and so I had to take photos of the two together. I love those photos so much, the plain chambray next to the colourful quilt is such a great combination.

Thursday, 23 July 2020

An Update on my English Paper Piecing Quilt


I don't think I've ever been this excited to write a blog post about pieces of fabric glued to paper before!! I am so in love with this English paper piecing project, it just keeps getting better and better. Now that more and more colours are present it's even more gorgeous to look at, I think half the time I spend English paper piecing is actually spent admiring the fabrics!
For a bit of background on this quilt you can read the introductory post I wrote in June 2019. After planning a large EPP project for a while, I finally decided on the design and fabrics for this quilt in around January 2019. My mum named it 'The Soothing Quilt' as the project is intended to provide a way to soothe or relax, which is exactly what EPP is for me. 
This quilt is all about the sewing process rather than the actual finished result, so if this seems like a never-ending project which will take forever to complete - that's the point! Having said that, part of me can't wait to finish it to see what it looks like when it's completed.


Since introducing the quilt on my blog I've written two posts about its progress: one in August 2019 and one in February 2020. I can't believe how much it keeps changing and I love having the photos to look back at and see what it looked like before certain colours were added on. I had been sharing an update every time two additional rows of blocks were added, but because it's a square the number of blocks to add on with each row increases and so the time taken to sew them on increases too! Also, I love how it looks after my latest row so much that I wanted to take photos before it changed again. 
I have definitely been working on this quilt more often during lockdown, it really has been the perfect project to fill some very long days! I've also become really eager to add on more colours, even though I know it will pay off in the end with the gradient part of me still wanted to add in more colours at an earlier stage!


The best part of this quilt has definitely been adding the pinks to it. I love how the different colours begin to creep in a little at a time! When I first started adding the yellows I couldn't wait to change the blues and purples which I'd become bored of. But now, I've now become bored of sewing with yellow and want to go back to purple and blue again! I have wanted to add the pink in for so long and I can't wait for the next row which has even more pinks and darker purples in it. Cutting the fabric is kind of strange because I've almost run out of fabric for some of the colours but with others, I haven't even cut into the fabric yet! I think after the next row every fabric will have been used so I'm looking forward to seeing that.


It was so much fun taking these photos because I usually have the quilt folded up and don't see it in all of its glory. This photo is definitely my favourite - you can see the colour gradient for the first time! The quilt is so big now (I just ran upstairs to measure it and it's 1.25m x 1.25m) it's a bit of a struggle to sew the blocks onto it! 

Friday, 17 July 2020

Handmade Polo Shirt with embroidered patch


Much like my zip-neck Freya top, this make was something that I have had planned since I bought the fabric but it's taken me a while to actually make it. I knew as soon as I saw this fabric that I wanted to buy it, it was just too cool to pass over. I think it's Airtex, something that I've never seen for sale before. I also loved the colour so much and I really wanted to make a polo shirt out of it.
I'm still really enjoying getting through the fabrics that I bought from Tomato in Tokyo, they're all fabrics that, almost a year later, I wouldn't hesitate to buy again. A quick update on where I am in terms of sewing up those fabrics: I've made a grey Linden, a purple Linden and a red turtleneck top from the ribbed fabrics, a pair of Anima Pants and a top for my mum from the checked fabrics, the top I'm sharing today from the blue Airtex fabric and then the only two fabrics left to be made into something are a pink jersey and a floral fabric. 
These makes are some of my absolute favourites, they're all things that I spent a long time planning to make something that I will wear again and again from the gorgeous fabrics.


Like I said, I've had this planned ever since I bought the fabric. I always knew I'd make it at some point so wasn't too worried about having the fabric lying around for a while. My main concern for this top was having no idea how to approach making a polo shirt. I didn't want to buy a pattern because the type of shirt I had in mind was quite specific. Also, most polo shirt patterns available are designed for men. I actually bought myself a polo shirt in February and in the end was able to use this as a base to create a pattern to make this one - I'm really not sure what I would have done had I not bought one though because I don't think I could have drafted this from scratch!
Although the construction of the shirt was fairly easy and I knew the order in which to do all the steps, the placket was pretty difficult. I googled lots of different placket tutorials but none of them looked like the shirt that I was trying to copy. You can see that there isn't a seam on the right-hand side of the placket which I really wanted to achieve for the more fluid look. All the tutorials I could find had a seam added in there (you can see the difference if you look closely at this placket), so I basically had to make it up as I went along using the RTW shirt to try and figure it out.
I'm so happy it worked in the end but there was a moment where I thought it was a complete disaster and I did also have to do a bit of hand sewing to close up a slit I cut!


The best part of this shirt is, without a doubt, the little fish embroidered patch that I added on! I really love embroidered patches and have seen quite a few RTW tops with them added on recently. I don't add them to my makes very often but I thought this shirt needed one as the finishing touch. I bought the patch in Japan at the start of our holiday before I bought the fabric, but as soon as I planned this shirt I knew that the fish was perfect for it. It's also nice to have put it on something rather than just keeping it in a drawer for years which is what sometimes happens! I definitely need to add patches to my clothes more often, I think the only time I've done it previously was with this top.


I enjoyed a very successful button shopping trip a few weeks ago when my local craft shop reopened (it's the small things in life!) when I bought the buttons for my Shelby Dress. I wasn't intending to buy buttons for this shirt as I was going to just use white shirt buttons but I saw these and really loved them. They were just so perfect for this top, and luckily also ended up being the perfect colour to match the fabric. I didn't have a fabric sample with me when I bought them so it was a bit of a gamble but luckily they were just right.
You might notice that the buttonholes aren't sewn in a matching thread colour - I actually did the first one in a matching thread that I found in my sewing box, but the thread that I had was really old, too thick, there wasn't enough of it and the buttonhole looked so awful that I unpicked it. I wasn't sure which colour to use and tentatively chose a pale grey thread but I actually love it! I'm really proud of how neat these buttonholes are and I also think that the grey looks so good with the pale blue.
To make this shirt extra-nice, I made a 1cm wide rouleau loop and hand sewed it along the inside of the collar. It took a long time but makes it so nice, especially as I wasn't happy with the messy finish inside once I sewed the collar, you could just about see the unfinished seams when the shirt was on.


There was a moment when I really regretted not making this shirt long-sleeved. The reason I didn't was that the shirt I already own has long sleeves and I didn't want the two shirts to be too similar. I was worried that the short sleeve would end up looking strange but I think it's worked really well. I turned up the fabric at the hem to create a cuff which I like a lot.


I'm really happy with this shirt and I love that I've made something really nice out of the fabric. This shirt really came together thanks to the finishing touches - the buttons, the patch, the cuffs. I'm also really pleased to have learnt a new skill of making a shirt with a collar and placket, although next time I think I'll use a pattern! In fact, having made my dad a shirt over three years ago maybe I should make him a polo shirt next!

Thursday, 9 July 2020

Handmade Floral Viscose Skirt with Split


This make is very much all about the fabric! Since making my floral viscose Shelby Dress I have been slightly obsessed with viscose. It's just the perfect fabric for summer, especially for summer skirts and dresses as it has such a lovely drape to it. I really love the current trend for ditsy floral viscose fabrics and was on the hunt for one to make myself a skirt. 
I found the perfect fabric at Fabrics For All who have a wonderful selection of viscose fabrics, and while I hesitated over which one to get I kept coming back to this one.


There are a lot of floral viscose fabrics around at the moment but what I love about this one is that it's slightly different from the classic white on navy/black background. I wouldn't usually choose a green fabric but somehow this colour just works so well with the white petals and splashes of pink. 


I've had the idea for this skirt in my head for a while so I knew exactly what to make out of the fabric when it arrived. This is a style which is a bit out of my comfort zone as I tend to stick to above-the-knee skirts, but I kept seeing skirts like this one on the high street and really loving them. The common theme seemed to be a below-the-knee length (so not quite midi-length) with a split up the side. My favourite RTW skirt that I found which matches this design is this one, but why buy it when you can make it yourself?!


I spent a really long time (as in, way too long!) deciding on the exact style of this skirt. I've seen so many variations with elastic waists, with or without splits, the split in the side-seam, the skirt flaring out...etc that it was hard to choose the exact features that I wanted to include. I decided that I wanted the skirt to have a zip rather than an elasticated waist and for the slit to be on the 3/4 of the way across the front skirt rather than in the side seam. I spent a long time deciding whether or not to include a panel on both sides of the centre front but eventually decided to only have an extra panel on the side with the slit. I'm so pleased I made that decision as it makes the front a lot smoother.


I was going to draft the pattern myself by creating a kind of trapezium shape that came in at the waist. Then, on a genius (if I may say so myself!) spur of the moment idea, I realised that I could use the skirt of my prom dress pattern to make it! To make my prom dress I used Simplicity 8330. Looking at that pattern you can see that the skirt is quite different from the skirt that I've made here. It was, however, the perfect base pattern to hack. It's a fitted skirt with darts at the back and front and on top of that, I'd already hacked it to add in a split when I made my prom dress.


The only difference between this skirt and the skirt of my prom dress is that this one doesn't have that extra panel in the front (it also has the zip in the side-seam but that's not a very obvious difference). I honestly confused myself a fair bit when cutting out the front pattern pieces as it involved some fairly inaccurate pinning of pattern pieces on top of each other and fabric flipping, but the point is that the pattern was perfect in the end!


In order to get the fitted look that I wanted I chose to finish the skirt with an invisible zip which I put into the side-seam. I'm pretty pleased with how invisible it is! I chose this dark grey zip which I think goes nicely with the fabric. To avoid breaking up the print I cut the back skirt pieces on the fold and inserted the zip in the side seam rather than the centre back.


I'm especially pleased with the fit that I managed to achieve on this skirt, mainly thanks to the darts. The only problem with a skirt like this one is that there is no give in it, meaning that once zipped up it has to fit perfectly at the waist. I was nervous about making it too small and actually ended up making it a little bit big, so had to go back and take it in by 2cm at the side seam. It's still a little loose but that's definitely preferable to it being too tight!
I finished the waist with a bias binding that I folded over and topstitched down. It's such a lovely neat finish and gives the skirt a special touch.


I really love this skirt and I'm also really proud of how well it fits. It turned out exactly as I hoped it would and I can't wait to wear it when the weather warms up a bit. 

This fabric was gifted to me by Fabrics For All as part of their blogging team, but all thoughts and opinions are my own.

Friday, 26 June 2020

Black Floral Viscose True Bias Shelby Dress


I'm so excited to share my latest make today! I love it so, so much. I have been wanting to make myself a new dress for quite a while but waited to find the perfect pattern and fabric. I'm not really a dress person so in order to wear it, I wanted to choose a fabric and style that I really loved. I've seen a lot of floral dresses and skirts on the high street at the moment which I wanted to recreate and I'm really enjoying sewing with viscose fabric.


Like I said, I wouldn't describe myself as a dress person. That's not to say that I don't like dresses, they just don't really fit the description for the kind of clothes that I wear every day, though I do wear skirts quite a bit in the summer. I have made dresses in the past, some successful and some not quite so much. I've probably worn my dungaree dresses the most, especially this black needlecord one (now given to my sister) as I find the style a bit easier to wear. This dress never really got worn as it's not really my style and although I love my Rosa Shirtdress and have worn it a bit, it could definitely be worn more often. More recently I made a simple rib t-shirt dress which I really like as it's a bit more casual and a chambray dress that I made to take on holiday last year which I also like but would class as more of a holiday dress than a going-about-my-day dress. So that's the rundown of my handmade dress situation - I probably could have made that into an entire blog post to be honest!
Anyway, in summary I've sometimes struggled to wear the dresses I've made as they feel a bit too out there for everyday clothes. However, as I've got older this has been another thing which has changed and I felt that this year was the year to finally make myself a perfect summer dress. And I think I have!


Other than wanting a ditsy floral print, I still hadn't settled on the style of dress that I wanted to make. I had seen the True Bias Shelby Dress when it first came out and liked it but didn't think much of it as a style that I would wear. It wasn't until I saw Liz's dress that she made on the first week of the Sewing Bee and then Fiona's version of the Shelby Dress that I realised it was the perfect pattern and that I absolutely had to make it! Both Liz and Fiona made the longer version but wearing a dress is already stepping out of my comfort zone a little, I don't think I'm ready to cope with a midi or maxi dress yet!


My re-discovery of the Shelby Dress pattern happened at exactly the right time as I wanted to make the dress in time for summer. Of course the inevitable happened and the paper pattern seemed to be out of stock everywhere just when I decided to make it. Luckily I managed to find a version at Sew Essential. I did briefly consider making the playsuit/romper version but I really wanted a dress. I do think it's really great to get those two options in one pattern though.


It then came down to finding the perfect fabric. Like I mentioned, I knew that I wanted a ditsy floral viscose print. I discussed my thoughts on floral fabric a bit in this post but basically I feel as though I can now wear a floral pattern without looking like a 10 year old! I love the look of ditsy floral prints and I think I'm correct in saying that they're very 90s, so it's the perfect print to pair with the Shelby pattern. As someone who wasn't alive in the 90s, I'm delighted to be able to wear the dresses now that they've come back in!


There is honestly an overwhelming amount of floral viscose fabrics available. I spent so long trying to decide which one to get but I love the one I chose. I knew that Minerva has a really great and affordable viscose fabric selection so focused on their fabrics. I wanted a white flower on a black background which you'd think would narrow down the choice considerably, but there were still lots to choose from! The one I bought is this one, but I also love this one, this one and this one. Honestly, I was very tempted (and still am !) to buy several of them to make some skirts and trousers too but managed to resist. I find that Minerva can be a slight gamble with fabric quality and I try never to order fabric with polyester in it online so I got a 100% viscose fabric and the quality is amazing! It's really the most gorgeous fabric, so soft and drapey and not at all see-through. I bought 3m to be on the safe side but measured how much I used once I'd pinned the pattern pieces to the fabric and found that I used exactly 2m. So I have 1m of it left and would love to make a skirt or some trousers (like these ones) out of it.


The dress is a pretty relaxed fit so I made a size 2 which was just perfect, it fits so well with no adjustments. I love that it comes in at the waist thanks to the ties so it's fitted while the skirt is loose and floaty, making it comfortable for warmer days. I'd really recommend using viscose as it drapes beautifully and gives some swooshiness to the skirt. I made view A which is the short dress version. I'm still slightly amazed at how well it fits me, I even used the suggested hem width and it's the perfect length which never happens!


The princess seams give the dress such an effortless feel, although I did have to do quite a bit of ironing when sewing them! The best part of the dress is probably the tie back which brings it in at the waist to give it shape. In tying them loosely at the back the dress is still loose and comfortable around the waist but avoids looking at all sack-like. 


I like the effect of the rouleau loops a lot, as well as bringing the dress in at the waist the bow adds a really pretty touch.

I was pretty lucky that my sewing of this dress co-incided with shops reopening after lockdown (non-essential shops reopended on 15th June for us). While I did have to wait a while before buying the buttons I was able to pop into my local craft shops to find the perfect ones which I was very happy about. I think buttons are always the final touch so I didn't want to order some online without matching them to the fabric.


I went into the shop knowing exactly what I wanted but also knowing that I had to buy whatever they had so that I could finish the dress! Luckily I was able to find the buttons that I had in mind. I chose to go for matte black buttons, it's a finish that I much prefer the look of at the moment and reminds me of FIMO buttons that I used to make when I was little.


I hadn't made the dress in time for the first heatwave around Easter so when I heard that there was going to be a heatwave this week I was determined to finish it in time! The dress had been waiting for its buttons for about a week so I bought those last weekend and then finished sewing the buttonholes and buttons on Tuesday evening. We had 30-degree weather on both Wednesday and Thursday this week and I wore my new dress on both those days! I loved wearing it too so it's safe to say that it's a complete success. By the way, I do appreciate that 30-degrees is nothing in a lot of countries but for us it's almost unheard of and has everyone moaning and drooping all day long! Except for me of course, because I had my new dress on...

Sunday, 14 June 2020

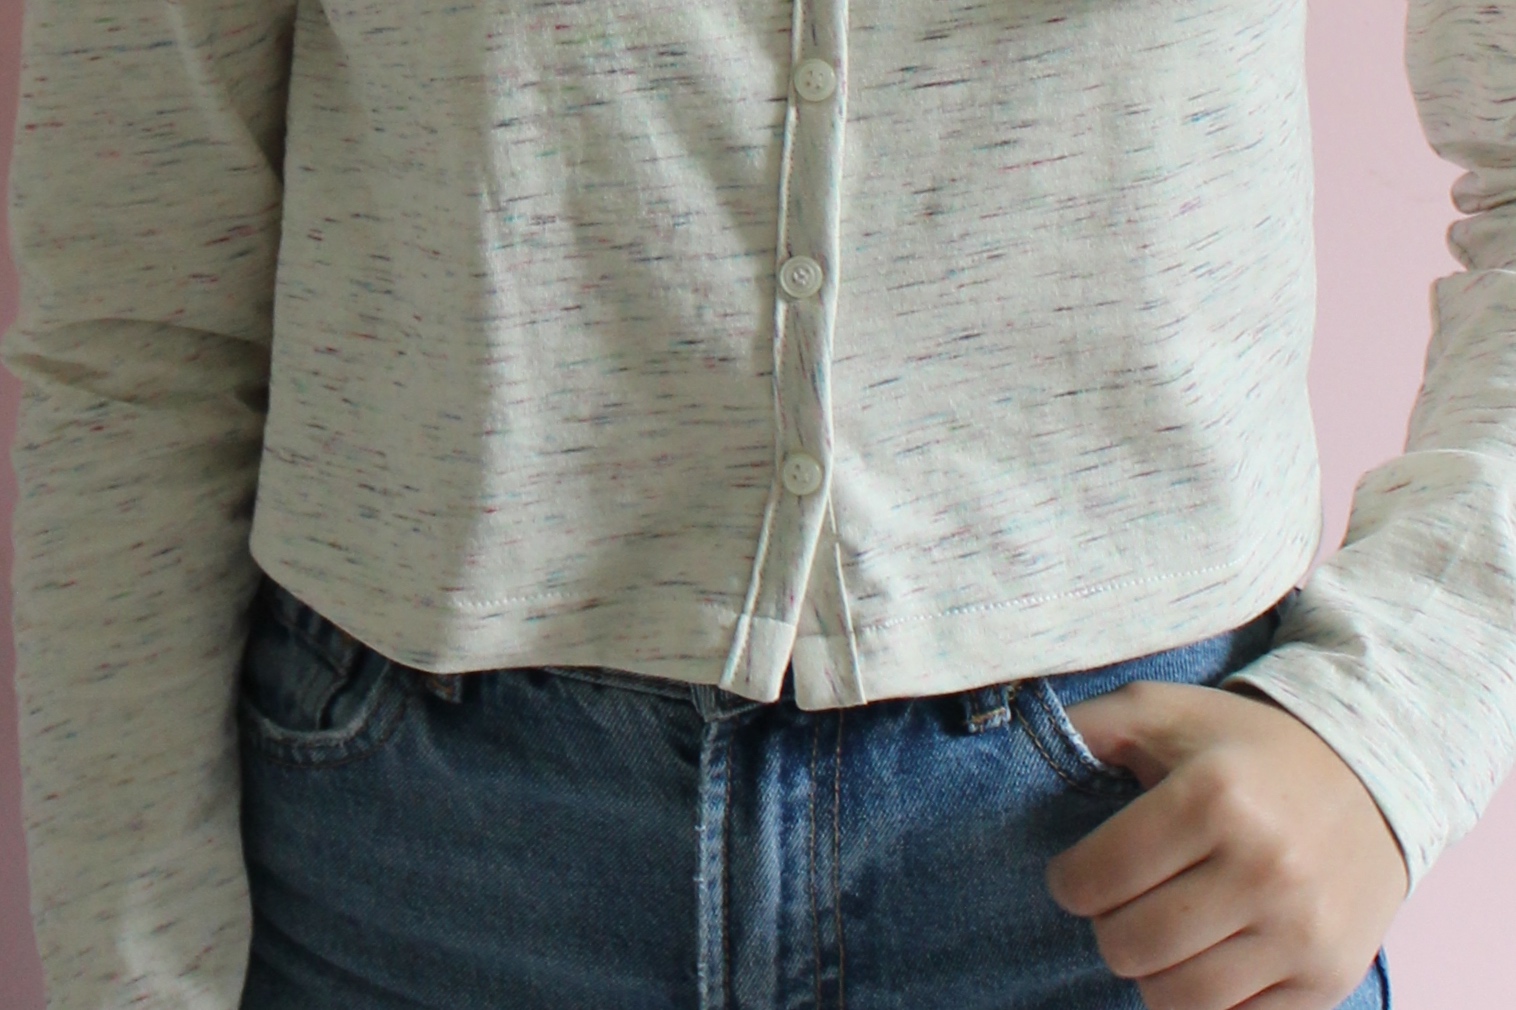
Faberwood Organic Jersey Handmade Button Down Top


I might be unusual in this opinion but my favourite things to sew are always the simple, everyday makes. Sewing elaborate dresses and intricate blouses can be really fun, but for me nothing beats sewing a classic jersey top or jumper. That isn't to say that I don't enjoy more involved projects because I really do, it's just so nice to make something knowing that it will receive a lot of wear. 


This top is basically my ideal make! It's simple and easy to sew but still involves techniques that make it interesting both to make and to wear. If I had drawn a sketch of what I thought this top would look like before making it (this scenario assumes that I can draw and this thus hypothetical), it would have looked exactly like the finished version. What's not to love about a make that comes out exactly as planned?! 


It's often interesting to think about what comes first in sewing project planning, the fabric or the pattern. For me, it's nearly always the fabric, only occasionally do I choose the pattern first and then buy the fabric. When Fiona from Faberwood offered to send me some of her lovely fabric and mentioned this Flàme Organic Jersey I immediately knew that I wanted to make a button-down top out of it. I use this as a way of deciding whether or not to buy fabric, if I can't envision it as a garment then I don't get it. I've made a few things from Faberwood fabric in the past and I love the selection of fabrics that Fiona has. My Arum top, pineapple trousers and raindrop top (which I then remade here) are all made from gorgeous Faberwood fabrics. I already find it strange looking back at posts written a few years ago, the photos are so much worse and I look so young!


I do have a slight obsession with button-down jersey tops. As in, I've made at least four with plans to make more! I wear them all so much though, it's a style that I really like and one that can look really different depending on the shape of the top and the fabric. The first button-down top that I made was this one, which I then made again with long sleeves in white. I then made a version without a collar in navy last year which I really like and wanted to make again. This top is the same as the navy one but I think the different colours mean that they don't look too similar. What makes this fabric really perfect for a top like this one is that it's a lovely weight and really good quality (which is why I love organic jersey). I also love the flecks of colour on the cream background so much, they add such a nice detail. I love elevated basics and this top is exactly that.


I used my usual cheat button technique which I love, it involves sewing the buttons through both layers of fabric to avoid sewing buttonholes. I don't hate buttonholes but they're not particularly enjoyable to sew onto stretchy fabric. Using this cheat technique massively simplifies the sewing and avoids any messy buttonholes. I always use buttons from my dad's old shirts on these tops (I think he finds it quite strange that these buttons used to be on his shirt!), they're the perfect size and mean that I can get enough buttons that match.


I often finish jersey makes with a lettuce hem but wanted a crisper, neater finish on this top. I felt like the fabric, which is really high quality, deserved a proper finish. I'm really happy with the wide hem, it avoids the fabric twisting and showing the wrong side which I can't stand but is something that I wasn't aware of when I first started sewing with stretch and turned under too little fabric when it came to hemming. The other benefit of the hem is that it's different to the other similar tops that I already own. 


I'm so happy with this make, it's such a lovely feeling when something turns out exactly as planned! I really love this top, the style and fabric are both very 'me' and it's exactly the kind of thing that I wear all the time.