Wednesday, 25 March 2020

Megan Nielsen Dawn Jeans in Grey Corduroy


I've made another pair of jeans! This was one of the main sewing goals that I had in mind at the start of this year. The ginger jeans that I made a couple of years ago are sadly now too small. I don't mind too much as I got a lot of wear and joy out of them and it also gave me the excuse to make a new pair of jeans. I particualarly wanted to make the Megan Nielsen Dawn Jeans which I have loved ever since the pattern came out. I recieved both the pattern and this fabric for Christmas, leaving no excuses for not getting on and making them.


Although I was able to enjoy wearing my ginger jeans for some time, I made the unforgivable mistake of using rigid denim for a stretch denim pattern. My experience with sewing has increased a lot since and this time I wanted to get the fabric and pattern right. I could have made the Ginger Jeans again using the right kind of fabric, but my style has also evolved over the past couple of years. Now, I much prefer wearing 'Mom Jeans' to skinny jeans so I cannot emphasize enough just how perfect the Dawn Jeans sewing pattern was for what I wanted. Ready to wear jeans are always a nightmare size wise, and I wanted to have a jeans pattern that I had tried and tested so that it fit perfectly. Also, the Dawn Jeans come with four variations - how amazing is that?! I made view A with a tapered leg for this pair but can't wait to make the wide-legged version too. 


Because they're designed to be a classric high-waisted rigid jeans pattern, the Dawn Jeans have a button fly. I don't mind the button fly detail and particularly like the visible button fly version, but like I mentioned in my post about my Lander Pants I find adding buttons unecesary unless they're adding to a design feature. This isn't just about having to sew the buttonholes, I find it much more practical to have a zip fly over a button fly when it comes to wearing the jeans too. Luckily, there is a sewalong avaliable which covers inserting a zip fly. Like most zip fly techniques it isn't as good as the Closet Case Patterns fly insertion tutorial, but works well all the same.
I love adding secret details that only I can see and pocket bags are perfect for that. I had this cotton fabric in my stash (left from when I enjoyed making tote bags!) and it matched my fabric perfectly. 


Now onto the complications... I had two main fitting issues when it came to making these jeans. The first was fairly straight forward to solve as it's something I have to do with all trouser patterns - taking a triangular wedge of about 1" either side out of the centre back seam. This is pretty easy to do and makes a big difference to the fit due to my sway back. It does mean that the back yokes don't quite line up but it's an almost perfect alteration other than that.
The second issue was much harder to solve and I was pretty tempted to give up on these jeans because of it! I spent quite a long time trying to decide which size to cut. My waist put me in a size 4 but my hips were in a size 8. I considered grading between sizes 8 and 4 but decided that the change between the sizes would be too much. In hindsight, I probably should have done this anyway. In the end I decided to cut a size 6, thinking that I could take in the waist (which I did do at the centre back) and that the fabric at the hips would stretch with wear. The sizing at the hips actually ended up being pretty much spot on, but when I tried the trousers on for the first time the legs were way too tight. This isn't something that has ever happened to me before and I was quite surprised that it happened. At this point I'd been sewing for a few hours and to try the jeans on and find that they were too small was incredibly frustrating! I put them down for about a week (giving them the occasional death stare) until I felt ready to undergo the incredibly boring task of unpicking the side seams and inner leg seam. The side seams were fine to unpick as they were just basted in place but the inner leg seam had been finished with two rows of topstitching! Having to unpick that was honestly slightly heartbraking. I re-sewed the entire thing using the tiniest seam allowance possible, about 1/4" instead of the 1.5cm initially used. But hey, at least it was worth it in the end!


The fabric is a big part of what made these jeans successful. I loved this fabric as soon as I saw it in Fabric Land. It's a gorgeous dark grey/purple colour and is a really great quality corduroy. It's one of those Farbric Land scores, good quality fabric for a fairly low price. I did initially want to use denim to make my first pair of Dawn Jeans but the corduroy worked really well and now that I've established the fit I'm willing to spend a bit more money on good quality non-stretch denim for my next pair.


Looking closely at this photo, you can see that I haven't bothered to trim all the threads along the side seam - those are left over from the mamouth unpicking task I had to do! It wasn't until I put the finished jeans on for the first time that I realised how much I love them. I was initially worried about wearing the colour but actually I think it's really very wearable. I am so happy with the fit of these jeans, after spending so long getting the fit right it's nice to have a successful outcome. The pattern is such a brilliant design, I love how high-waisted these jeans are and I can't wait to make another pair.

Sunday, 15 March 2020

Upcycled Grey Ruched Front Top


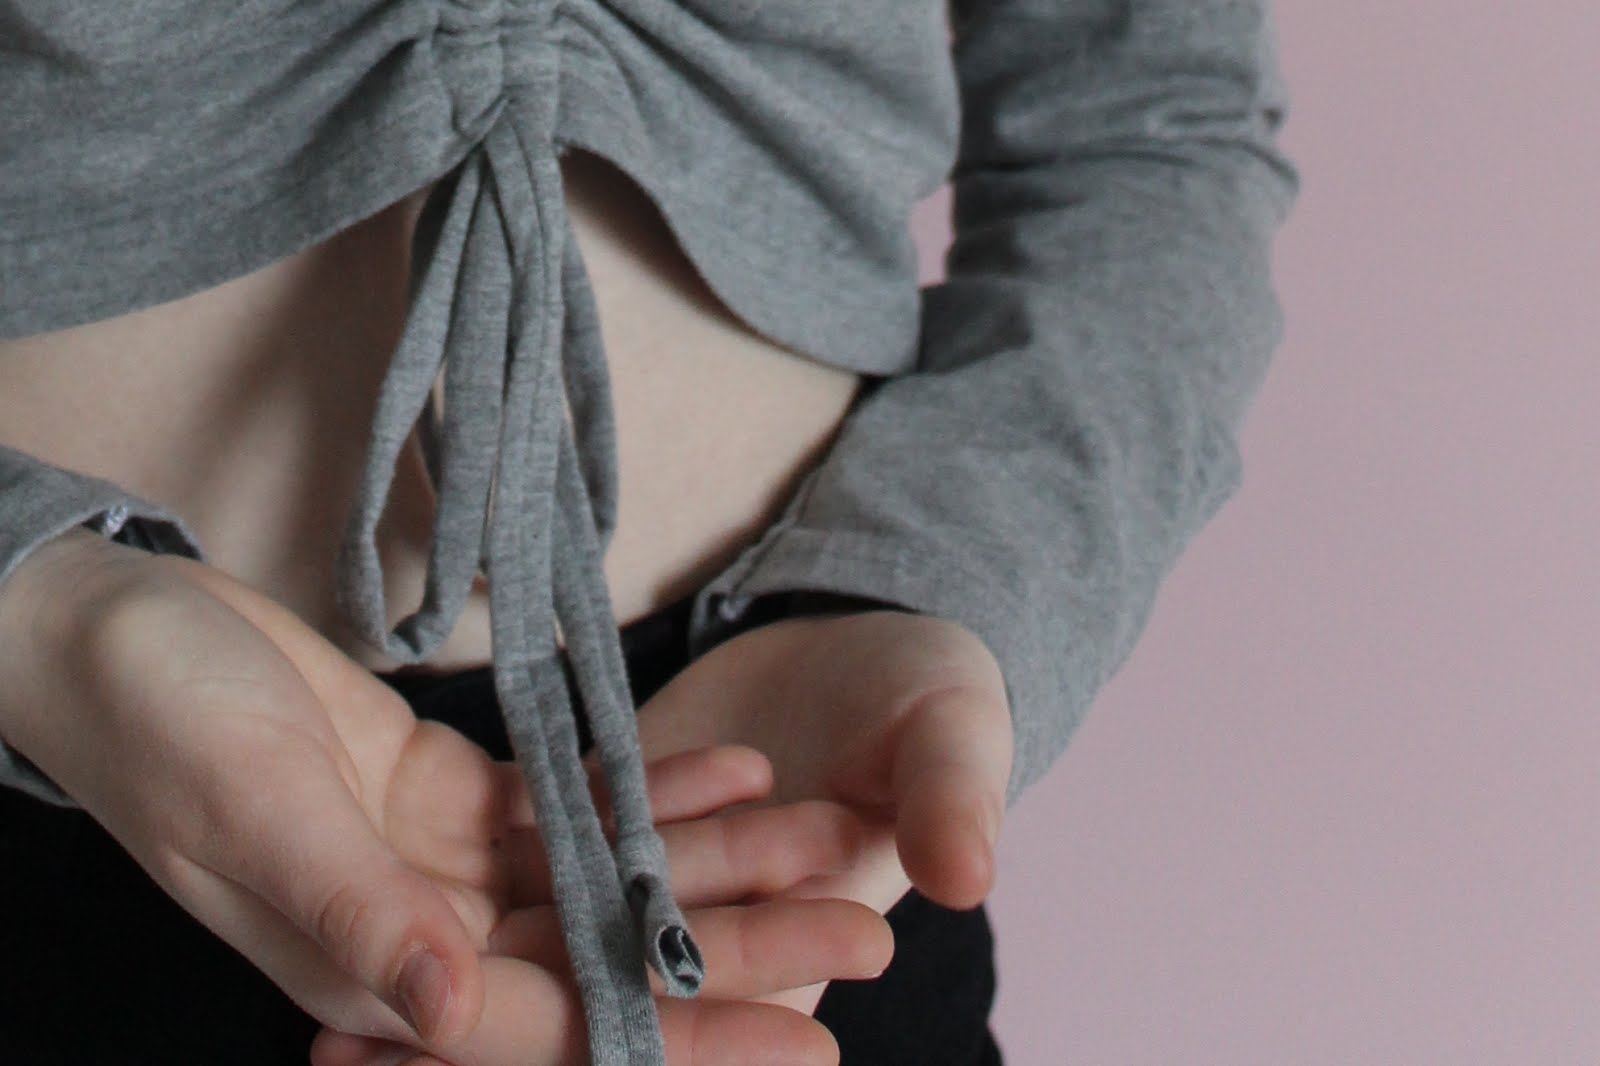
I've had the idea for this top for a really long time. I really love adding twists to basics (you can see this here and here) and adding a ruched front to a top seemed like a great way to make it a bit more interesting. It's a detail I've seen on quite a few ready to wear tops recently too which is often where I get inspiration from.


Here's the bonus part of this make: it's an upcycle! My dad was given a pair of pyjamas on a long distance flight with work a few months ago and he gave them to me to thinking I could use the fabric. This is the top, there is also a pair of burgundy pyjama bottoms which I might try and alter to make myself a pair of joggers at some point. 
So I started with a long-sleeved men's t-shirt which I then cut along the seams to get seperate sleeves and bodice pieces. I then placed my pattern pieces over the corresponding t-shirt pieces and cut them out. With the leftover fabric I cut lots of 1" strips to make the ties and then a neckband. I used pretty much all of the t-shirt which is always very satisfying! Also, my dad was pretty surprised to see how much the t-shirt had changed!


The ruching is actually much easier than it looks. Essentially I created two channels which then gather when the ties are added. It's not that easy to explain so I'd reccomend watching this video which shows just how easy it is. The top in the video is a bit different to mine, I was keen to add long sleeves so I kind of made up the process as I went along. Luckily, it worked! After looking at some RTW tops it seemed like most of them had v-necks which is what I went for. This was actually my first time sewing a v-neck. It could definitely be neater, but to be honest I don't think you can really tell when I'm wearing the top. 


My preference is to tie the the ties in a bow and then just leave the ends hanging. It means you can make the ruching more or less prominent, or even leave it completely flat without any ruching if you like. I tied knots at the end of each tie and then just cut it as jersey doesn't fray. I also made one tie slightly longer than the other, I like the more casual look more than if they were both the same length (even though it was done on purpose!).
One feature that I'm really pleased with is that I was able to keep the original hem of the t-shirt. Hemming jersey can be quite frustrating and the original hem has a professional coverstitched finish.

Tuesday, 10 March 2020

Pink Zip-Neck Jumper


I really enjoyed the process of making this jumper. It required quite a bit of thinking which is what I like when it comes to dressmaking. I find projects where I've had to think about drafting and construction much more satisfying than those where I've just followed a pattern and instructions. Having said that, I do like having a mix of both kinds of projects as bought patterns offer more mindless sewing.


I've seen so many variations of zip-neck jumpers recently. They seem to be everywhere and I really like them. I'm hoping to make a top with an exposed zip in the front soon but this jumper seemed like an easier place to start. It has a seam at the bottom of the zip which is so much easier to sew than to try and get a neat finish at the bottom of an exposed zip. Having looked at jumpers like this one online I saw that the zips tended to have extended covered ends reaching down to the seam. The zip that I bought ended up being shorter than I would have liked so I had to extend the fabric covering the end a bit more than most of those that I saw but I don't think that matters too much.


I really like the sleeve of this jumper, it matches the boxy feel nicely. It's a two piece sleeve which makes a nice feature of the seams. I gathered it at the end before adding the cuff, something that I'd like to try on another top with a slightly drapier fabric for a larger effect.


The fabric I used was a scuba type knit with a lovely soft inside. I decided to leave the hem raw, partly becuase I couldn't decide whether or not it should have a hem band.
I really like the style of this jumper but I'm not over the moon about it. The scuba was really hard to topstitch neatly on which is something that I'm quite picky about. The main issue is that at the bottom of the zip the fabric doesn't quite lie flat; it's a small thing but again something that really bothers me. This jumper isn't perfect but I'm pleased to have made it, especially as I wanted to test out this design. It's given me a few ideas about what to do next time I attempt a zip-up neck jumper.

Monday, 2 March 2020

Handmade Sherpa Jacket


This jacket has straight away been put onto my 'all time favourite makes' list. It's a list which changes fairly frequently as new makes come along, but I think that this is on it to stay. It also earns a 'doesn't look handmade' badge and an 'I just LOVE it!' trophy. Basically, I think it's pretty awesome!


A sherpa jacket has been on my mind for such a long time. I kept on seeing more and more in shops and really liking them, but I was determined to make one instead of buy one. Part of the delay in making one was the hunt for the right fabric. It was definitely worth the wait because this sherpa fabric from Visage Textiles is just perfect! I've seen a lot of different colour variations of sherpa, the most common one being shades of white and I really love the cream colour of this one. I'm not so much a fan of the more browny/beigey colours, and while grey or pink sherpa fabric looks really cool I wanted a white jacket for it to go with lots of items of clothing.


The best thing about this jacket is the fact that it is fully lined! It adds more work but it is definitely worth it, there's something so much nicer about a lining. I usually wear jackets unzipped and what sometimes annoys me is that the lining shows. The way to solve this was to add a facing along the inside edge which worked so well. It has the added effect of looking so much more professional too, especially with an added row of topstitching along the seam joining the sherpa to the lining. 
I also added an orange hanging loop. I love secret details like this, it's a reminder that actually you can't buy a jacket quite like this one!


A reccuring detail that I've noticed on ready to wear jackets at moment is a circle zip pull. It was something that I really wanted to add on my jacket and was so pleased to be able to find one online. The zip pull took a bit of plier manipulation to get it on, but we (it was a group effort!) managed to attatch it. I spent a long time choosing the zip and went for a silver YKK zip which is really good quality brand. I was slightly worried about choosing the white colourway as it doesn't quite match the cream colour of the sherpa, but it was actually completely fine because you can only see the teeth.


Another brilliant feature is the pockets! I copied the style of these from the high street and they are really perfect for this jacket. They are so simple, just 7" squares sewn onto the jacket but I think that the shape is actually perfect for the style of the jacket. I always find myself putting my hands into my coat pockets so I'm really pleased to have these. Interestingly, I've seen quite a few ready to wear ones where the opening is at the top, but I left the opening in the sides which seemed much more comfortable and practical for actually using the pockets.


Both the sleeves and hem are finished with elastic. It's a look that I really like, even though sewing an elastic channel in thicker fabrics is a bit of a nightmare! Luckily, the sherpa is very forgiving so any odd-looking stitches are hidden by the fabric.  


One of the main  features of the jacket is the collar. There are so many variations of sherpa jackets but my favourites are always those with a collar, so that was the feature that I wanted to add to mine. It also has the added benefit of keeping your neck really warm!
Overall, I just love this jacket. Features like the circle zip pull make it feel so professional, but I love that the addition of the hanging loop makes it one of a kind. I'm so pleased to have spent time planning this project and finding the perfect fabric for it as I think it's something that I'm going to wear for years to come.


Wednesday, 19 February 2020

The Soothing Quilt - English Paper Piecing Update


I am so excited to share these photos of the latest update of my Soothing Quilt EPP project! To find out all about it, you can read my introduction post here. It has changed a lot since my last update back in August. I've added two extra rows since then and the colour scheme has changed so much with the addition of yellows and a few oranges. I love it, but I do kind of miss the original blues and purples! It's also getting a lot harder to attatch the pieces to - it's currently just over 1m² so as you can imagine it's no longer as easy to manoeuvre.


One thing that I do really enjoy is picking out new fabrics that I haven't yet used when planning the next rows. I love how the splashes of oranges and greens that orignally didn't quite fit are now beginning to tie in as the gradient expands. I also really like how colours that I would never usually pair together look really good side by side when part of a much bigger colour scheme.


I've been enjoying adding to this quilt bit by bit. For me, the whole point of EPP is to go slowly. The aim of this quilt is to provide a calm evening outlet so there is no deadline by which to finish it. I've never actually made a quilt before so I'm not entirely sure what to do when it comes to the quilting process but I'll see when I get there. 


I took this photo of the wrong side and I love it almost as much as the right side, it reminds me of a stained glass window. The only thing I'm not looking forward to is having to take all those papers out!


I'm going to keep adding to this until it's large enough to cover a double bed. I'm keeping it as a square for now, but that might change towards the end. I'm excited to see which colours are going to be added next from the Alison Glass Sun Print 2018 fabrics, hopefully some pink will appear soon!

Saturday, 15 February 2020

Cropped Black Jumper


A black jumper is perhaps one of the most basic garments that can be sewn, but one of the garments that receives the most wear. I've been on the lookout for a fabric to make into a simple cropped black jumper for a while and this fabric felt like a good one to start with. It's a lighter weight sweater knit so not necessarily a classic fabric for a jumper, but the drape allows it to hang really nicely and it's ideal for when the weather is slightly warmer.


I tried to keep the design as simple as possible but I was keen to add cuffs to the sleeves to make the jumper seem a bit more finished. I made the sleeves slightly too long in order to be able to properly cover my hands with the cuffs if I want to during colder months. The proportion of the cropped jumper with the long sleeves is something else I really like too.


Despite it's simplicity this top promises, I hope, to be a regularly worn staple. I'm really pleased with how the shape of it turned out and I would really like to make a few more of these in different colours. I'd like to try it with a heavier weight fabric too to see how the fabric weight changes the style.

If you'd like to find out more about this top, head over to Minerva Crafts to read the whole blog post.

Wednesday, 5 February 2020

Black True Bias Lander Pants


I've finally made a pair of Lander Pants! I can't believe how long it's taken me to make these but I'm so happy I finally have. I bought this pattern just over a year ago and have been wanting to make it for longer still. I wanted to start by making a classic black denim pair, and now that I've made these I'm looking forward to making more in different colours.


To me, these trousers all came down to finding the right fabric. The pattern is a really simple shape and I think  the details such as the pockets and visible button fly call for a plain fabric. I really love how the black shows off all of these details, and it's also a really useful colour for trousers. I had black non-stretch denim at the back of my mind for months (I was actually hoping to find some in Tomato) but I don't go to fabric shops that often so it took me a while to find the perfect fabric. I actually pretty much stumbled across this one accidentally. On a trip to my local Fabric Land I saw that they had a lot of really lovely denims in stock. I immediately wanted to find something to make a pair of Landers out of and their black non-stretch denim was perfect. Oh, and it was only £4 a metre! £4! I should have bought the entire roll but at least I got enough to make the perfect pair of Landers.


My favourite detail is definitely the exposed button fly. It was actually a feature that I wasn't so sure about when I first bought the pattern, but over time it's something that I've come to like more and more. I've never sewn a button fly before but the instructions were very simple to follow and I love the result. I used brass jeans buttons which I think give a lovely contrast to the black. I definitely think I'll sew an exposed button fly again but probably never a hidden button fly, to me it just seems like an unnecessary annoyance compared to a zip fly if it doesn't add a anything to the design.
The great thing about this pattern is the pockets. I love them! I think trapezium pockets look great and I would love to make these with contrast topstitching around the pockets.


Fit wise I actually found this pattern to be really good. I was really surprised at how few adjustments I needed to make, I usually have to take a large wedge out of the centre back seam to account for having a sway back but these fit fine. The only thing I would say is that the waistband isn't curved, so I knew from the start that I would have to make the waistband smaller. I tend to do this by sewing a triangle at the side seams of the waistband, the seam is then covered by a belt loop. I took out about 1" at either side of the waistband when I was making them but still found them to be much too big at the waist so I had to take out about the same again. I think that was probably due to not taking any fabric out of the centre back seam but I was keen to keep that seam as it was seeing as it fit so well.


I'm so pleased to have finally made the Landers, it's such a brilliant pattern and I love mine. A final detail that I added is a Kylie and the Machine 'you can't buy this' label into the side seam. I got some for Christmas and they are just perfect!