Wednesday, 19 February 2020

The Soothing Quilt - English Paper Piecing Update


I am so excited to share these photos of the latest update of my Soothing Quilt EPP project! To find out all about it, you can read my introduction post here. It has changed a lot since my last update back in August. I've added two extra rows since then and the colour scheme has changed so much with the addition of yellows and a few oranges. I love it, but I do kind of miss the original blues and purples! It's also getting a lot harder to attatch the pieces to - it's currently just over 1m² so as you can imagine it's no longer as easy to manoeuvre.


One thing that I do really enjoy is picking out new fabrics that I haven't yet used when planning the next rows. I love how the splashes of oranges and greens that orignally didn't quite fit are now beginning to tie in as the gradient expands. I also really like how colours that I would never usually pair together look really good side by side when part of a much bigger colour scheme.


I've been enjoying adding to this quilt bit by bit. For me, the whole point of EPP is to go slowly. The aim of this quilt is to provide a calm evening outlet so there is no deadline by which to finish it. I've never actually made a quilt before so I'm not entirely sure what to do when it comes to the quilting process but I'll see when I get there. 


I took this photo of the wrong side and I love it almost as much as the right side, it reminds me of a stained glass window. The only thing I'm not looking forward to is having to take all those papers out!


I'm going to keep adding to this until it's large enough to cover a double bed. I'm keeping it as a square for now, but that might change towards the end. I'm excited to see which colours are going to be added next from the Alison Glass Sun Print 2018 fabrics, hopefully some pink will appear soon!

Saturday, 15 February 2020

Cropped Black Jumper


A black jumper is perhaps one of the most basic garments that can be sewn, but one of the garments that receives the most wear. I've been on the lookout for a fabric to make into a simple cropped black jumper for a while and this fabric felt like a good one to start with. It's a lighter weight sweater knit so not necessarily a classic fabric for a jumper, but the drape allows it to hang really nicely and it's ideal for when the weather is slightly warmer.


I tried to keep the design as simple as possible but I was keen to add cuffs to the sleeves to make the jumper seem a bit more finished. I made the sleeves slightly too long in order to be able to properly cover my hands with the cuffs if I want to during colder months. The proportion of the cropped jumper with the long sleeves is something else I really like too.


Despite it's simplicity this top promises, I hope, to be a regularly worn staple. I'm really pleased with how the shape of it turned out and I would really like to make a few more of these in different colours. I'd like to try it with a heavier weight fabric too to see how the fabric weight changes the style.

If you'd like to find out more about this top, head over to Minerva Crafts to read the whole blog post.

Wednesday, 5 February 2020

Black True Bias Lander Pants


I've finally made a pair of Lander Pants! I can't believe how long it's taken me to make these but I'm so happy I finally have. I bought this pattern just over a year ago and have been wanting to make it for longer still. I wanted to start by making a classic black denim pair, and now that I've made these I'm looking forward to making more in different colours.


To me, these trousers all came down to finding the right fabric. The pattern is a really simple shape and I think  the details such as the pockets and visible button fly call for a plain fabric. I really love how the black shows off all of these details, and it's also a really useful colour for trousers. I had black non-stretch denim at the back of my mind for months (I was actually hoping to find some in Tomato) but I don't go to fabric shops that often so it took me a while to find the perfect fabric. I actually pretty much stumbled across this one accidentally. On a trip to my local Fabric Land I saw that they had a lot of really lovely denims in stock. I immediately wanted to find something to make a pair of Landers out of and their black non-stretch denim was perfect. Oh, and it was only £4 a metre! £4! I should have bought the entire roll but at least I got enough to make the perfect pair of Landers.


My favourite detail is definitely the exposed button fly. It was actually a feature that I wasn't so sure about when I first bought the pattern, but over time it's something that I've come to like more and more. I've never sewn a button fly before but the instructions were very simple to follow and I love the result. I used brass jeans buttons which I think give a lovely contrast to the black. I definitely think I'll sew an exposed button fly again but probably never a hidden button fly, to me it just seems like an unnecessary annoyance compared to a zip fly if it doesn't add a anything to the design.
The great thing about this pattern is the pockets. I love them! I think trapezium pockets look great and I would love to make these with contrast topstitching around the pockets.


Fit wise I actually found this pattern to be really good. I was really surprised at how few adjustments I needed to make, I usually have to take a large wedge out of the centre back seam to account for having a sway back but these fit fine. The only thing I would say is that the waistband isn't curved, so I knew from the start that I would have to make the waistband smaller. I tend to do this by sewing a triangle at the side seams of the waistband, the seam is then covered by a belt loop. I took out about 1" at either side of the waistband when I was making them but still found them to be much too big at the waist so I had to take out about the same again. I think that was probably due to not taking any fabric out of the centre back seam but I was keen to keep that seam as it was seeing as it fit so well.


I'm so pleased to have finally made the Landers, it's such a brilliant pattern and I love mine. A final detail that I added is a Kylie and the Machine 'you can't buy this' label into the side seam. I got some for Christmas and they are just perfect!

Tuesday, 28 January 2020

Handmade White Hoodie


It's often hard to predict which makes are going to be winners but I was certain when making this that it was going to be a good one, and so far I've been proven right. In the weeks since making this hoodie it's already become one of my currently most worn me-mades and I absolutely love wearing it! 


I've wanted to make a simple white hoodie for quite a long time but have struggled to find the perfect fabric. I wanted the fabric to be thick enough to be worn as a jumper with a top underneath but thin enough to be able to keep some drape and add in lots of interesting details. This white jersey fabric from Craft Cotton Co was absolutely perfect: the right weight so it could be easily manipulated but not too thin. Most importantly when it comes to white jersey - its opaque! I've been disappointed by so many see-through white jerseys so it was brilliant to find that this one isn't.


I first got the idea of this hoodie from a ready to wear one that I own. It's a fairly basic hoodie but the design made it something else and I wanted to try and replicate it's interesting panneling. I find that when drafting patterns it also helps hugely to have similar style garment on hand to get the proportions right. This is especially the case when it comes to anything cropped and boxy as it's important to get the proportions of the length and width right.


A white hoodie may seem like the plainest and potentially most boring thing possible to make, but that's where the details come in! My favourite parts of clothing are always in the details such as topstitching and interesting pattern design. For this hoodie the detail is all in the design. With the addition of something as simple as an extra pannel in the side seam the top becomes an entirely different garment. Combined with topstiching along its seams, the hoodie was elevated into something much more interesting. I like the subtleness of the white topstiching but it could look amazing in a contrast colour too, something I'm very tempted to try. 

An interesting part of this hoodie is how big the hood is. Hoods are an oddly make or break detail as the proportions can often look off. I love the massive hood here! It's hard to tell the size from the photos, but I can't see anything when it's up. The only problem with this was that it used a lot of fabric! The width of the bodice and sleeves to give the hoodie its slouchy feel meant that it used up quite a bit of material. The large fully lined hood took up the same amount of fabric as the back and front bodice combined so it's probably not one to be making from scraps. Definitely worth it in my mind though.


The only issue I had sewing this was when it came to the button holes. Usually, button holes can be sewn fairly easily on jersey if interfacing is added to the back. For whatever reason my machine just wasn't cooperating with this fabric so in the end I made the decision to hand sew the button holes. I'm so glad I did that as they've turned out so much neater than they would have been had I sewn them with the machine and because they're not being used for buttons it doesn't matter if they aren't as durable.


Overall, I couldn't be happier with this hoodie! I've worn it so much already. The interesting design makes it a bit less casual but doesn't take anything away from how comfy it is. The only thing that I'd like to add are drawstrings, I'm thinking about buying a long shoelace and using that.

Monday, 20 January 2020

A handmade bag


For my mum's Christmas present this year I made her handbag. I love making her clothes, but when it comes to presents it's often safer to make something other than a garment. I did make her a Linden sweatshirt last year though, so I would say that patterns that have been made before are also good for presents. I could have made another Linden but I wanted to make something a bit different that I knew she needed.


Here's the thing about this bag: I was actually supposed to make it a while ago. On our trip to Denmark, my mum bought this really lovely upholstery weight fabric from Stoff & Stil and asked me if I could make a bag for her out of it. That was over two years ago! In my defence, I wasn't purposely putting off the bag making: shortly after she bought the fabric she actually got given a new bag and so this one was no longer needed. After that I think we both kind of forgot about the fabric until I found it again in November. As her other bag was beginning to wear out, I realised it would be perfect to finally make her one out of the fabric for Christmas.


I would never normally make my mum a bag without first consulting her, so I was really lucky that she had actually already planned this one. This meant that I was able to use a fabric that she chose herself and a design that she liked without her actually knowing that I was making it for her as a present. For the design, I remembered her saying that she wanted an a copy of her old one, which is pretty much exactly what this one is. I even managed to re-use the old straps which I'm pretty pleased about. I think that on something like a bag it's really important to get the finishing details like straps right, so it's nice to have been able to use more professional looking ones. 


The eyelets are another detail that really elevate the bag into looking less handmade, as well as the metallic clasp to shut it. It's hardware elements like these that I think are always worth buying as they are the finishing touches. I also added a small pouch on the inside of the bag - again a feature copied from the other bag and something which my mum finds really useful. I made sure it's big enough to fit a phone in, but it's perfect for keeping safe anything that's small. As a finishing touch I added one of my labels onto the pouch and also a brown leather patch to the outside. Once again this was bought from Stoff & Stil, it's a small brown rectangle with a star on it and I love it! It's the perfect finishing touch and exactly the kind of thing you would find on a shop bought bag.
I was so pleased with how well this bag turned out and I think my mum really likes it. It's exactly the style that she wanted but with the added benefit of being in a really lovely fabric that she picked out herself - and of course the fact that it's made by me!  It may have taken a couple of years but the bag did finally get made!

Friday, 10 January 2020

White Long Sleeved T-shirt


The top is a perfect example of how the most simple makes are the most useful ones. Last summer, I made myself a white t-shirt. I had no idea just how much wear I would get out of it, so making a long-sleeved white t-shirt to wear when the weather is a bit colder was imminent. I'll probably have to make another short-sleeved one at some point too, I really have nearly worn it to death!


Unlike the twist that I added to the short-sleeved t-shirt, this one is as simple as it could possibly be. I wanted to have a t-shirt that I could pair with anything and it's been perfect for wearing with patterned trousers like these ones or these. The other great thing about this top is that it took hardly any time to make! T-shirts are the perfect project to whip up when you only have a small amout of time and they also use very little fabric.


Whilst this is as simple as possible, I did decide to add a lettuce hem - just becuase I love the finish. It's pretty subtle on this top and leads to a much better finish on jersey than having to hem it. I'm so pleased with this quick and easy make. It might seem like a boring thing to sew but I love speedy projects and it's alwasy nice making something that I know I'll get a lot of wear out of.

Friday, 3 January 2020

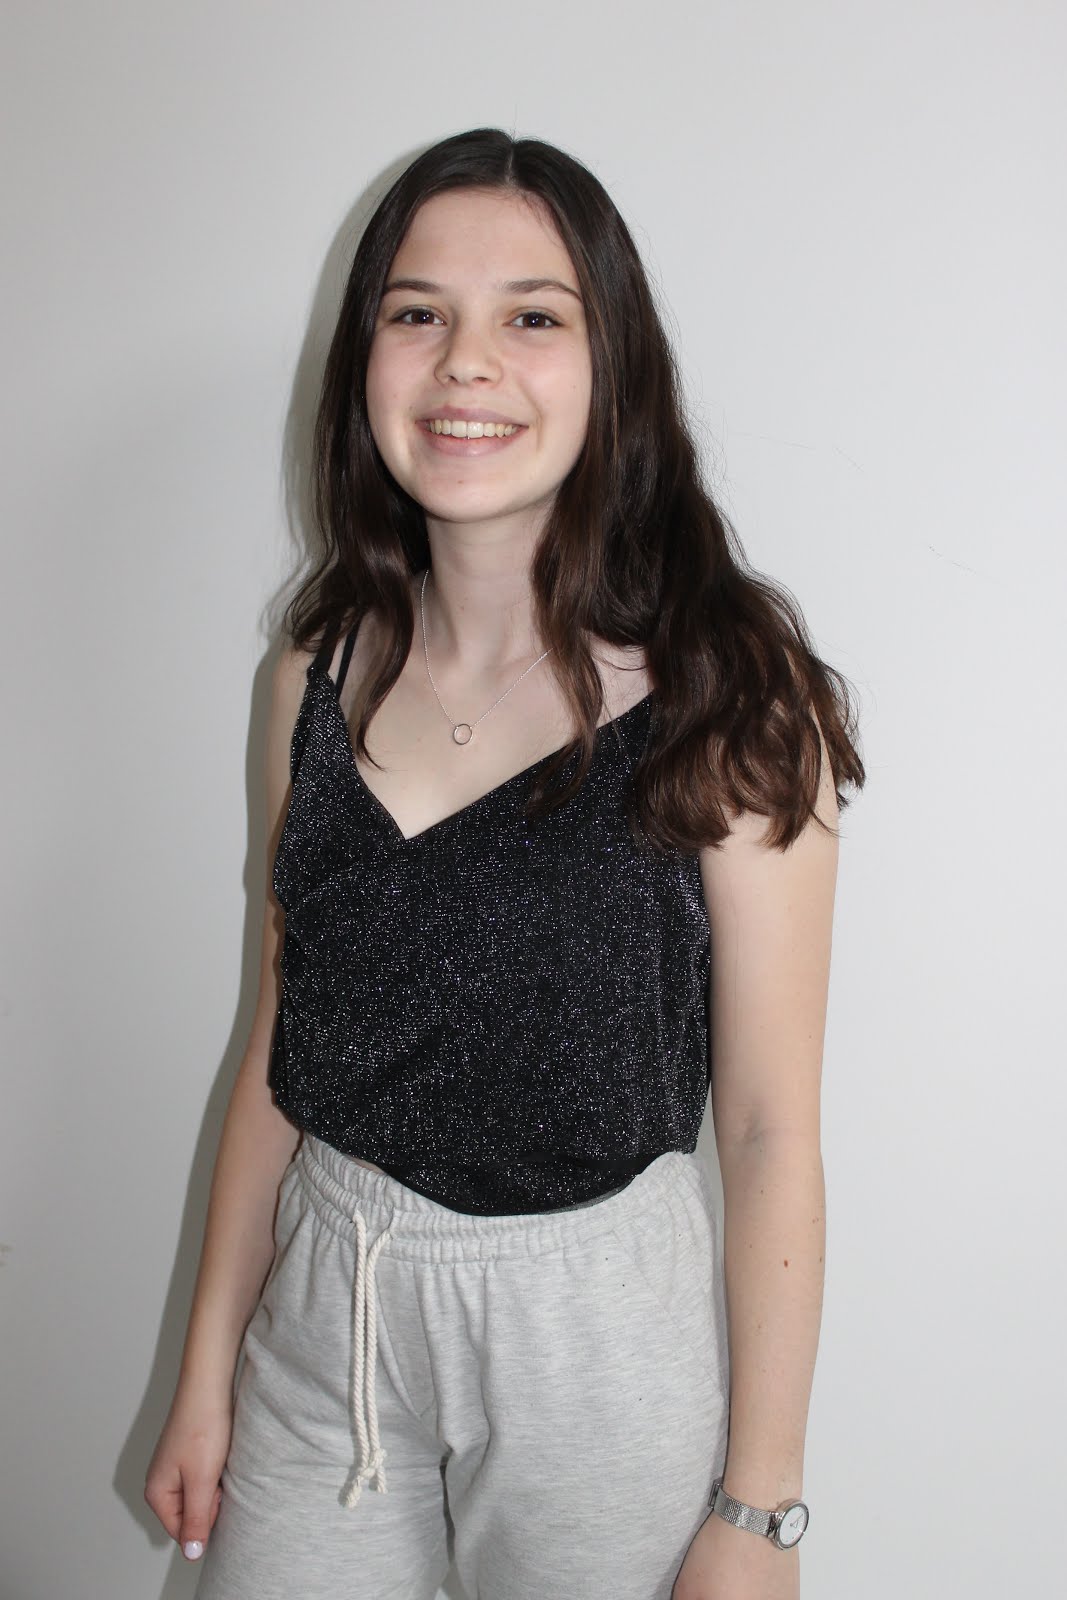
Black Sparkly Top


As much as I am someone who plans sewing projects, I do enjoy making things on the spur of the moment. These makes have much less pressure attatched as it doesn't matter whether or not they work out. On top of that, it's a really good way to use fabric leftovers which makes the project free and without expectations.


I whipped up this top in an afternoon when I wanted to do some sewing but didn't have a project on the go. I've been wanting to make a few more tops as opposed to jumpers or t-shirts and this also fit the brief of not requiring too much fabric and therefore perfect for scraps. I decided on the design of a simple faux-wrap top which I drafted. It was actually quite simple to draft, two trapezium shapes that overlap each other joining together at the opposite side seam. 


The fabric and pattern kind of came together at the same moment. I wanted to make a sparkly top and had some of the black lurex fabric left over from this top. I've never actually worn that other top (I just don't like the design) but I wanted to give the fabric another go. Thanks to having used it before I knew that it was sheer so each piece of lurex is lined with a plain black jersey fabric. It's worked perfectly, the fabrics are sewn together at the top and side seams but not at the bottom. This creates a loose floating affect of the layers when the top is being worn which I really love.

Considering the fact that this top required no planning I am so pleased with how well it turned out. The fabric works so well with the black underneath and I think the wrap shape adds to the floatiness. I'll definitely be making this design again, it's perfect for a simple top and requires very little fabric.