Wednesday, 28 October 2020

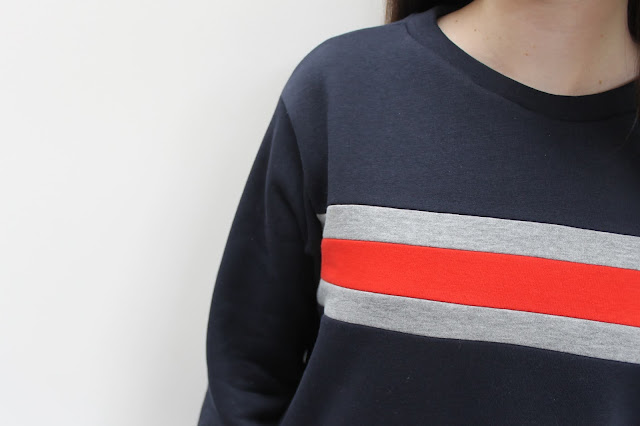
Navy Sweatshirt with Red and Grey Stripes


It feels pointless to make dresses or even t-shirts in the autumn and winter as it's just too cold for me to wear them, so I've been trying to make items of clothing that are warm. Because of this, I've found myself gravitating towards sweatshirting fabrics which are just so soft to wear and sew with that it's going to be a while before I want to sew with any other kind of fabric again!


When I was planning what I wanted to make next, I knew that the only thing I actually want to wear at the moment is a jumper that feels comfy and warm to wear. Determined to make myself a perfect jumper, I started looking online at sweatshirt fabrics and found exactly what I had in mind at Fabrics for All. They have a large range of different sweatshirting fabrics but I kept being drawn to the fleece-lined ones which I decided would fit my brief of warm and comfy perfectly! I liked the idea of using a plain colour which I could then get a lot of wear out of but didn't want the jumper to look too dull. The design actually came together perfectly once I saw that there were three colours in the fleece-lined sweatshirt range and I decided to use the navy as the main colour of the jumper, with red and grey as accents.


I was expecting the fabrics to be soft, but the level of cosiness when they arrived was even better than what I'd hoped for! The wrong side of the fabric is fleece-lined, making it super soft and nice to wear. It's also heavyweight, making it ideal for a jumper. I've found it so tricky to find fabrics that are thick enough to make jumpers out of so I'm really pleased to have found these. There's nothing worse than making a jumper to wear in winter but finding that the fabric is too thin to actually be able to wear it.


The stripe was so simple to do but completely makes the jumper and it's definitely something I'd like to do again. I spent a while deciding on the widths and placement, in the end I went for 1.5" for the red and 1" for the grey. My main advice for doing this would be to use fabrics which are all the same weight, as I mentioned before the fleece-backed sweatshirting fabric that I used came in three different colourways which was perfect.


When it came to choosing the style of the jumper I knew from the start that I wanted a long, relaxed fit. I enjoy wearing and making more cropped jumpers like this white hoodie and this purple Linden, but when it's cold I want something a bit warmer. Also, a relaxed jumper like this one is ideal for throwing on without having to think about how it looks! With my new jumper, I'm essentially replacing this navy Linden jumper that I made a few years ago. I really loved it and wore it so much but it's a bit worn out now and shrunk a little in the wash. I considered making another Linden but decided against raglan sleeves as I wanted to add in the stripes. The design I came up with in the end was also a bit looser than the Linden is, making it really comfortable.

Friday, 23 October 2020

Hand-decorated Sewing Boxes


I can't believe I'm writing this - I've opened an Etsy shop! This is something that I've put off doing for a long time but I've now taken the plunge to launch it. On it you can find sewing boxes, designed and decorated by me.  


The thing with a hobby like sewing is that you end up with a lot of stuff. My sewing space is always scattered with notions like zips, buttons, ribbons and thread. I like to store all these accessories in boxes and drawers that actually look nice, so I decided to decorate some.


The bottom section of each box is painted and the top features a panel from a sewing pattern. I love the two together, they definitely provide something that is practical as well as looking lovely.


The boxes measure 16x16x7cm and are ideal for storing sewing notions. I use mine to store pattern weights, spare sewing machine needles, zips and basically any other sewing notions that need a storage space! They would also be ideal for storing fat quarters of fabric or English paper piecing tools.


These would make a lovely gift for anyone who loves to sew, especially filled with fabric or a handmade present.


I hope you like these boxes! If you'd like to buy one, you can do so on my Etsy shop. I've really enjoyed both making and using them and love the thought of others using them too.

Sunday, 18 October 2020

Fibre Mood Norma Blouse


Keeping with my custom of dragging reluctant family members around fabric shops when I'm on holiday, my auntie and I visited Le Marché Saint-Pierre together. It's one of my favourite shops in Paris' fabric district, a few years ago I bought the fabric to make this skirt and this dungaree dress from there. On my most recent trip, I bought a gorgeous grey and white gingham fabric which I used to make a pair of Lander Pants. It's a really big shop with about four floors and we found a lovely selection of floral cotton prints on one of the floors. I offered to make my auntie a blouse out of one of the fabrics, and after hesitating between this fabric and one with blue, purple and pink fabrics we left the shop with 1.5m of floral cotton as well as the gingham.


What really made this blouse come together was the fact that we'd been to Rouje the previous day admired their collection of blouses. They really do have the most lovely ready-to-wear clothing, but it's also very expensive! Judith (my aunt) especially liked the Julie blouse (now out of stock) and when we found this floral cotton print the next day I said I'd try to recreate it. The main features of that blouse we'd seen in Rouje was a v-neck with buttons, gathered sleeves which ended just above the elbow and a small peplum at the hem. I immediately thought of the Fibre Mood Norma Blouse which had the same neck and sleeve details, albeit no peplum. I was initially going to try and add the peplum on, but in the end I decided to just stick with the pattern as I Judith couldn't try it on for size while I was making it.


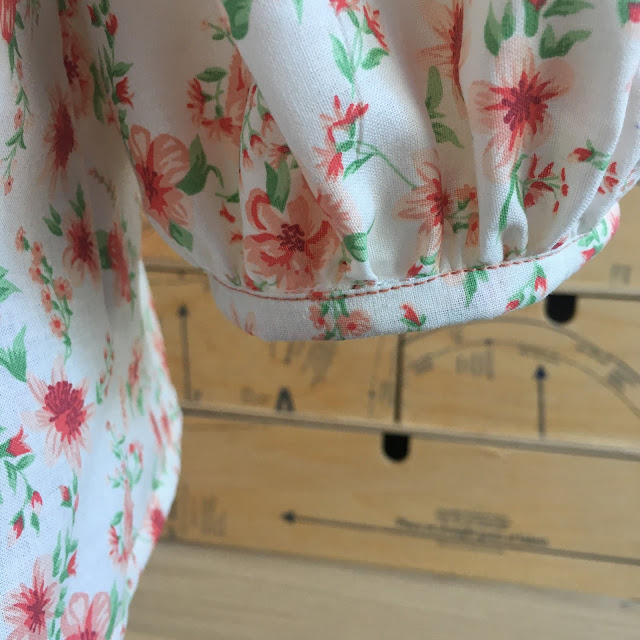
The sleeves on this pattern are what really sets it apart, I love how they're gathered at the end with a cuff to finish it off.


There was a lot of gathering involved in this make which I don't mind too much but definitely wouldn't have enjoyed if the fabric was heavier weight. Luckily this cotton was perfect gathers and it was a really enjoyable sew. It's also heavy enough to give the sleeves some structure so they stand out when being worn.


In the end, the only adjustment I made was to lengthen the bodice by 4cm which was pretty easy to do. The hardest part about making an item of clothing for others is them not being able to try it on, so I took lots of measurements when I could to compare them to the pattern size chart. 
This was my first time using a Fibre Mood pattern, I purchased it from the Foldline who have a PDF printing service. The best part was that the Foldline added on the seam allowances, it's a bit annoying that Fibre Mood doesn't do that!


Although this wasn't intended to be a birthday present I finished it around the same time as my aunt's birthday, which was a nice coincidence! I really enjoyed making this and would happily make another Norma Blouse, maybe one for myself next time. 

Judith, je te souhaite un bon anniversaire et j'espère que tu aimes ta nouvelle blouse!

Sunday, 4 October 2020

Black Papercut Patterns Anima Pants


I'm so excited to talk about my latest make, it was one of those sewing projects where everything came together perfectly and I'm so happy with the finished result! I am a massive fan of the Papercut Patterns Anima Pants sewing pattern. It was one of those patterns that, when I bought it, I had no idea I'd get so much use out of. Somehow it filled a gap in my wardrobe for jogging bottoms that I never knew I had and I've ended up making six versions! Six! Not only that but my original grey Anima Pants as well as these checked ones have been some of my most worn makes of all time.


My handmade joggers really came into their own during lockdown when they were pretty much all I wore. I actually made this pair specifically to wear in lockdown out of a pair of men's pyjama trousers. Wearing them so much made me realise that a) this is a pattern that fits me perfectly and that I love the style of and b) I would definitely wear another pair of Anima Pants if I made them. I really wanted to make myself a classic black pair of joggers that I could easily throw on and would go with everything.


Finding good quality jersey fabric can be quite tricky. There are lots of knit fabrics out there but I hate anything that feels synthetic. Also, with black it's so frustrating when the fabric isn't completely opaque. I managed to find the perfect black fabric for my joggers at Bobbins and Buttons. They have a fab jersey range and for a minute I was tempted to go for pale blue but managed to stick to black which I know I'll wear all the time! The fabric I used for these joggers was a black French terry fabric which was lovely to sew with and is the perfect weight for a pair of trousers like these. I've actually made this pattern in a variety of jersey fabrics ranging from more heavyweight to more drapey ones and all work well, but French terry is a great balance between heavy and lightweight.


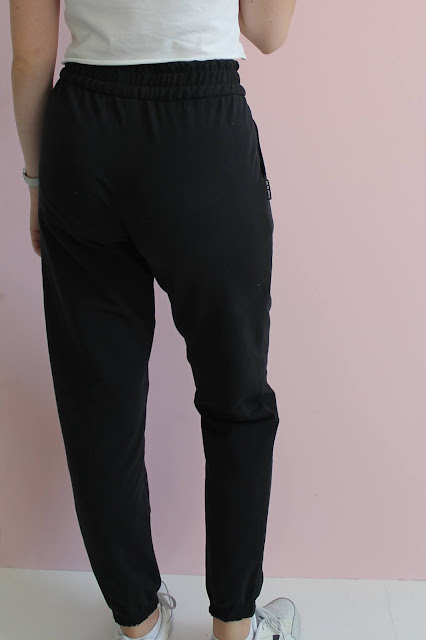
I made a couple of changes to the pattern, only small things but they've really helped change the feel of the joggers. One thing I really like about the Anima Pants pattern is that depending on the fabric and details they can look dressier or more casual. For this pair I wanted a classic pair of black joggers, so kept the design simple and casual. The first thing I changed was to omit the drawstrings at the waist and just have the rows of stitching. I like the drawstring on my other pairs but it's more of a decorative feature than a useful addition so it wasn't a problem leaving it off. I copied this from a RTW pair of joggers that I saw and love the effect.


My favourite addition to these joggers is the cuffs! Again, this is something that I've seen on RTW joggers and wanted to copy. With all the other pairs of Anima Pants I've made I chose to simply turn up the end for the cuff, but on this pair I added elastic and sewed a few rows of stitching to mimic the waistband. I love how the stitching looks in the black and it's nice to finish these off a bit differently. I was a bit worried that the proportions would be wrong as the pattern isn't designed to have this finish but it was really easy to do and worked so well.


I love how all the details look together. My favourite feature of the pattern is the faux-fly, not something commonly found on joggers but I think it really makes the pattern more special. The fabric worked really well when it came to adding in the elastic which means that they hang perfectly.


As a final touch, I added a Kylie and the Machine 'You can't buy this' label to the side seam. The label sums up the best thing about sewing to me and I really like how subtle it is. At the same time, it isn't hidden inside out of sight like most labels. Because it's black with silver writing I particularly like adding them to all-black makes like these joggers.


These joggers are going to be worn so much and I'm really happy with how they turned out. I like the details a lot, especially the elasticated cuffs. They're also so comfy to wear! It just goes to show that jersey is the best fabric to make things out of.

Saturday, 19 September 2020

Tilly and the Buttons Allsorts Jersey Placket Top


I've been on a roll making jersey tops recently! It's not always easy finding good quality jersey fabric so when I do it always gets sewn up quickly. I love making t-shirts as these always get a lot of wear and are super quick to sew. The simple design of t-shirts means that they are perfect hack and I always enjoy adding slightly different details, in this case, a placket.


I've been wanting to try sewing a placket in a jersey top for ages, it's a feature that I really like when I've noticed it on RTW garments. It was surprisingly easy to do! It's definitely harder to sew a placket in a knit fabric as opposed to a woven one but using a walking foot and taking my time helped. I'm pretty pleased with how it turned out considering it's the first time I've tried it, it is slightly wonky at the bottom which bothers me a bit but you can't really tell when the top is being worn.

To sew the placket I used this tutorial which has really clear instructions. Because I self-drafted the pattern I had to guess a bit at what size I wanted the placket and it's probably on the smaller end, but I think the shorter placket works well with the slightly cropped top. It also ended up being a blessing in disguise when it came to choosing the buttons - no matter how hard I looked I could only find two matching black buttons! Initially, I thought it would need three and I considered attaching three blue ones for the time being and then replacing them later, but was pleased to realise that I only needed two. I'm really glad I could use these black buttons as they are lovely, rather than being plastic they feel as though they are made out of clay. I am slightly shocked that I could only find these two that matched considering how many buttons I have!


The fabric (of course!) is the Tilly and the Buttons Allsorts Jersey in the blue colourway from Craft Cotton Co. I love the geometric design, not something that you can often find on a knit fabric. I think the buttons on the placket tie in nicely with the circles on the fabric too, although I am definitely going to be making another top with a placket which uses plain fabric for it to really stand out. I really love the other top that I made from the geometric jersey too, although the fabric design is the same having a different colour and style makes them both really different. 


I'm very pleased with this make, I'm sure I will get a lot of wear out of it. It's the perfect everyday kind of top which is made a bit more interesting thanks to the fabric and placket detail. A very speedy make too which is always a bonus! 

Thursday, 10 September 2020

How to Sew a V-Notch Neckline

A couple of months ago I made myself this top out of a lovely fabric that I bought in Japan. I had been saving the fabric for the right project, unsure of what to make out of it and had the idea to create a top with a v-notch neckline. I love how the feature turned out and thought that I'd share a tutorial on how I created it. Also, the best part of the v-notch neckline is that it can be added to any top! I used my own self-drafted pattern that I use to make a basic t-shirt but it works just as well with a commercial pattern. Whichever pattern you're using, instead of sewing the neckband follow this tutorial to add in a v-notch neck instead. 


Here's a close-up of the neckline! I wanted v-notch detail to be slightly curved, coming in at the top. It's finished with bias binding which makes it all really neat. Looking at it now, I think it would be a really nice touch to add the bias in a contrast colour.

Onto the tutorial - here's what you need to do to sew a v-notch neckline into any top:


Cut out your front bodice piece as normal using a basic top pattern. I'd recommend using your favourite simple t-shirt pattern that doesn't have too many details so that the v-notch stands out. I'm using a jersey top pattern which would ordinarily have a neckband, but you can use a pattern that is designed to have a facing, a bias binding etc around the neck.


Fold your bodice piece in exactly in half (along the fold line) and make sure it's lying flat. Now you need to decide how big you want the v-notch to be. The size will depend on how deep you want it and also how big the top you've cut out is so that it stays in proportion. One thing to note is that if your fabric is lightweight, avoid making the v-notch too big or the sides won't stay up when you're wearing it.

I made my v-notch 3.75" deep and 1.25" across. Bear in mind that the bias binding will add a little bulk, making the v-notch a bit smaller once it is finished. 


Mark the measurements with pins or a fabric pen. You can also pin the two layers of the bodice together to avoid the fabric slipping when you cut it. 
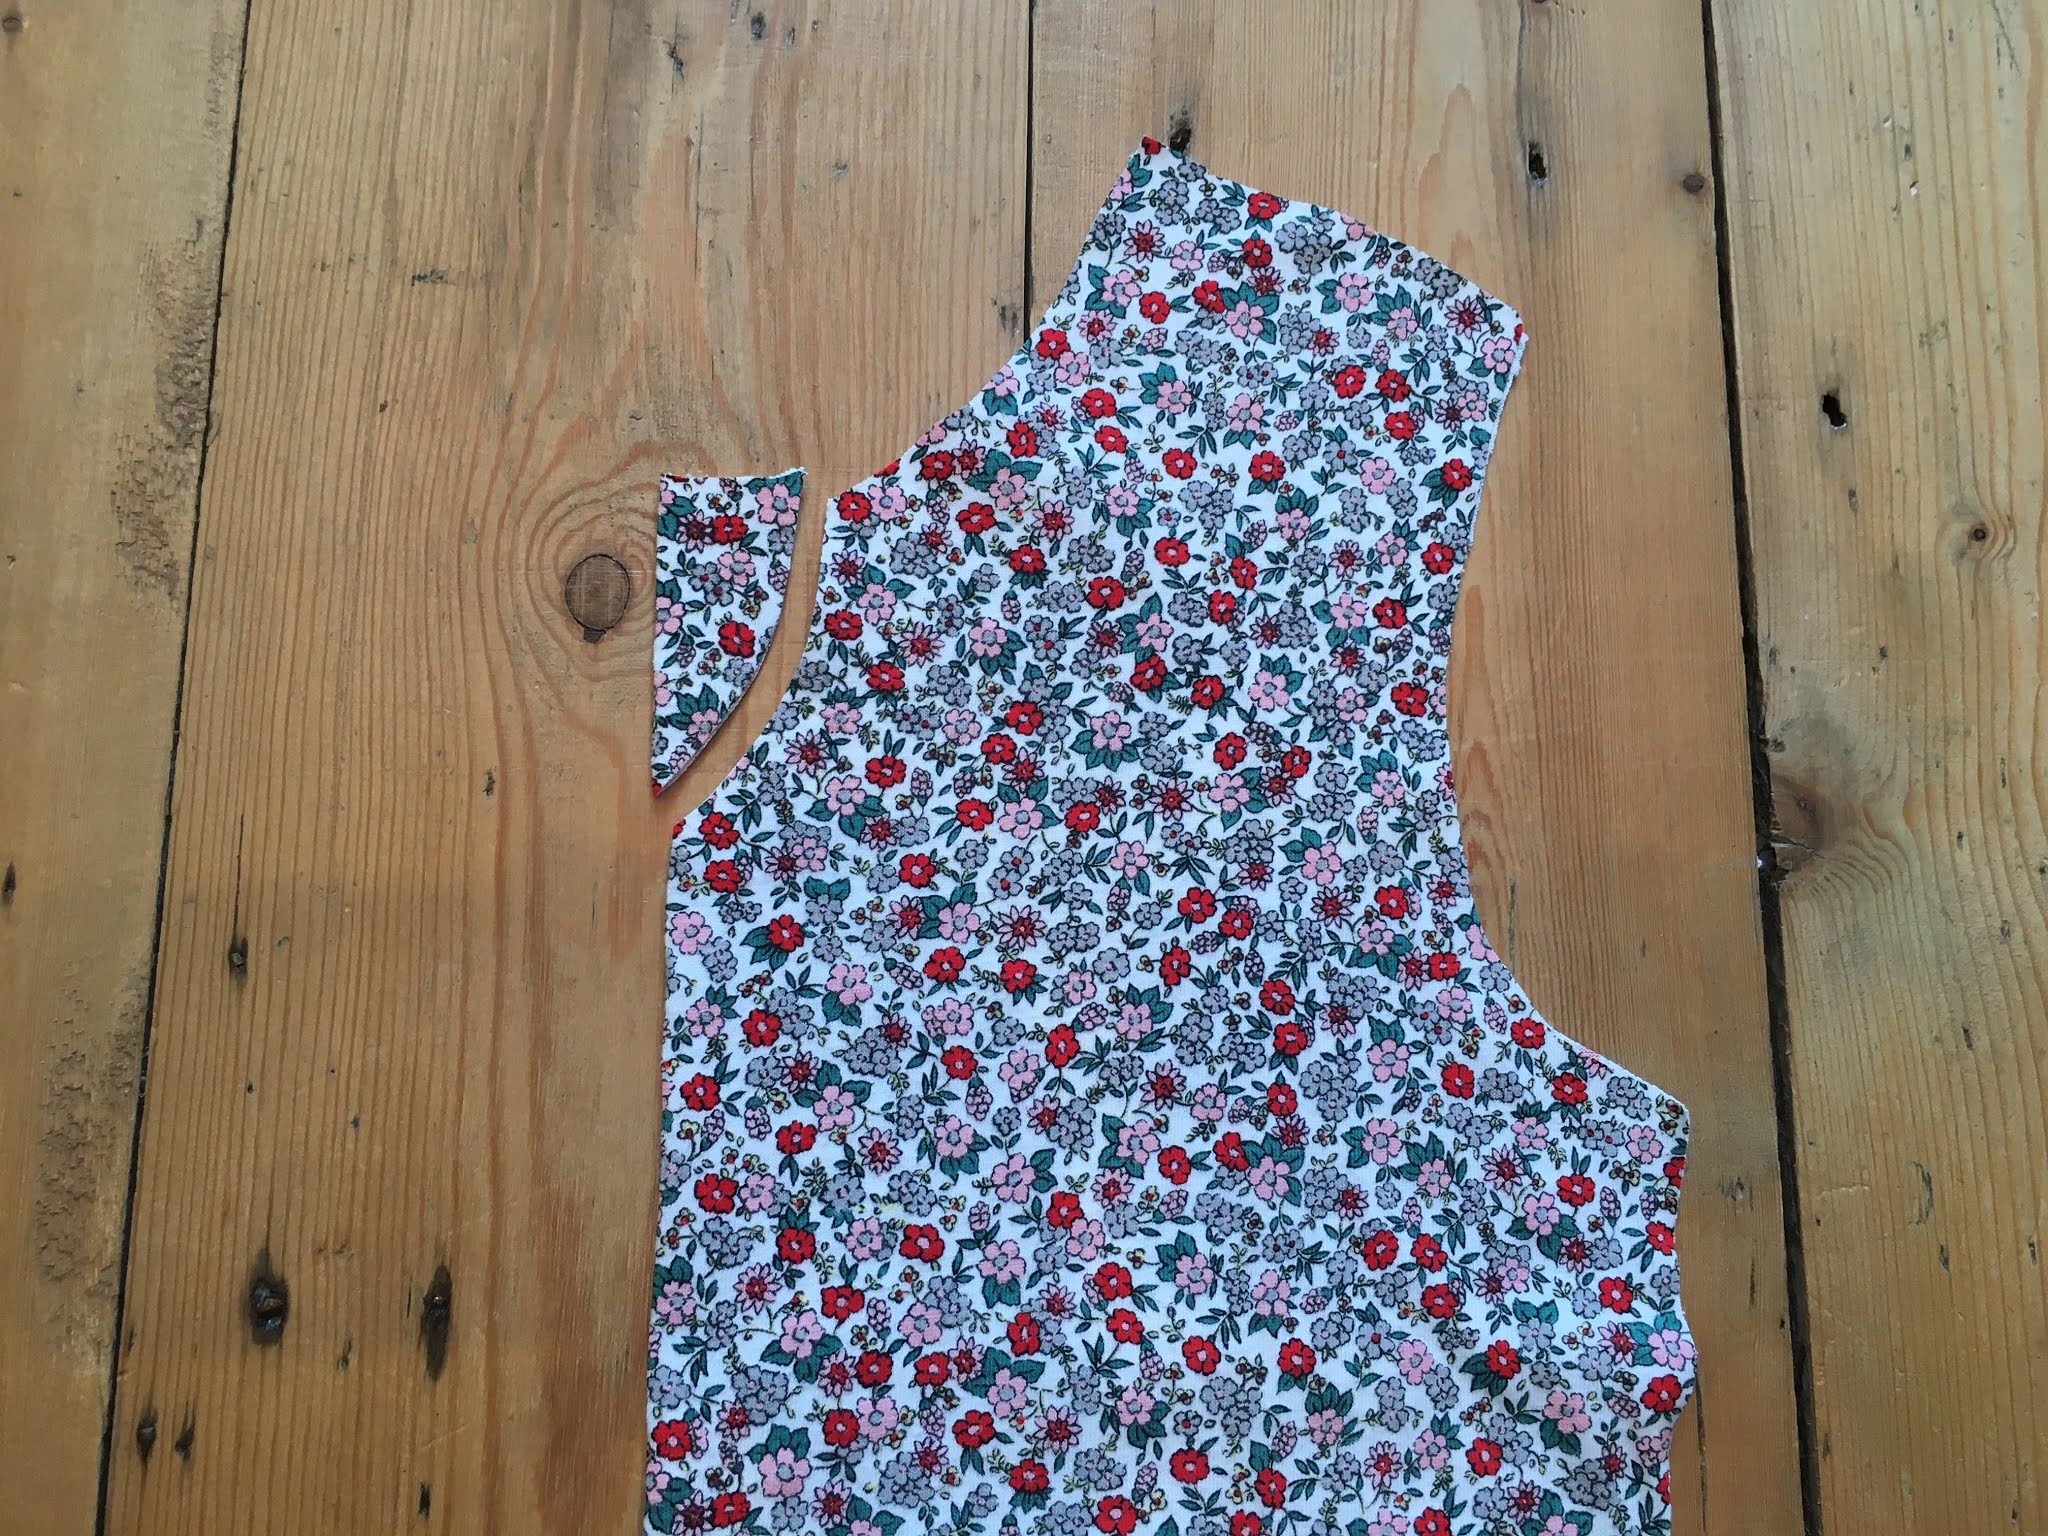
Carefully cut out the piece you marked, rounding it rather than cutting straight across. If you like you can draw on the circular shape before you cut, but I just cut the curve freehand which worked fine as it isn't a lot of fabric.


Unfold the bodice and check that you're happy with how the v-notch looks. You can hold it up against yourself to check the width and depth of the v and go back and cut more out if you'd like.


Making sure the fabric is lying flat, cut a tiny notch in line with the right curve cutting into the fabric on the left.


Here's a close up of what the notch should look like - very small! I'd recommend cutting about 1/4" in. If you do accidentally cut too much, making the bias binding wider later on will hide the mistake.


Time to create the bias binding. You'll need three strips: one long enough to go round the back neckline and most of the front and then two small strips to sew around the sides of the v-notch. I cut mine 1.5" wide.


The next part is slightly more fiddly but essentially it's just sewing bias binding around a curve. Fold over the right side of the bodice and sew a strip of bias binding onto the left side of the v-notch. The small notch that you cut into the left side of the fabric will allow you to continue the bias binding a few centimetres past the point of the v.


After you've sewn the bias binding, unfold the bodice and lie it flat. The end of the bias binding at the point should tuck smoothly underneath the right side of the v thanks to the notch you cut.


Now sew the bias binding onto the right-hand side of the v-notch. Bear in mind that the end of this will be visible on the outside of the top. In order to make it neat from the front, fold over the end of the bias by 1/4". 
In this photograph, the bias binding on the left is lying underneath that on the right to show you the folded up end. However, when you flip the bias to topstitch it down, the bias binding on the lefthand side of the v-notch will end up on top when viewed from the wrong side of the fabric.


This photo illustrates the point made above: once the bias binding on the right of v-notch has been topstitched down, the bias on the left side will be on top. 


From the front, carefully topstitch along the edge of the bias binding to secure it down. When you get to the point, the fabric that you turned under earlier should allow you to get a neat finish. Sew all the way down to the point and then around the corner to secure the two layers of bias binding together.


Trim any excess bias tape on the wrong side of the top to reduce bulk at the point of the v-notch. Sew the shoulders of the front and back bodice together, following your pattern instructions.


Now that the v-notch has been neatly finished, the only thing left to do is to attach bias binding to the rest of the neckline. Make sure that the corners of the bias tape are turned under neatly at either end of the v. 
I used a walking foot to sew the bias which I can't recommend highly enough when it comes to sewing with stretch fabrics, especially when sewing fiddly bias binding to a jersey neckline.


Once you've finished the neckline you can keep sewing the rest of the top as per the pattern instructions.


And that's it! I love how this v-notch looks on a simple top and I think it goes so well with the fabric I used. I really hope you found this tutorial helpful - let me know if you give it a go!