I tend to almost exclusively share finished projects on my blog, but sometimes it's more about the sewing process and less about the finished garment. I set myself a challenge at the start of the year to make myself a jacket sewn entirely out of fabric leftovers that I had in my stash. I wanted an in-depth sewing project and turned out so much better than I ever hoped it would!
I thought it would be fun to document the process along the way and to do a write up of the steps on my blog. I'll share more photos of the finished make too, but this gives a much better idea of the sewing process than seeing just the finished item could.

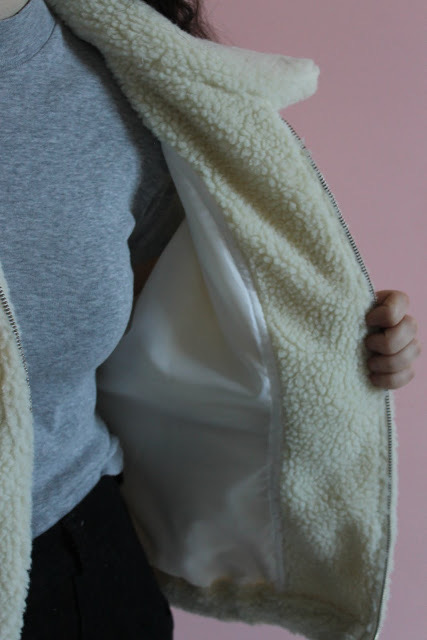
I started this project on a bit of a whim. Like I said, I wanted to have a challenging sewing project and seeing as I had just made a pair of jeans I thought that a lined jacket would be the next best thing. I decided to create a pattern from a RTW jacket that I own and then draft a lining. I needed a fabric that wasn't too lightweight but that I had in my stash, so the leftover corduroy fabric from my Dawn Jeans was ideal. Paired with the sherpa that I had leftover from my sherpa jacket that I made last year, it seemed like the perfect plan. I love how the two fabrics look together and I'm really pleased to have found a second project for the leftover pieces as there wasn't enough of either to make something without pairing them with another fabric. The sherpa was such a great lining fabric to use and makes the jacket really warm and cosy too.

I started the jacket by cutting out the front and back bodice pieces and sewing them together at the shoulders. I've made several jackets before (my
pink fluffy jacket, my
sherpa jacket and my
Kelly Anorak) so I felt quite confident sewing it without any instructions. Something that I do find useful when I've drafted my own pattern without instructions is to look up sew alongs for similar patterns, it helps to make sure the steps are all done in the correct order.

I spent a really long time trying to sort out the pattern placement before cutting out the fabric and discovered pretty quickly that I didn't have enough corduroy. I needed another fabric. When trying to decide what to pair the corduroy with, I thought that a black denim would be the best option. I didn't want to introduce a third fabric which would draw too much attention away from the corduroy and the sherpa. I thought I might have some black denim leftover from my
Lander Pants but unfortunately I used up all the scraps when making
my Moss Skirt.
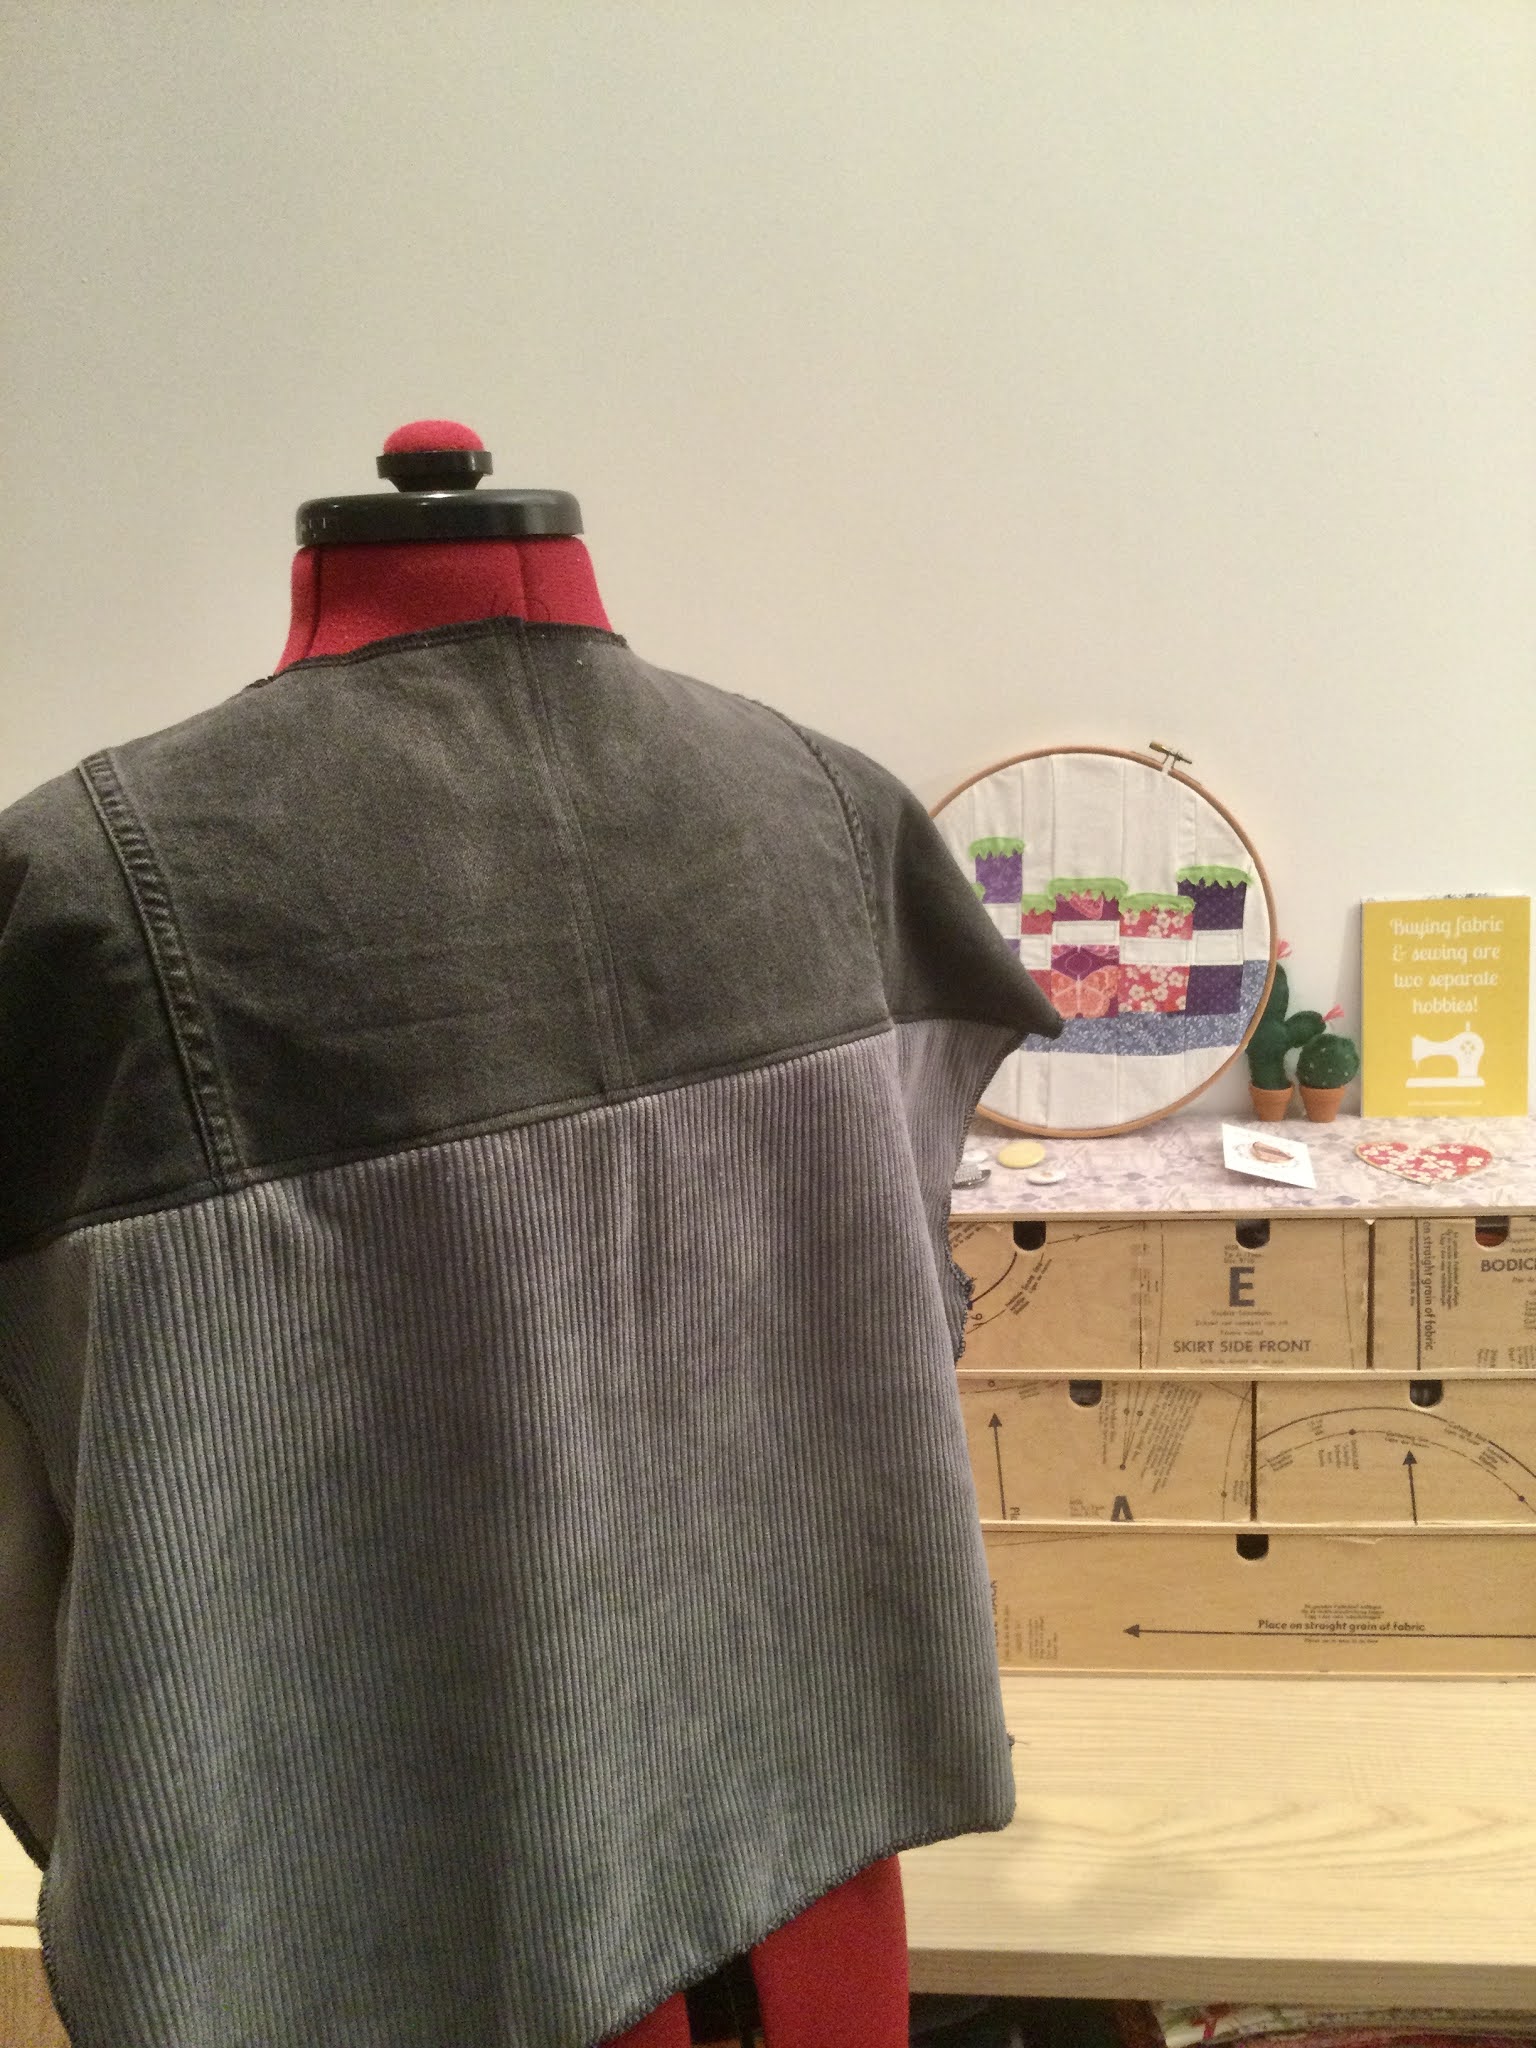
To me, a large part of this project was about thinking creatively and coming up with solutions that didn't involve buying more fabric. So I cut up a pair of old jeans! It turned out to be the perfect solution. Luckily I had an old pair tucked away ready to be transformed into something new, although at that point I was already overly invested in the project and prepared to sacrifice a pair of jeans that I currently wear for it haha.
The jeans saved me when it came to the back bodice and I created a denim panel to go across the top, but there was still a lot of piecing together of the corduroy to be done. I realised that for the sleeves (pictured on the left) I would have to add a seam across the middle. There still wasn't enough fabric though, so I had to add patch of denim there too. It's details like that which were accidental but I love how they add to the final jacket.
Jeans refashions are fun to do as the denim is often good quality and has been worn in a way that gives a nice used look. Making
this skirt out of a pair of old jeans was one of my first ever refashion projects, and I later went on to make
this top out of old jeans too.
I was really excited to sew the hood as I was able to pair together the corduroy and sherpa for the first time. The sherpa is such a great lining fabric to have and I really like the idea of the lining being a main feature. I was running low on corduroy at this point and had to start piecing scraps together to make one half of the hood. I'm very pleased with how forgiving the corduroy has been to the seams and you can hardly see them, but they are there. An important detail for me was to have the corduroy overlap the sherpa by about 3/4", it means that the lining doesn't roll over onto the right side.
The next detail that involved a lot of piecing was adding a facing to the lining. The photo above is the facing that I added to
my sherpa jacket, and I wanted to recreate that in the corduroy for this jacket.
The problem was that there was hardly any corduroy fabric left. To overcome this, I cut out as many pieces of corduroy as I could that were 2.5"wide of varying heights and sewed these together, before cutting around my pattern to create the facing shape that I wanted. Corduroy was a great fabric to use when it came to piecing scraps together, it's not too heavyweight so doesn't have bulky seams which denim would and the wale design is quite forgiving in masking where the pieces have been joined together.
The effort of creating the facing was worth it in the end though. It attached to the lining smoothly and just makes the jacket feel nicer when I'm wearing it.
When it came to lining the sleeves, I had just about enough of the grey lining fabric that I used on my
pink fluffy jacket leftover. It's also the fabric I used to line the sleeves of my
Kelly Anorak so it's been used for a lot of projects at this point! My only concern with the sleeve lining is that it was much lighter than the sherpa I used to line the body. This hasn't been an issue on the other jackets I've made as I used the same lining throughout.
To make the sleeve lining more similar in weight to the sherpa I added in a layer of quilt wadding. It felt like a bit of a risk to take at the time as I had no idea if the wadding would end up making the sleeves too stiff and bulky (it was also very old wadding that I had lying around and not the best quality!) but it worked out really well. I'm so pleased that it went to plan and I think the sleeves would have felt oddly light and also less warm without it.
To avoid having a loose layer of wadding that risked sliding around inside the sleeve I sewed it to the lining first before attaching the sleeve lining to the sherpa.
Here's what the lining looked like after the sleeves and facing were attached. I think the three fabrics actually made a pretty good combination! It made me think that a colour blocked jacket could be a fun project to try.
Once the lining was complete I sewed the zip to the front bodice before attaching the sleeves and sewing the side seams. The zip is the only thing I had to buy for this project, everything else I had already. It's a good quality
silver YKK zip that I purchased from
Jaycotts.
I then attached the lining to the main body of the jacket. At this point it was starting to look like a proper garment which is always the best stage of the sewing process.
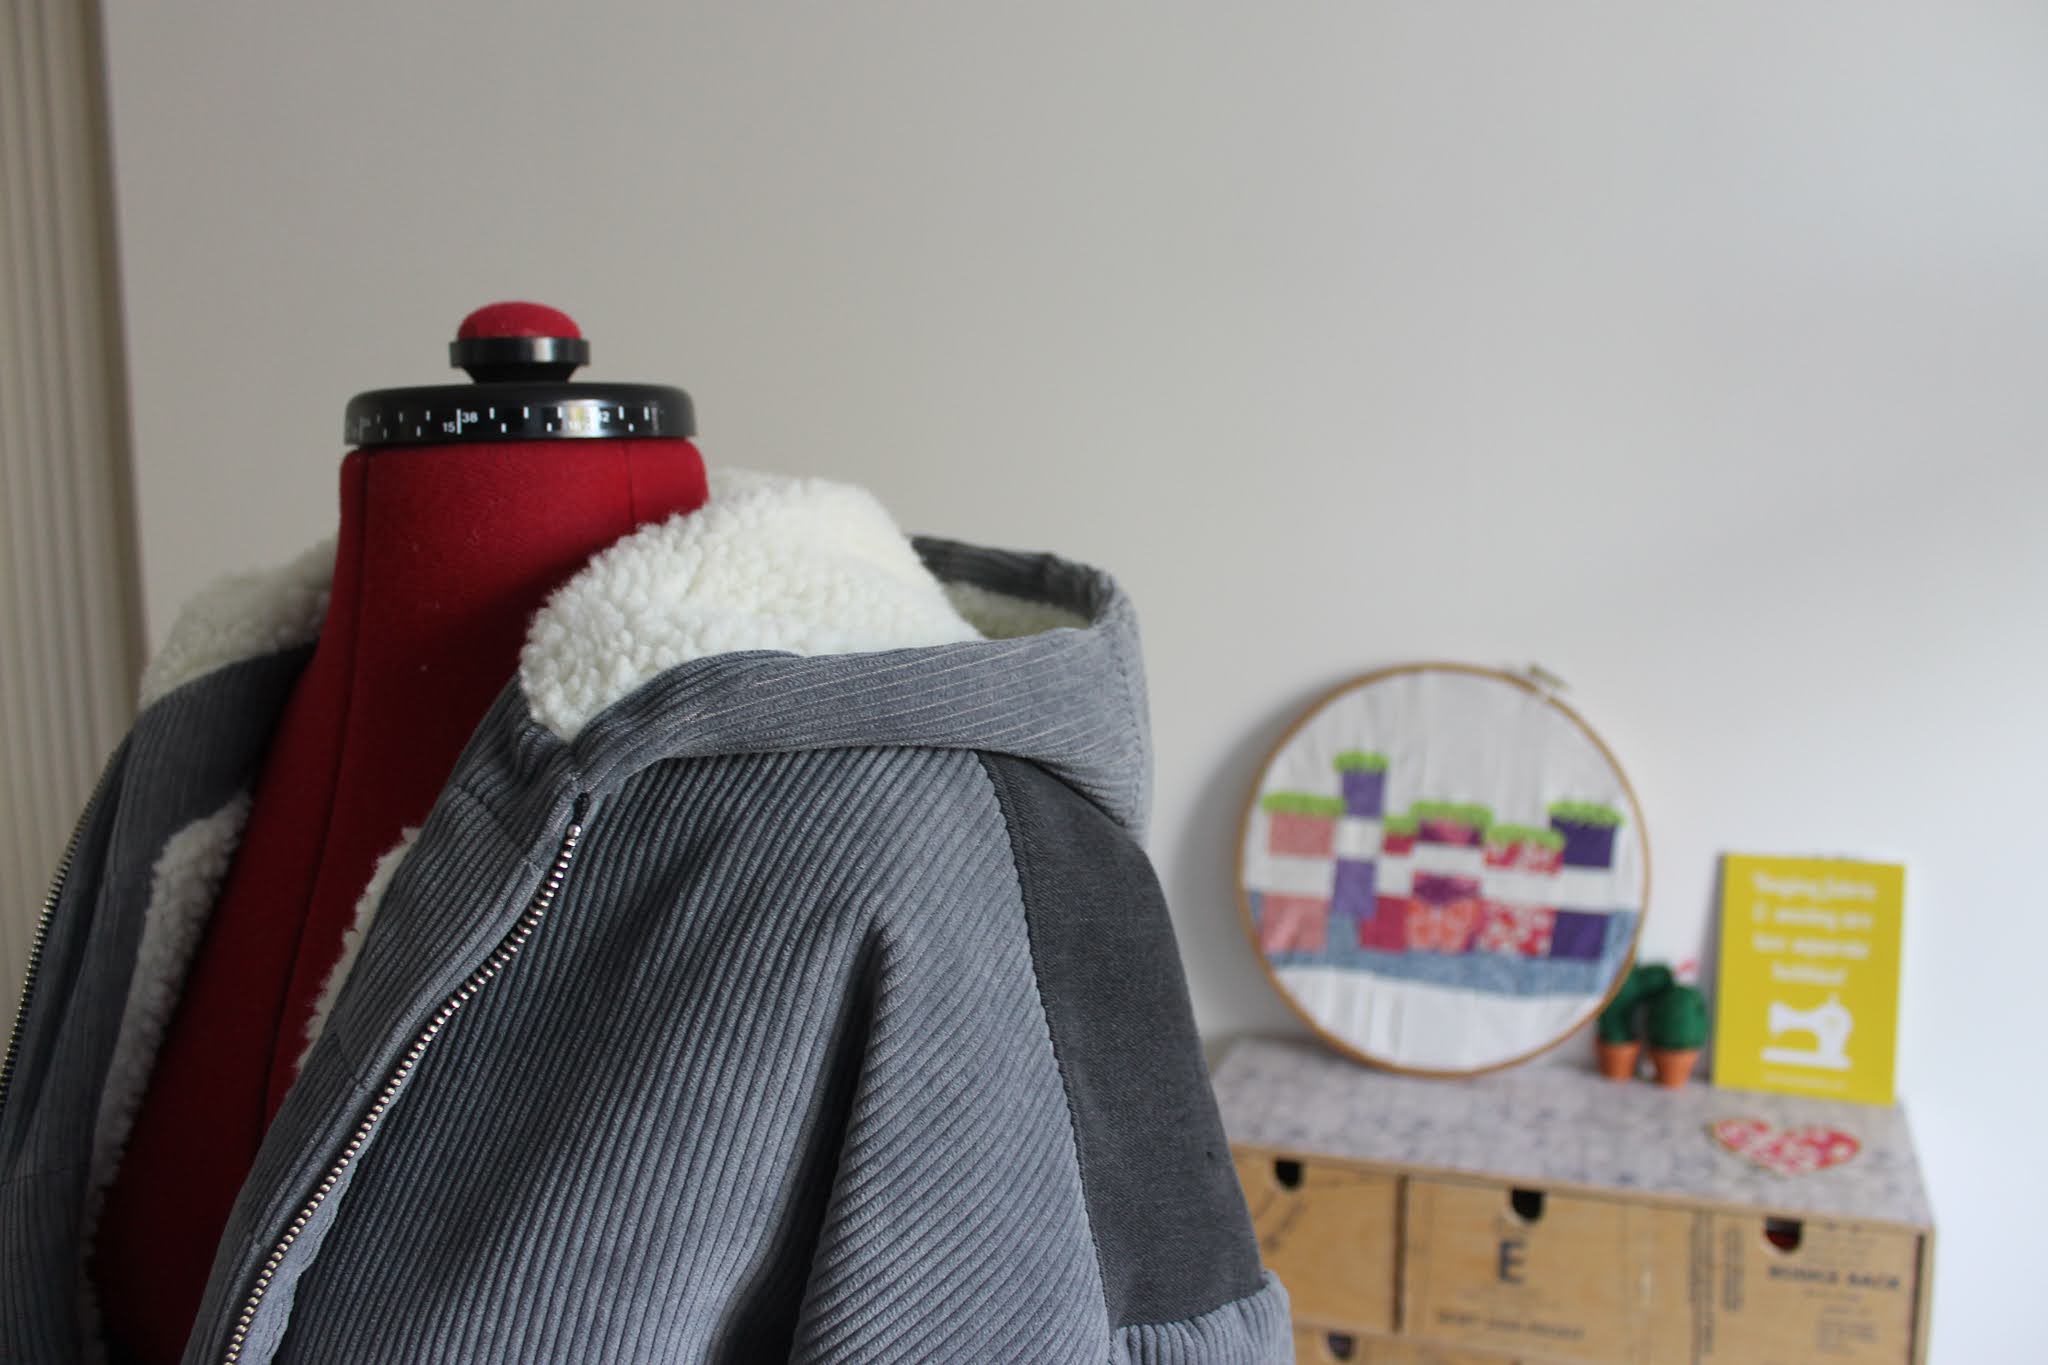
After attaching the lining I added in the hood. It remains my favourite detail, I love how the sherpa pairs with both the corduroy and the denim. I also really like the fact that half the hood has been pieced together from scraps, it feels like a secret detail and makes the jacket one of a kind.
I love adding finishing touches to my makes and especially to projects like this one which take a long time. It means that the finish isn't rushed and it's something to make me smile when I put the jacket on. I really like the liberty hanging loop that I added to my
Kelly Anorak and wanted to do something similar with this jacket. I used an orange bias from
Petit Pan which I love, my mum bought some ages ago and I've since used it on quite a few different projects including
my jersey shirt and
this swing top.
The hood made the jacket really take shape. What I like about this project is the fact that the lining is just as nice as the outer jacket. Everything has been finished neatly inside to create something that should last a long time.
We are so nearly at the end now! The final stage was to add an elastic channel along the bottom of the jacket to bring it in. This was one of the main features on my RTW jacket but isn't really obvious on this one as there are so many other details. The elastic didn't bring it in very much in the end (the elastic hems of my
pink fluffy and
sherpa jackets are a much larger feature) but it's a good way to finish the jacket off and does give a subtle cinching in.
I also really like having the corduroy channel turned up on the inside. It means that everything is finished neatly with no raw seams showing and is also a nod towards the corduroy facing. Pairing the two fabrics together in as many places as possible means that look like they match rather than contrasting each other.
The sleeves are finished in the same way as the hem, with a 1" elastic channel. Having such a narrow sleeve end was really fiddly to sew but worth it for the finished look.
I did add a couple more extra touches to the jacket, I can't help it I love tiny details like that so much! In addition to the hanging loop I put a
Kylie and the Machine 'You can't buy this' label into the side seam. I love these labels and it felt especially fitting for this jacket which has so many very specific details that couldn't be recreated.
The final detail was one that I wanted to include from the start. When I made
my sherpa jacket I discovered these
circle zip pulls from Prym that can be added to the end of zips. I've seen so many zips like this on RTW jackets and it makes a handmade item feel more professional.
And that's it! It feels like it took me almost as long to write this blog post as it did to make the jacket. I am really pleased to have recorded the process though, like I said the majority of the time we only see finished projects without getting a glimpse into the construction. I really loved making this and love the final product too, I'll do another write up of the finished jacket soon. I'm really pleased that I managed to stick to my goal of only using leftover materials that I already had in my stash, even if it did mean that there was a lot of piecing scraps together!