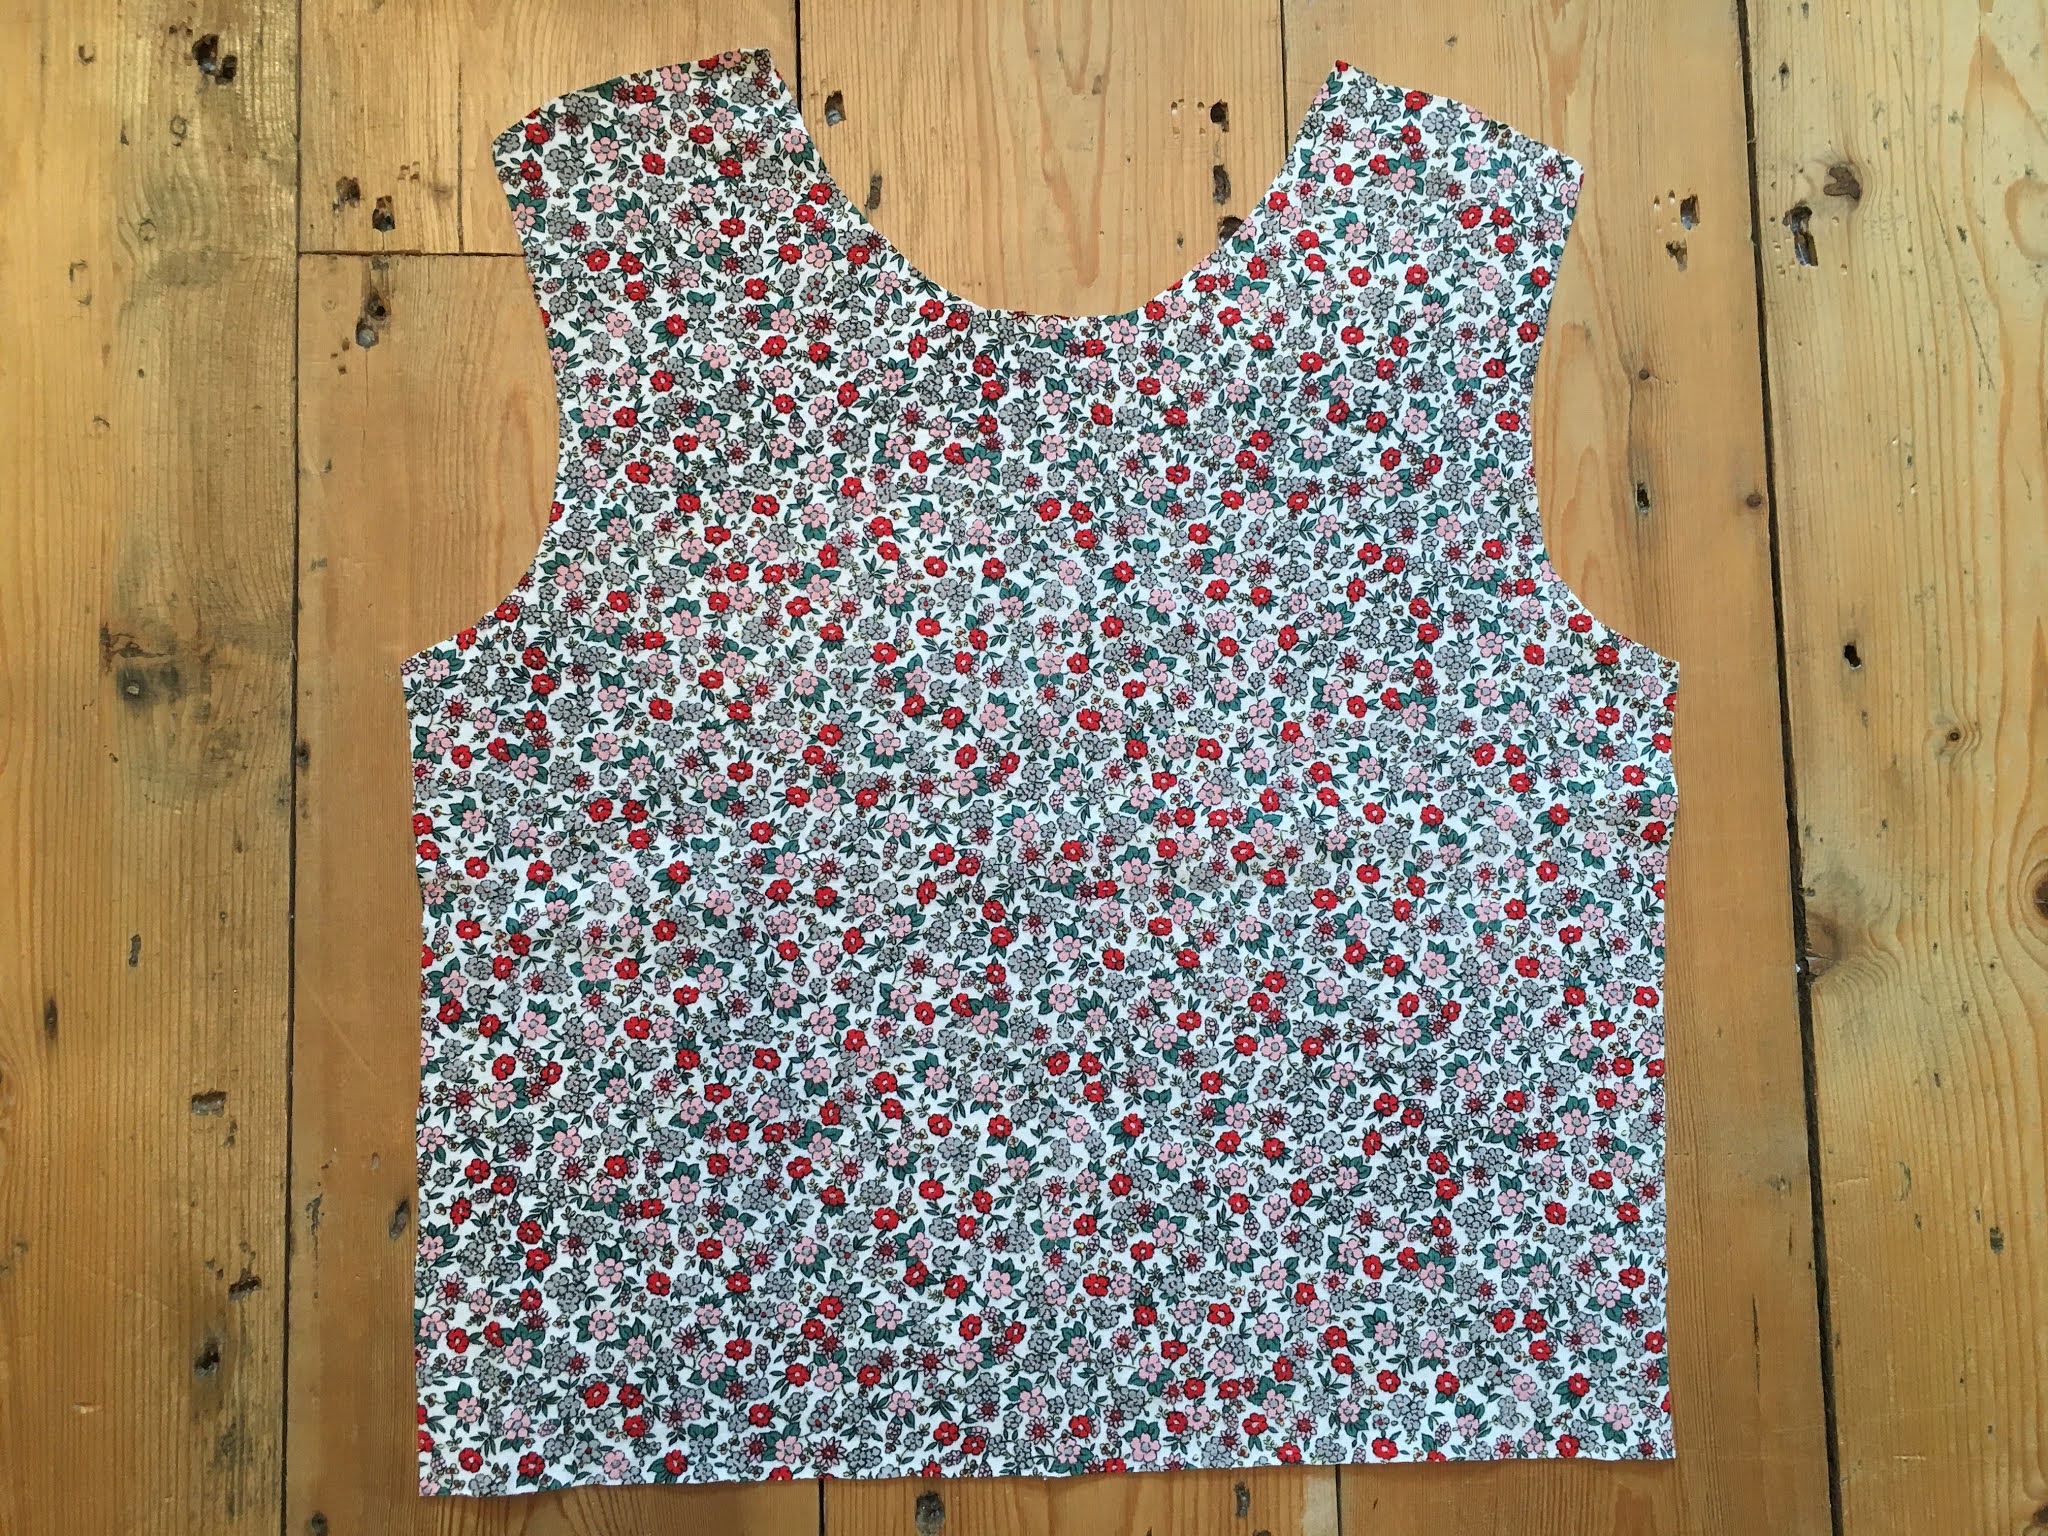
A couple of months ago I made myself this top out of a lovely fabric that I bought in Japan. I had been saving the fabric for the right project, unsure of what to make out of it and had the idea to create a top with a v-notch neckline. I love how the feature turned out and thought that I'd share a tutorial on how I created it. Also, the best part of the v-notch neckline is that it can be added to any top! I used my own self-drafted pattern that I use to make a basic t-shirt but it works just as well with a commercial pattern. Whichever pattern you're using, instead of sewing the neckband follow this tutorial to add in a v-notch neck instead.
Here's a close-up of the neckline! I wanted v-notch detail to be slightly curved, coming in at the top. It's finished with bias binding which makes it all really neat. Looking at it now, I think it would be a really nice touch to add the bias in a contrast colour.
Onto the tutorial - here's what you need to do to sew a v-notch neckline into any top:
Cut out your front bodice piece as normal using a basic top pattern. I'd recommend using your favourite simple t-shirt pattern that doesn't have too many details so that the v-notch stands out. I'm using a jersey top pattern which would ordinarily have a neckband, but you can use a pattern that is designed to have a facing, a bias binding etc around the neck.
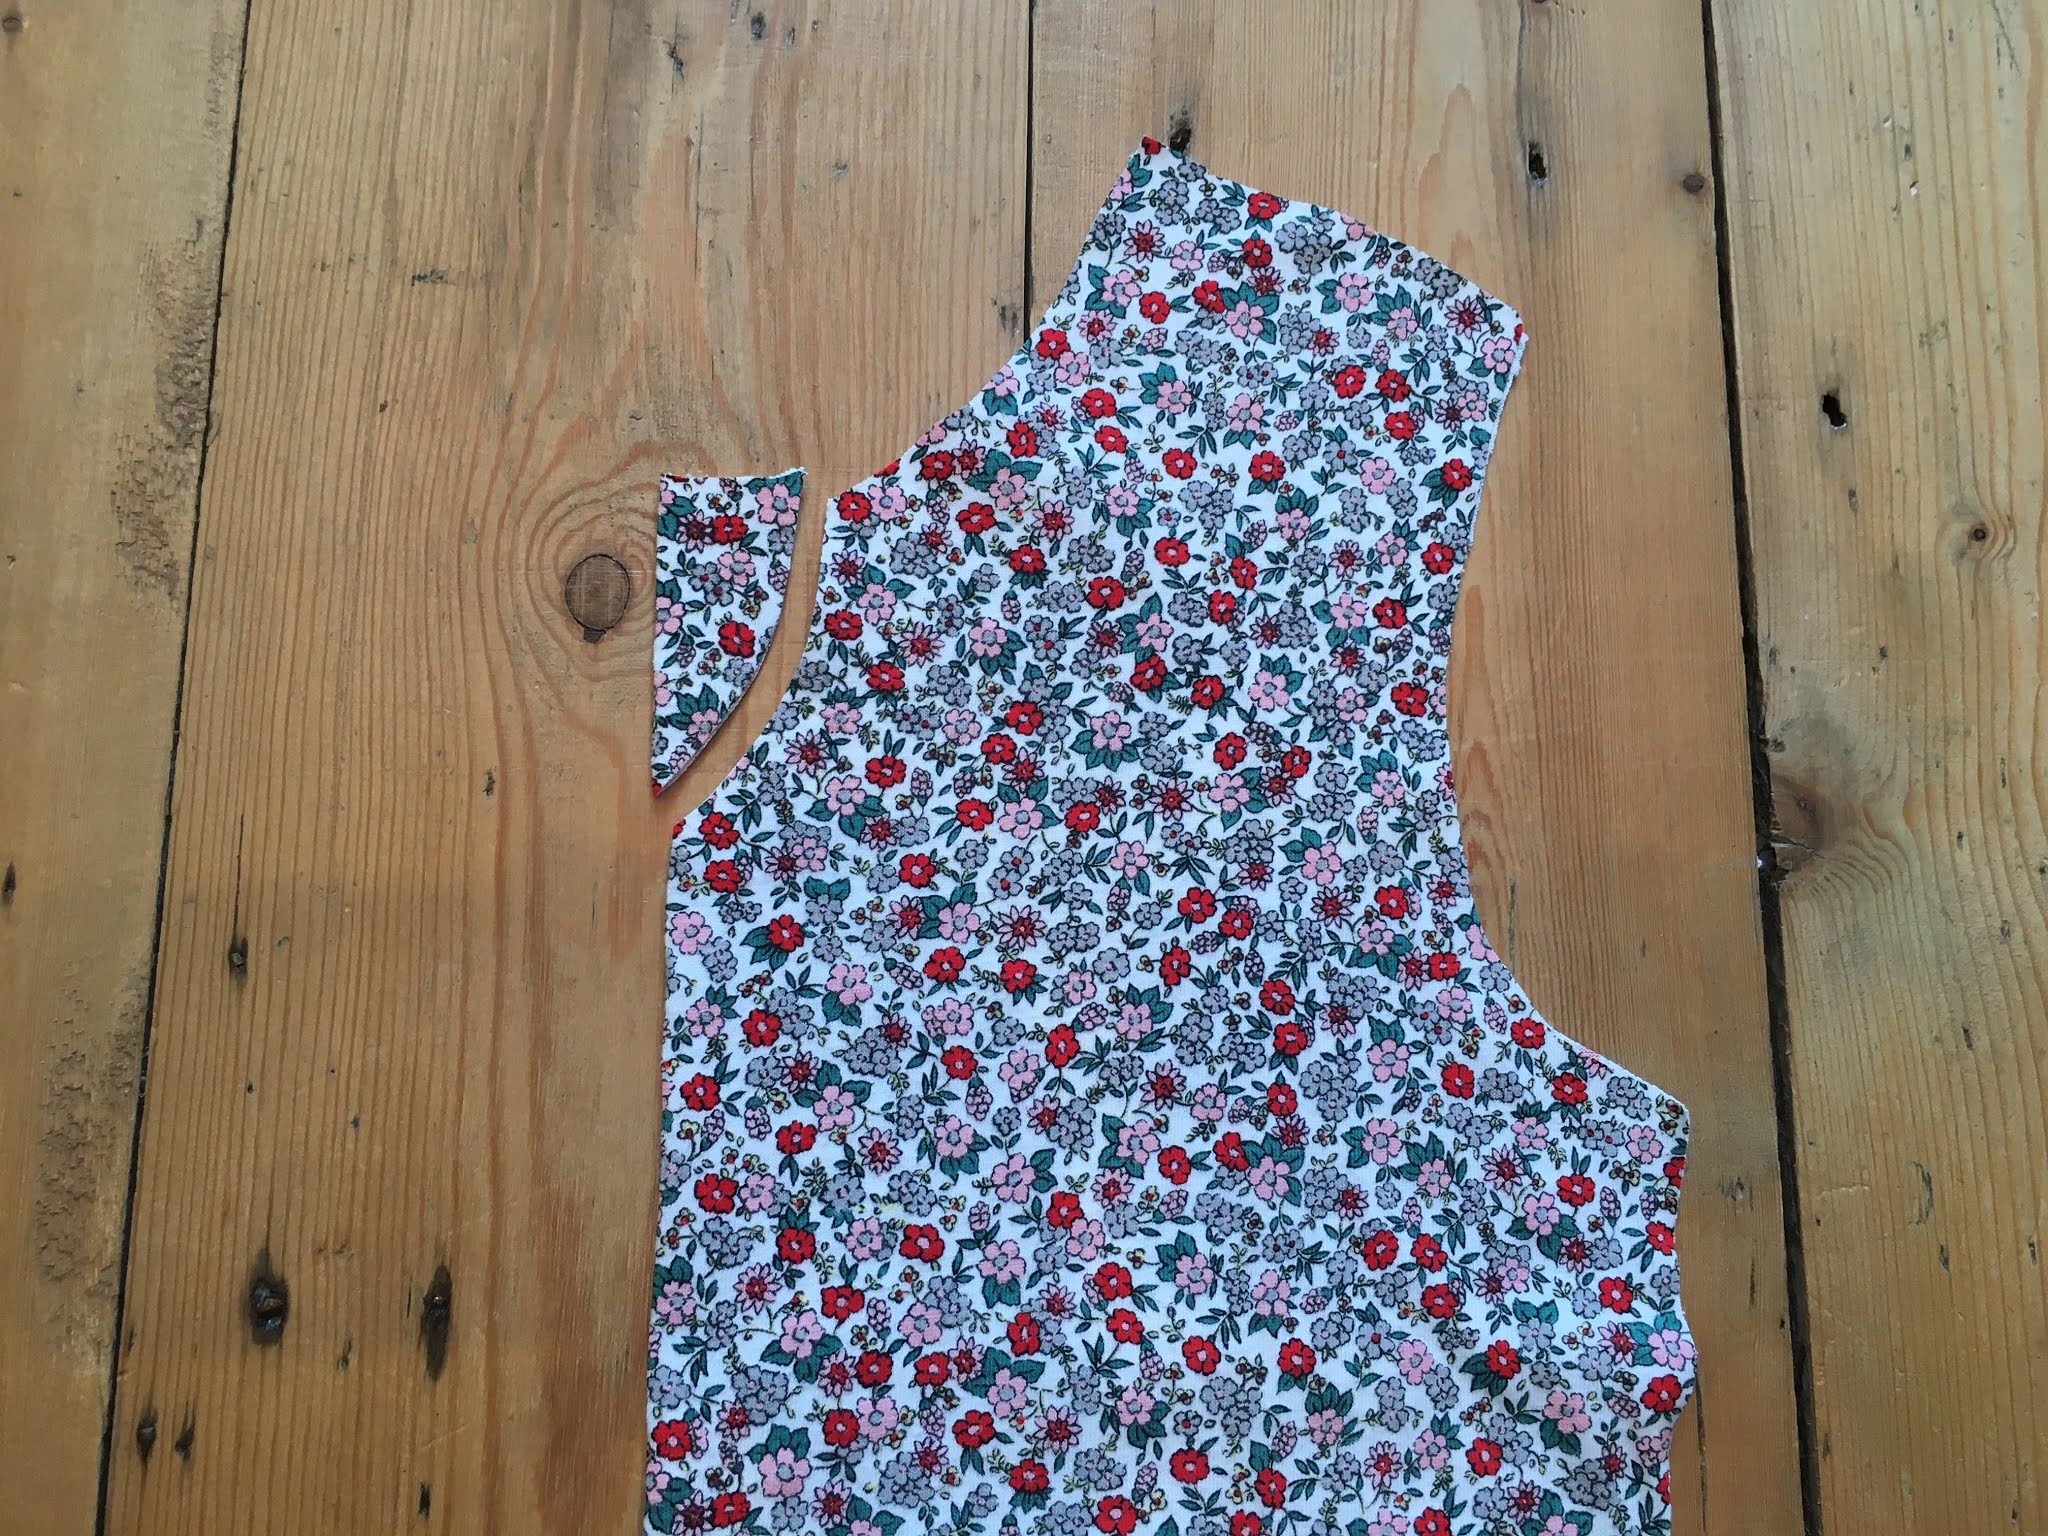
Fold your bodice piece in exactly in half (along the fold line) and make sure it's lying flat. Now you need to decide how big you want the v-notch to be. The size will depend on how deep you want it and also how big the top you've cut out is so that it stays in proportion. One thing to note is that if your fabric is lightweight, avoid making the v-notch too big or the sides won't stay up when you're wearing it.
I made my v-notch 3.75" deep and 1.25" across. Bear in mind that the bias binding will add a little bulk, making the v-notch a bit smaller once it is finished.
Mark the measurements with pins or a fabric pen. You can also pin the two layers of the bodice together to avoid the fabric slipping when you cut it.
Carefully cut out the piece you marked, rounding it rather than cutting straight across. If you like you can draw on the circular shape before you cut, but I just cut the curve freehand which worked fine as it isn't a lot of fabric.
Unfold the bodice and check that you're happy with how the v-notch looks. You can hold it up against yourself to check the width and depth of the v and go back and cut more out if you'd like.
Making sure the fabric is lying flat, cut a tiny notch in line with the right curve cutting into the fabric on the left.
Here's a close up of what the notch should look like - very small! I'd recommend cutting about 1/4" in. If you do accidentally cut too much, making the bias binding wider later on will hide the mistake.
Time to create the bias binding. You'll need three strips: one long enough to go round the back neckline and most of the front and then two small strips to sew around the sides of the v-notch. I cut mine 1.5" wide.
The next part is slightly more fiddly but essentially it's just sewing bias binding around a curve. Fold over the right side of the bodice and sew a strip of bias binding onto the left side of the v-notch. The small notch that you cut into the left side of the fabric will allow you to continue the bias binding a few centimetres past the point of the v.
After you've sewn the bias binding, unfold the bodice and lie it flat. The end of the bias binding at the point should tuck smoothly underneath the right side of the v thanks to the notch you cut.
Now sew the bias binding onto the right-hand side of the v-notch. Bear in mind that the end of this will be visible on the outside of the top. In order to make it neat from the front, fold over the end of the bias by 1/4".
In this photograph, the bias binding on the left is lying underneath that on the right to show you the folded up end. However, when you flip the bias to topstitch it down, the bias binding on the lefthand side of the v-notch will end up on top when viewed from the wrong side of the fabric.
This photo illustrates the point made above: once the bias binding on the right of v-notch has been topstitched down, the bias on the left side will be on top.
From the front, carefully topstitch along the edge of the bias binding to secure it down. When you get to the point, the fabric that you turned under earlier should allow you to get a neat finish. Sew all the way down to the point and then around the corner to secure the two layers of bias binding together.
Trim any excess bias tape on the wrong side of the top to reduce bulk at the point of the v-notch. Sew the shoulders of the front and back bodice together, following your pattern instructions.
Now that the v-notch has been neatly finished, the only thing left to do is to attach bias binding to the rest of the neckline. Make sure that the corners of the bias tape are turned under neatly at either end of the v.
I used a walking foot to sew the bias which I can't recommend highly enough when it comes to sewing with stretch fabrics, especially when sewing fiddly bias binding to a jersey neckline.
Once you've finished the neckline you can keep sewing the rest of the top as per the pattern instructions.
And that's it! I love how this v-notch looks on
a simple top and I think it goes so well with
the fabric I used. I really hope you found this tutorial helpful - let me know if you give it a go!