

Sometimes the most simple projects are the most enjoyable and can give the best outcomes. Sleeveless tops seem to fit best into this category, and for me they have the combined bonus of being really quick to make and requiring minimal amounts of fabric. I've been on a roll with these kind of tops recently, having made a couple of sleeveless turtleneck tops and a ribbed vest. After seeing this floral jersey fabric from Craft Cotton Co the opportunity to make yet another sleeveless top became clear. I wanted to make something that was simple to sew and easy to wear, letting the pretty fabric do the talking. The great thing about these tops is that that the style can be easily changed depending on straps, neckline etc to give rise to lots of different garments.

My initial plan with this fabric was to try and do something with elastic, perhaps to include puff sleeves or create an off the shoulder top like this one. I'd still like to have a go at one of those projects but I decided to go for something more basic that I knew I could pair with different trousers.
Last year I made myself a super simple pattern for a strap top that could be made from fabric scraps. I wanted to focus on the armhole and position of the straps to make it fit me perfectly, something that is hard to find with tops like these in RTW shops as they're often made cheaply. I'm so pleased with how well the fit turned out. It's a great pattern to use both for scraps that would be thrown away, or a fabric like this one where I wanted the design to be visible. Simple, easy to make and good for wearing on holiday.
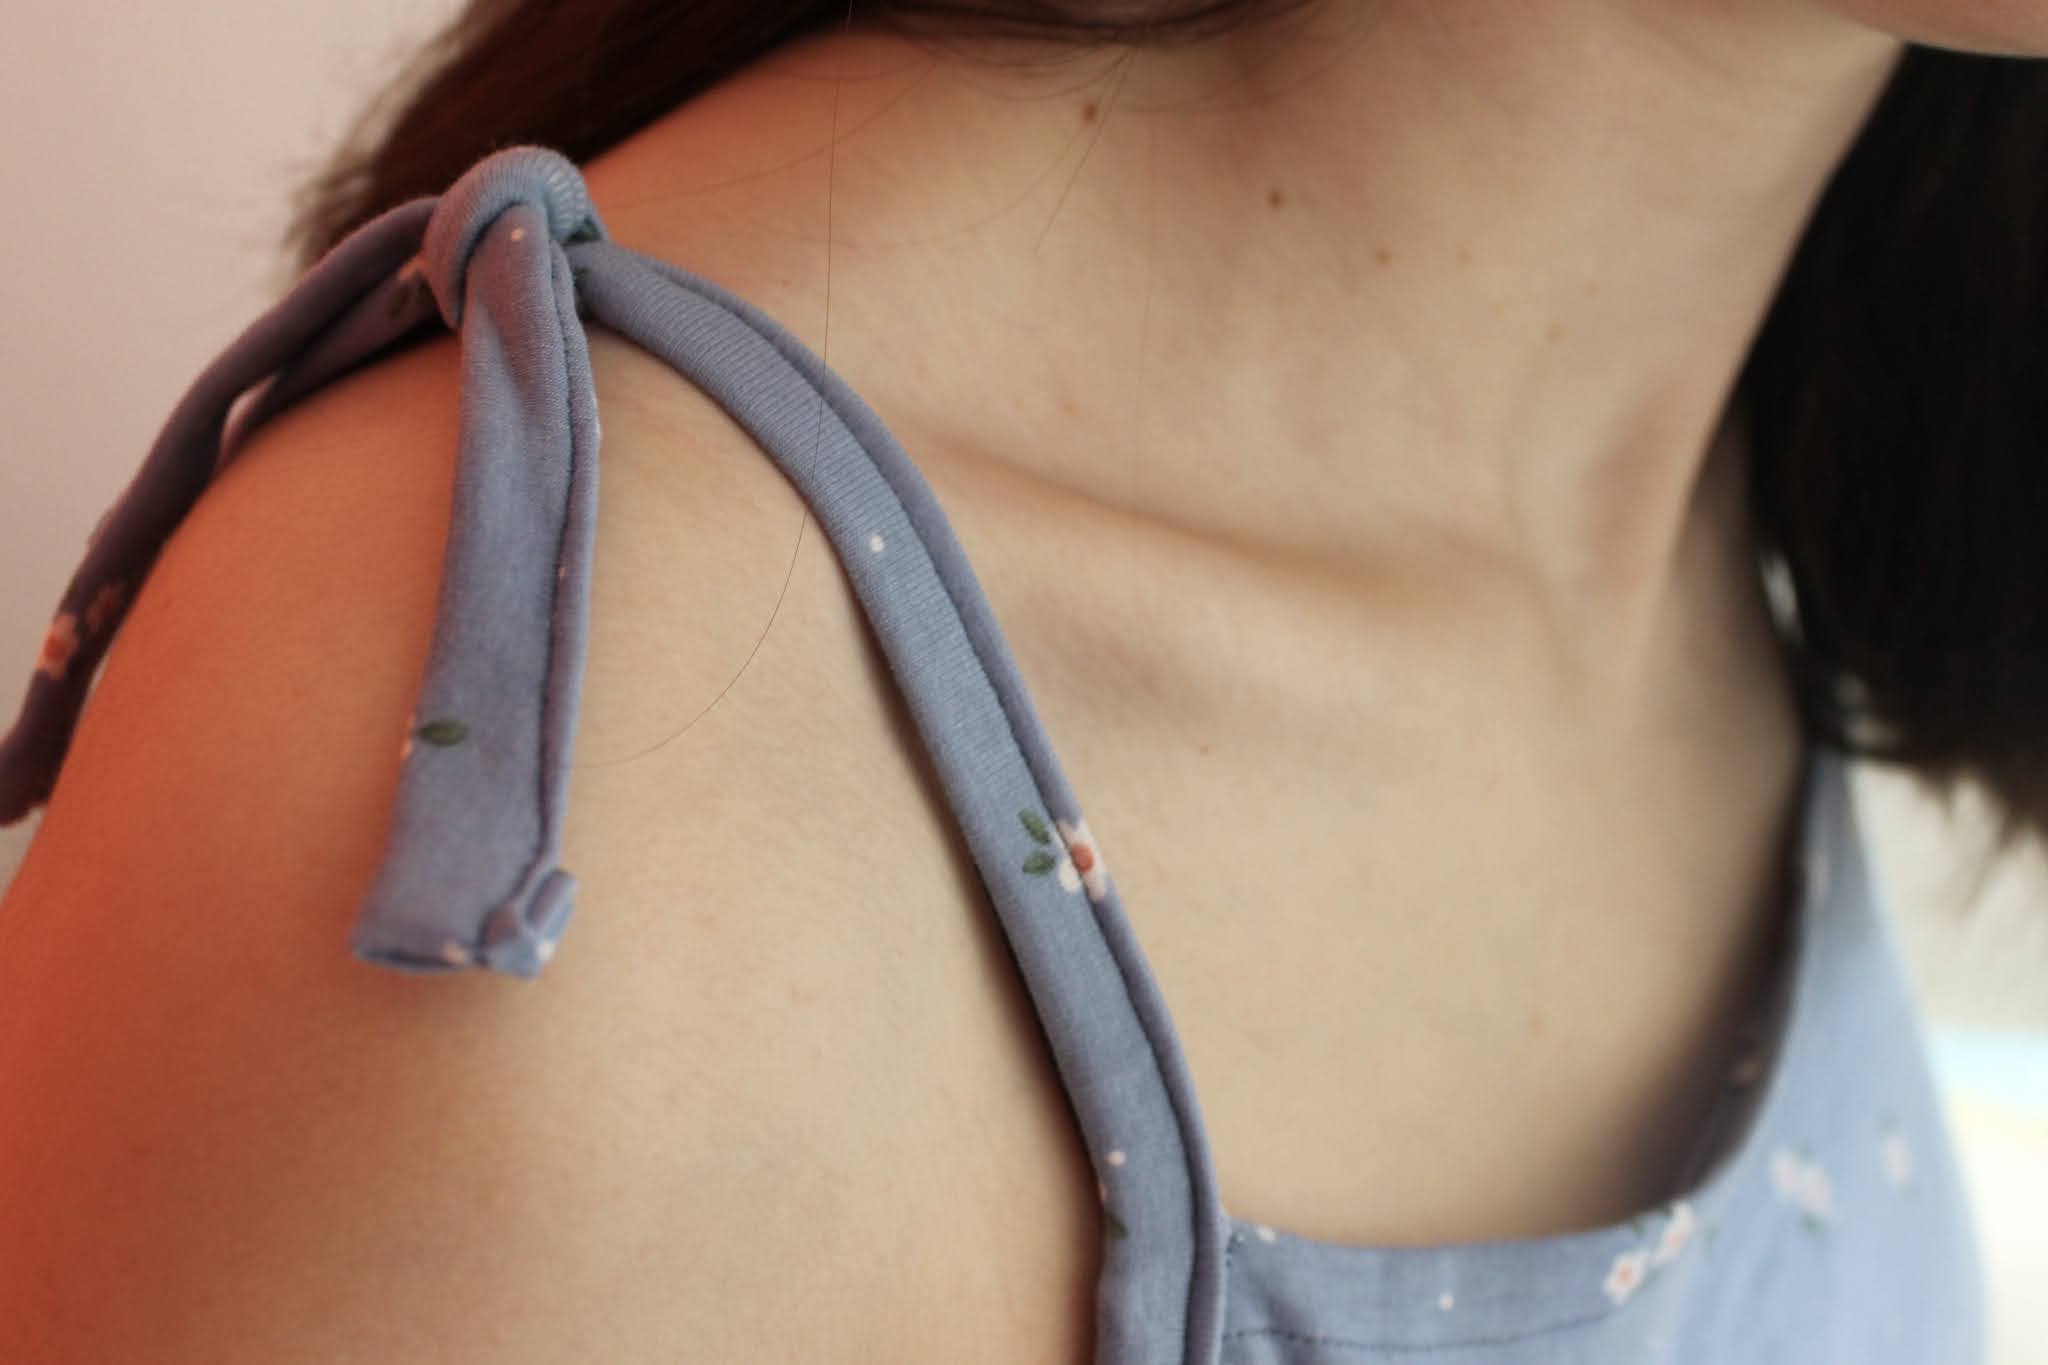
As mentioned I chose to go for a simple design in order to focus on the fabric. I did want to include some kind of fun detail though, so I decided to add a tie to the straps. It was so easy to do, I just cut the straps about 7" longer and tied them over my shoulder. It adds a nice bit of interest and works really well with this fabric as it's quite a small print. I went for a double knot with the ends hanging out, but a bow would look nice in a draper fabric or you could change the length of the ends.
One thing I like about the design of this top is that the straps also act as bias binding around the armholes. It gives the armhole a really neat finish and avoids a messy or weak attachment of straps to the bodice.


The first time I made a top like this, I left it un-hemmed and simply cut it at the length I wanted it to finish. It worked well on the rib I used for that project, but I wanted a neater finish on this top. Also, the jersey would have probably rolled if I hadn't hemmed it. I'd say the main thing I've learnt through sewing with jersey is that small hems do not work. They go wobbly and turn under, giving a messy finish to the project. It's something that's always bothered me about some of my older jersey tops like this jumper and this t-shirt, and I now make sure to finish all jersey makes with a hem that is at least 1" deep.
For this top I sewed a double row of stitching, a finish that I love. It doesn't take a lot of effort but I think it shows that you've put thought into the whole sewing process and just makes it look a bit nicer. It's so tempting to rush hems but I think a neat hem does make a real difference. I do keep meaning to buy a twin needle but for now I just sew the two rows of topstitching individually.
I think this was the perfect project for this fabric and I'm looking forward to wearing this top in the summer, hopefully whilst on holiday. It goes well with my new Lander Pants too!
I had (do I still have it?) one vintage singer that you could stick two needles up in the holder for twin needle sewing. Convenient because you dint have to worry about finding a twin in a stretch or universal and the right size, etc. Couldn’t adjust how far apart they were. It would take a twin needle from the package as well.
ReplyDeleteYou are ready for your next heat wave!